Payments in Forms
This article gives information about using the payment item in Forms.
The payment item is a predefined series of inputs to capture and process payments. Only one payment item can be added to a form. Once you have created and shared your form, respondents can complete the form and submit payments. To accept payments in Forms, you must be an Online Giving Customer.
Note* In order to submit a payment to a form, the browser must be configured to load the payment services code, which is required to process payments. Certain browser or network security settings, such as the Enhanced Tracking Protection feature in Firefox, may block the payment services code, resulting in the following message: “Error loading gift information view: PayServices is not defined.” To remove the error and submit the payment, the respondent will need to ensure that their browser is configured to allow osvmosaicservices.com to be loaded on the page.
Adding Payment to a Form
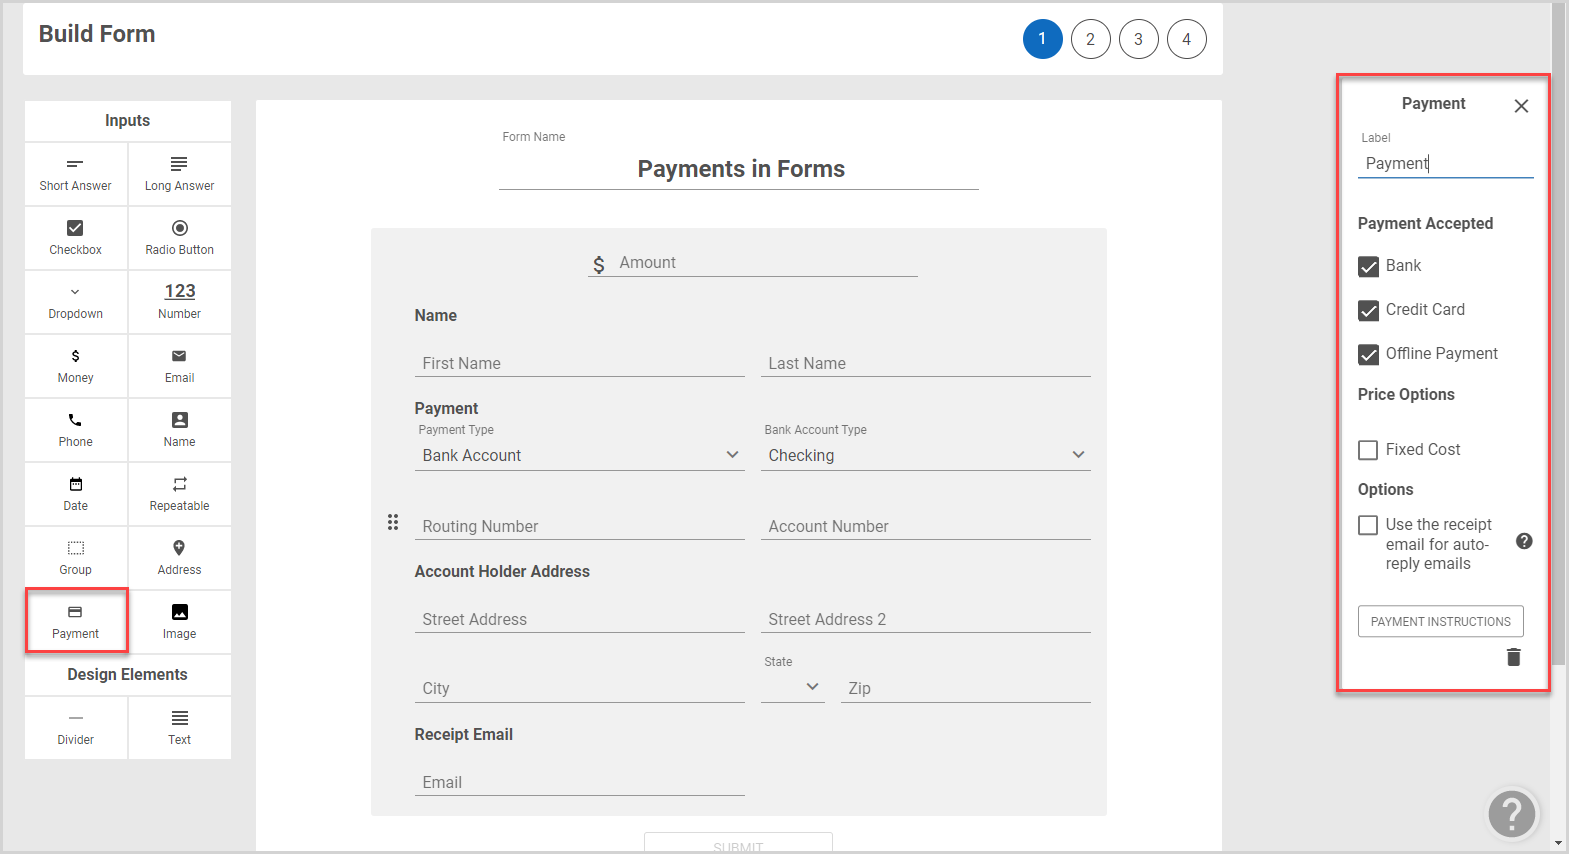
To add a payment block to your form, drag and drop the payment item into your form. Customization options are available in the options panel.
Payment Instructions
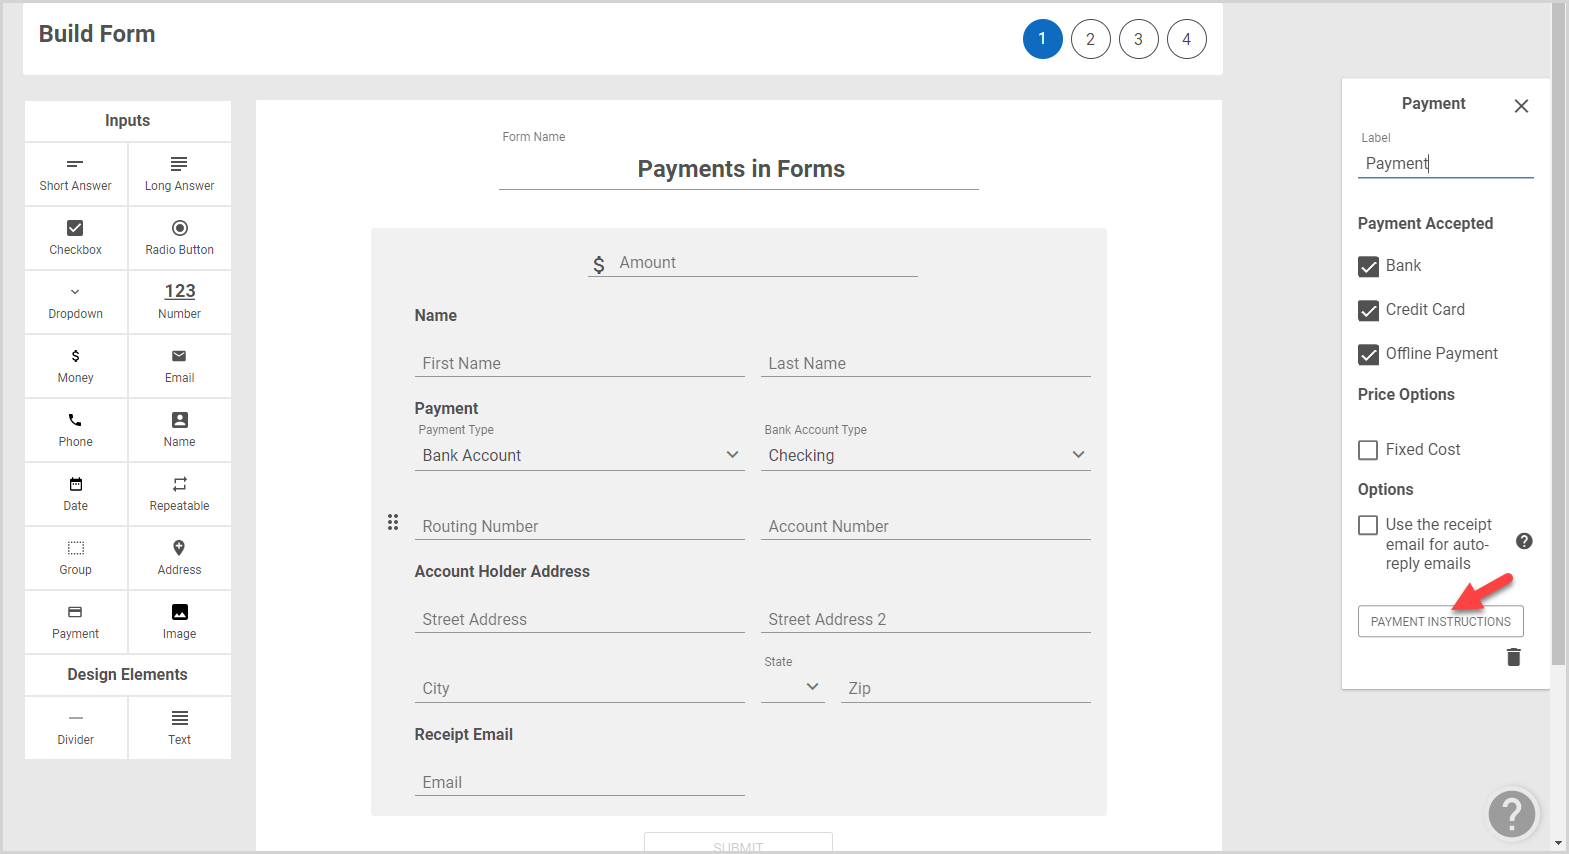
If you wish, you can add instructions for payment: In the options panel, click the Payment Instructions button to add instructions.
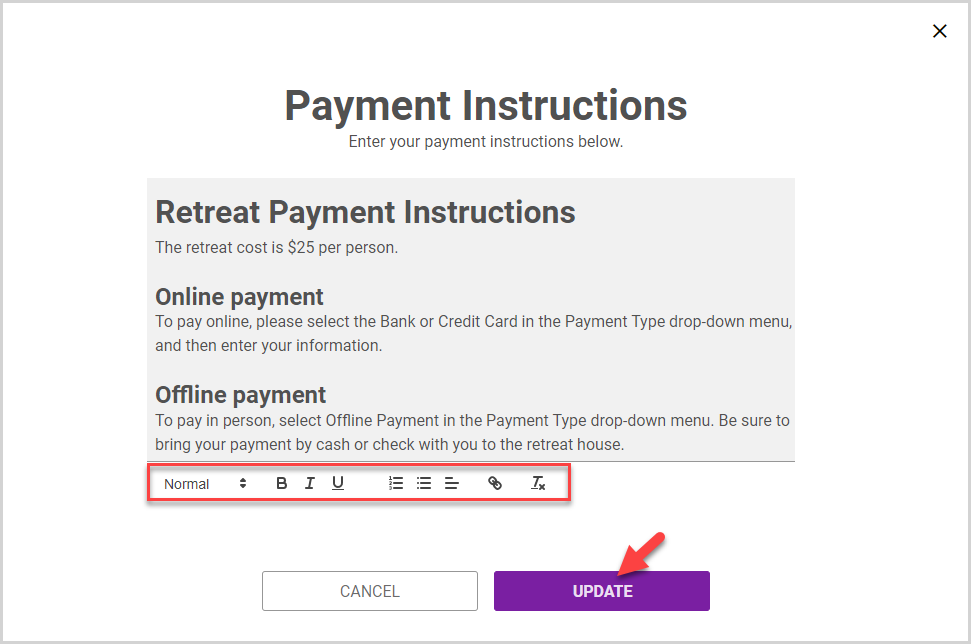
Enter your instructions in the text box. Customization options, including text headings and the ability to add hyperlinks, are available in the ribbon below the text box. Click the Update button when your instructions are complete.
Accepted Payment Types
In the options panel, you have the ability to select accepted payment types for the form. Three payment types are available: Bank, Credit Card, and Offline Payment. Enabling Offline Payment allows respondents to complete the form without submitting a payment. You will need to track and manually collect offline payments.
Note* To use the payment item, least one of the Bank or Credit Card options must be available for payment.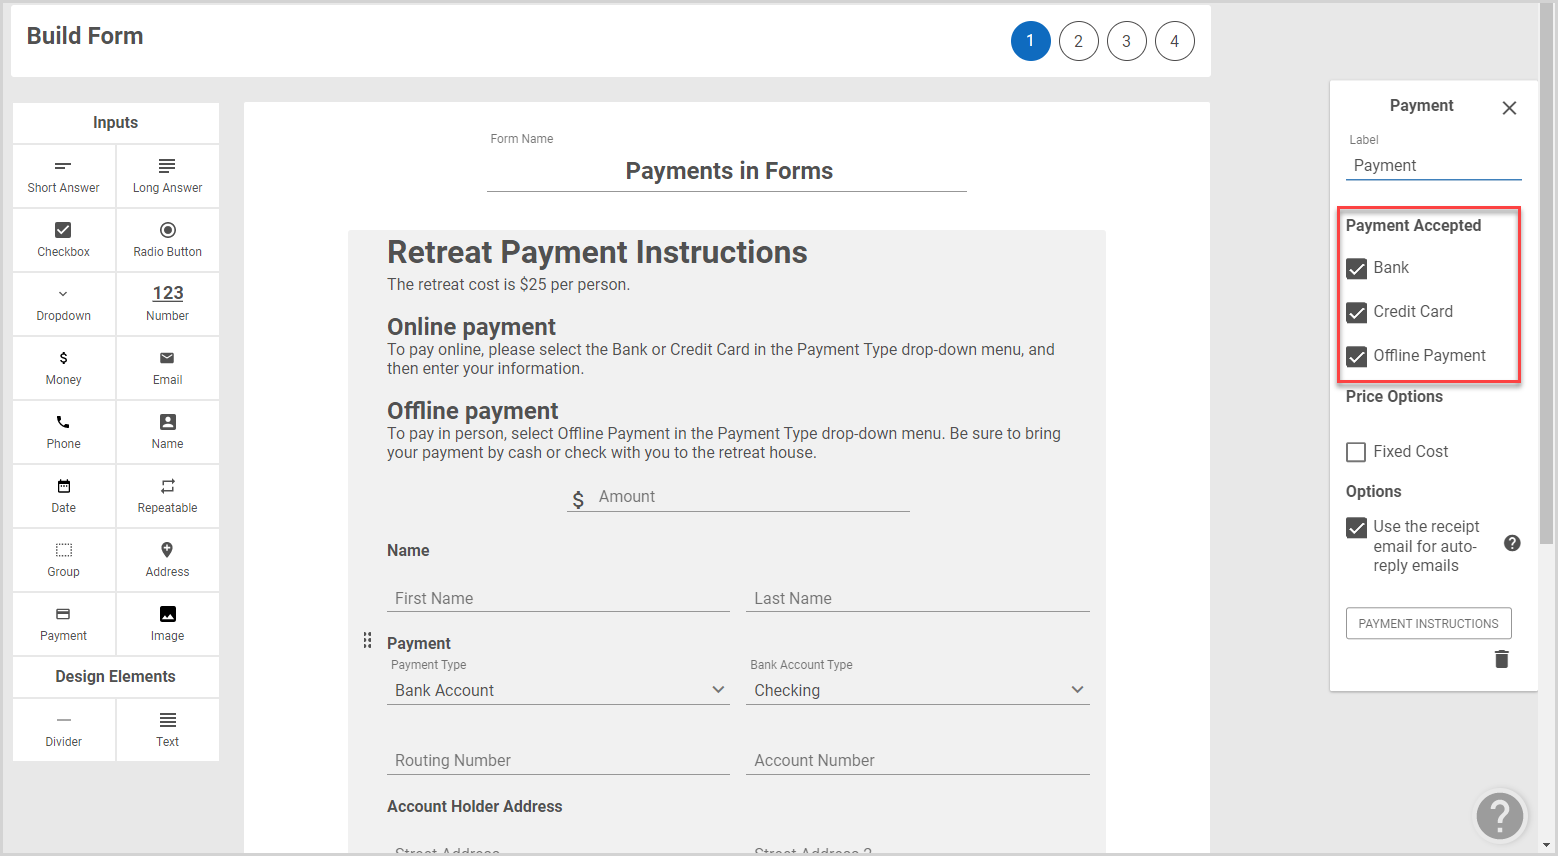
Setting Price Options
You can set a required price for payment by selecting the fixed Cost checkbox in the options panel. Enter the required amount in the options panel. The amount appears at the top of the payment block as the Base Cost.
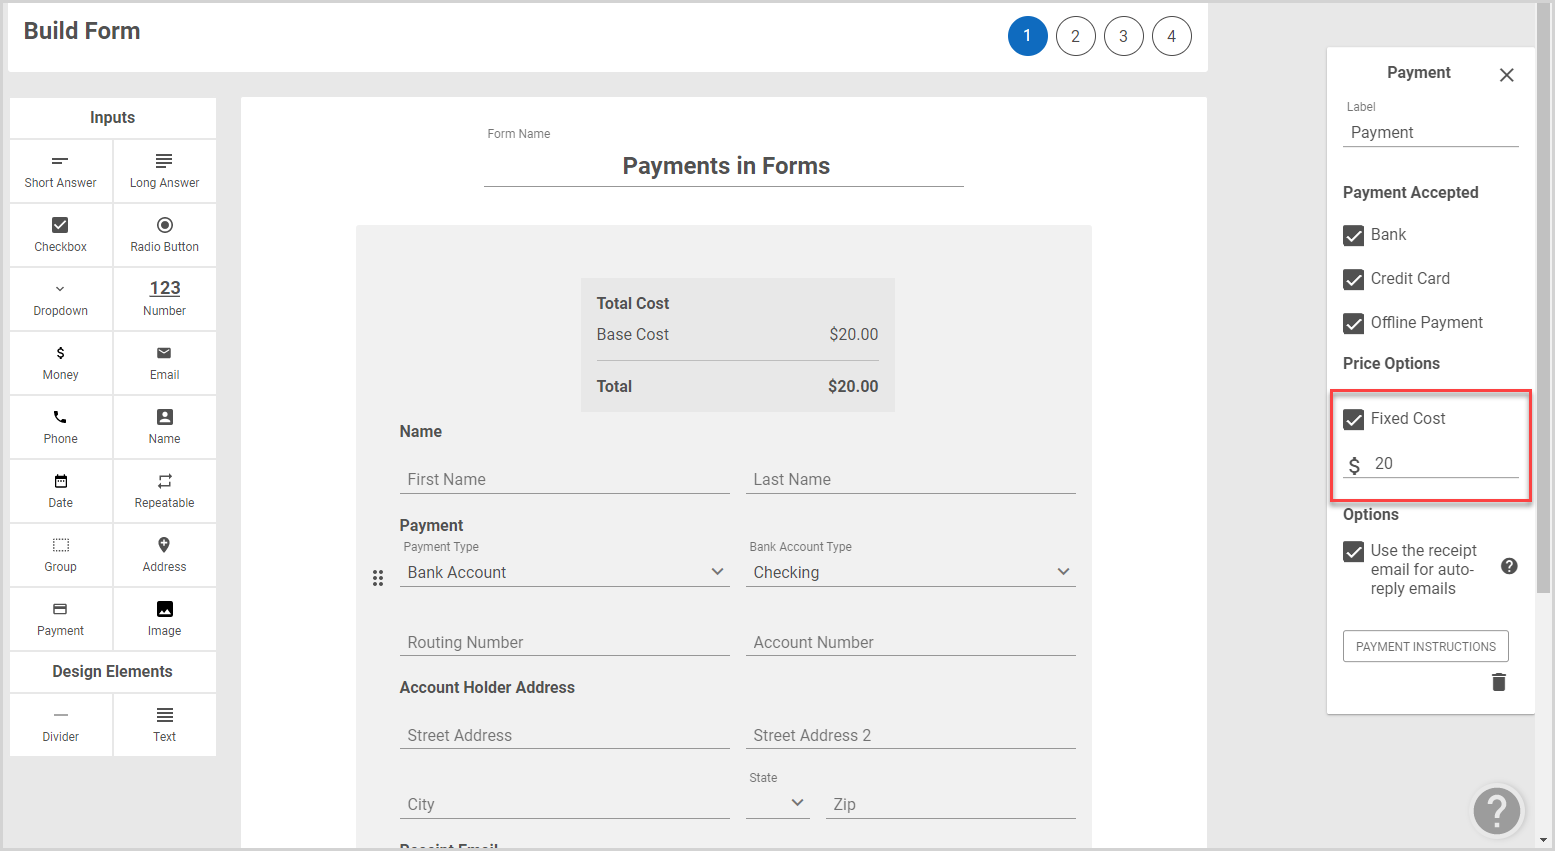
The fixed cost option can be used in conjunction with Checkboxes, Radio Buttons, and Dropdowns to set multiple pricing options. For complete information on these items, please read about Flexible Inputs.
Checkbox
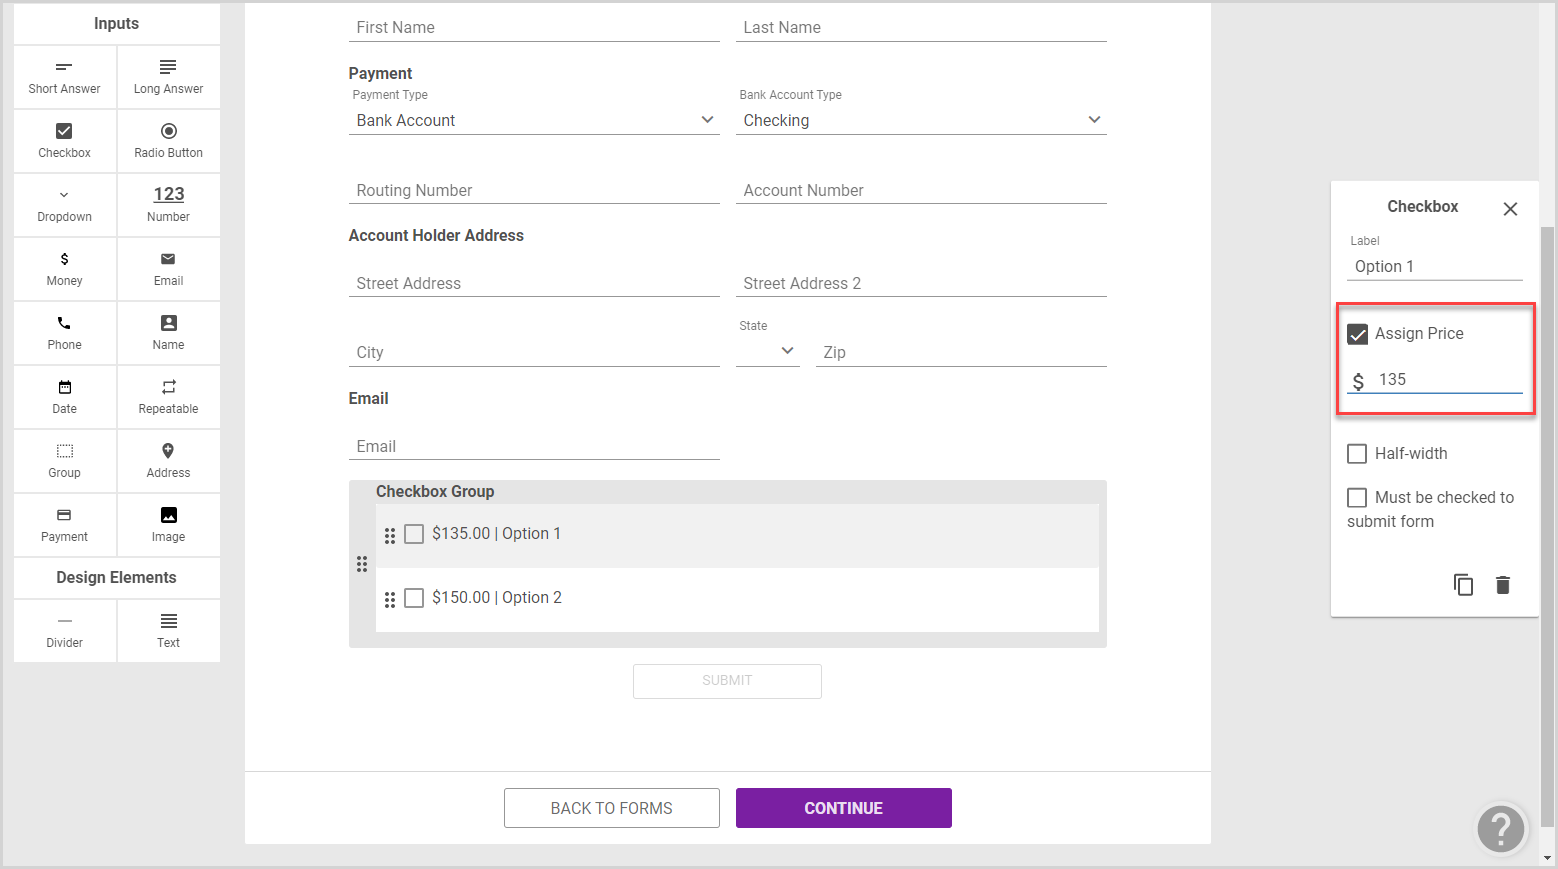
To set the price, select Assign Price in the options panel, and then enter the amount. It can be helpful to use checkboxes within a group to allow respondents to select multiple items on the form.
Radio Button
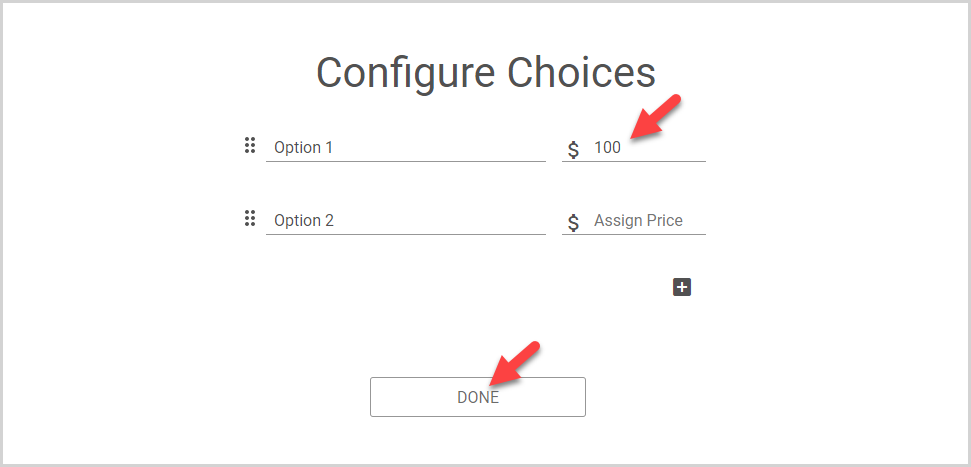
The radio button item allows respondents to select only one choice from the list. To set the price, click the Configure Choices button in the options panel.
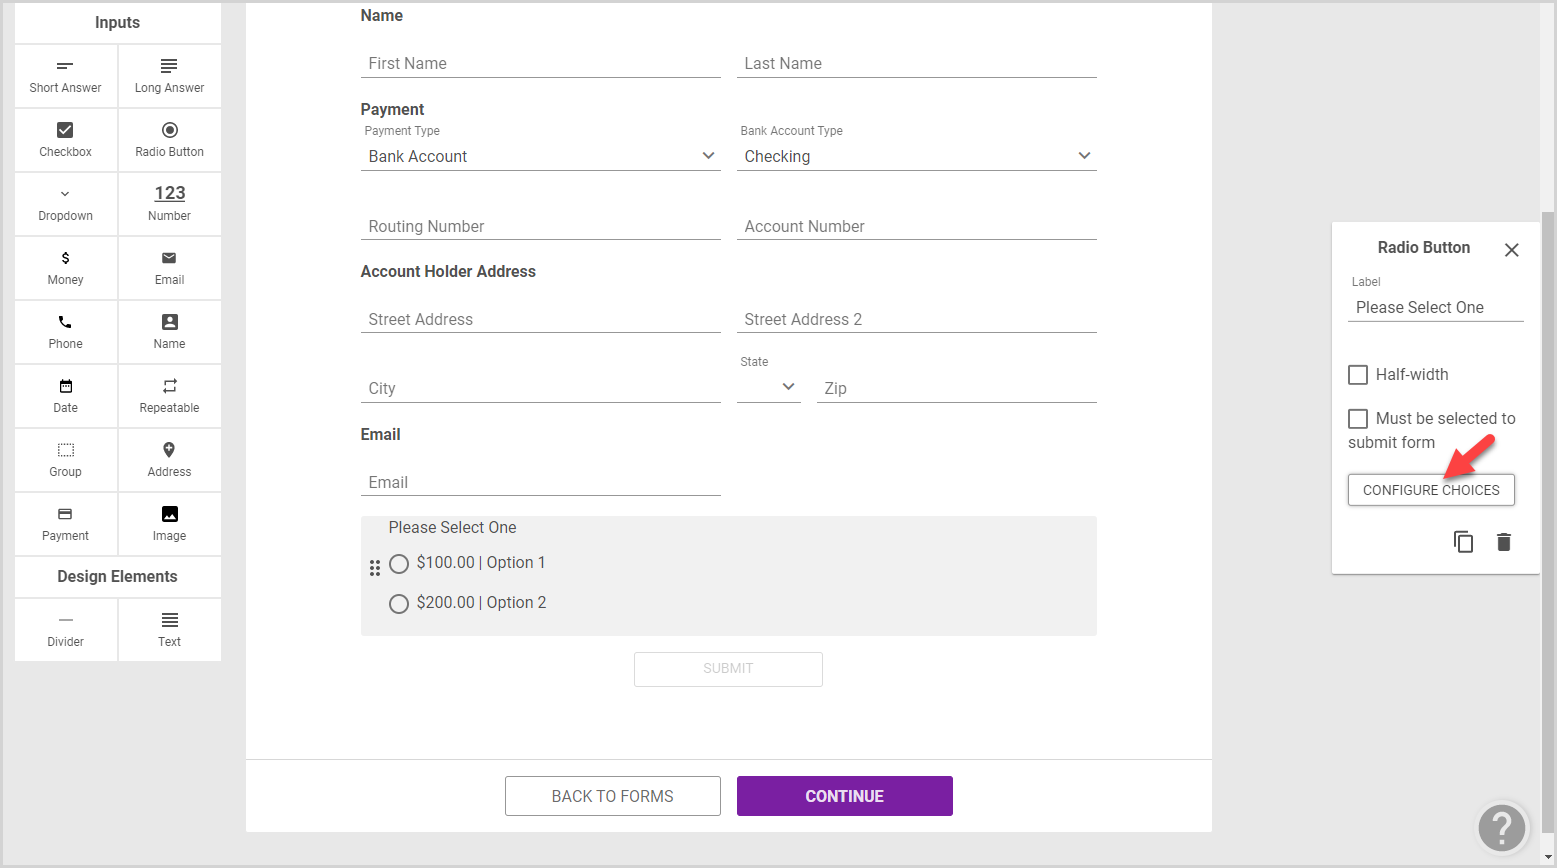
Enter the options, and then enter the price in the Assign Price field. Click Done when finished.
Dropdown
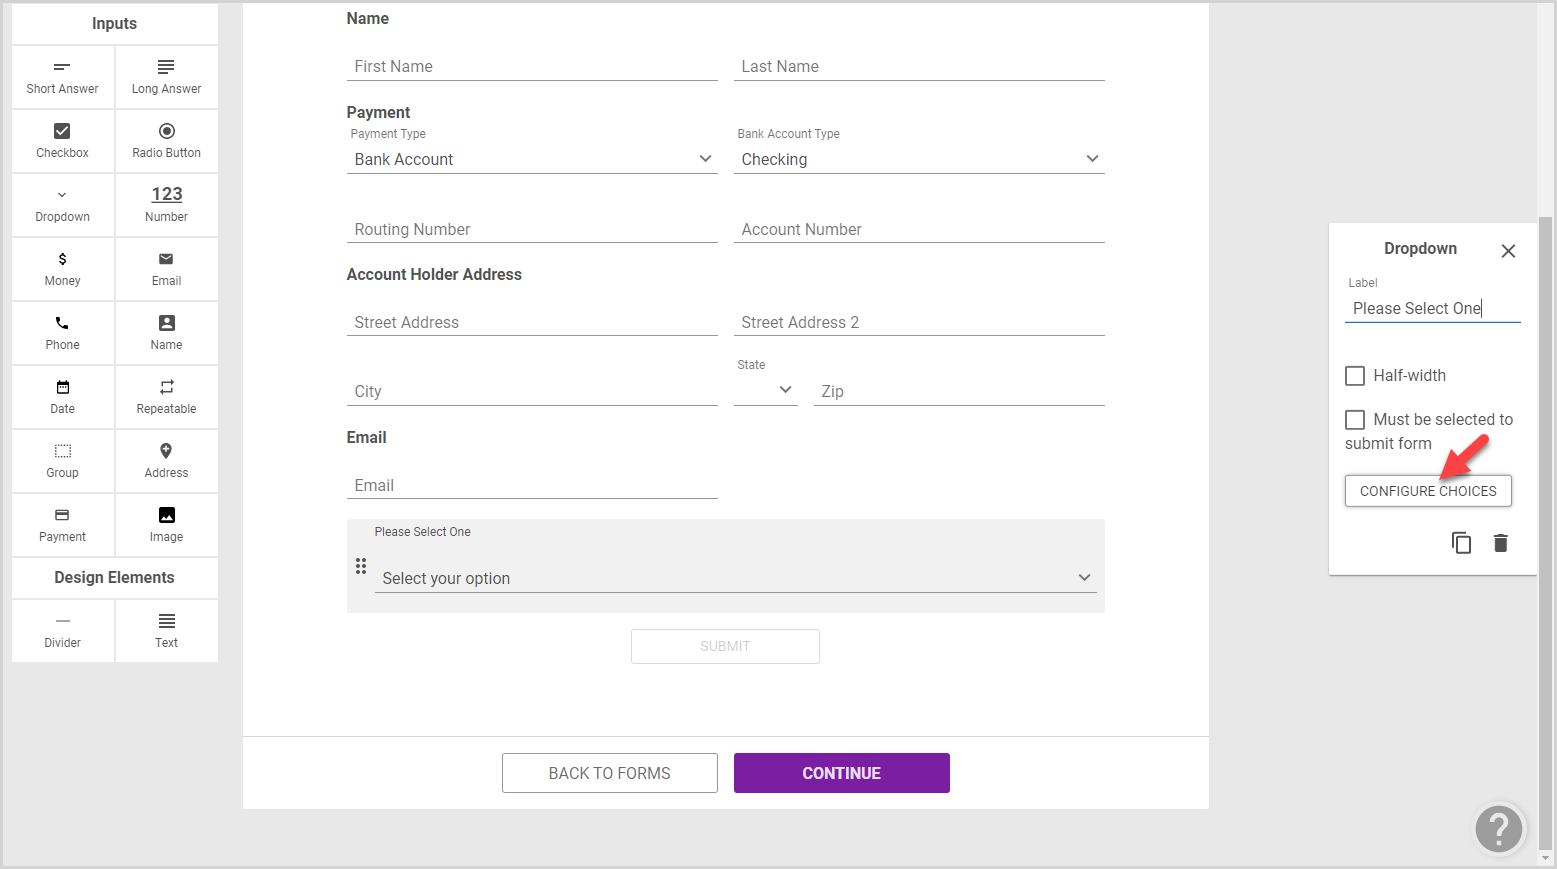
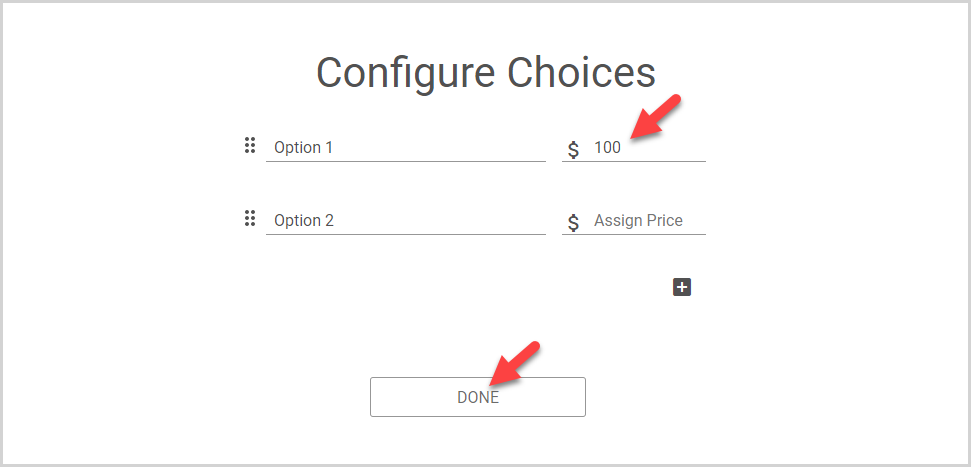
The dropdown item also allows respondents to select only one choice from the list. To set the price, click the Configure Choices button in the options panel.
Enter the options, and then enter the price in the Assign Price field. Click Done when finished.
Auto-Reply Receipt Emails
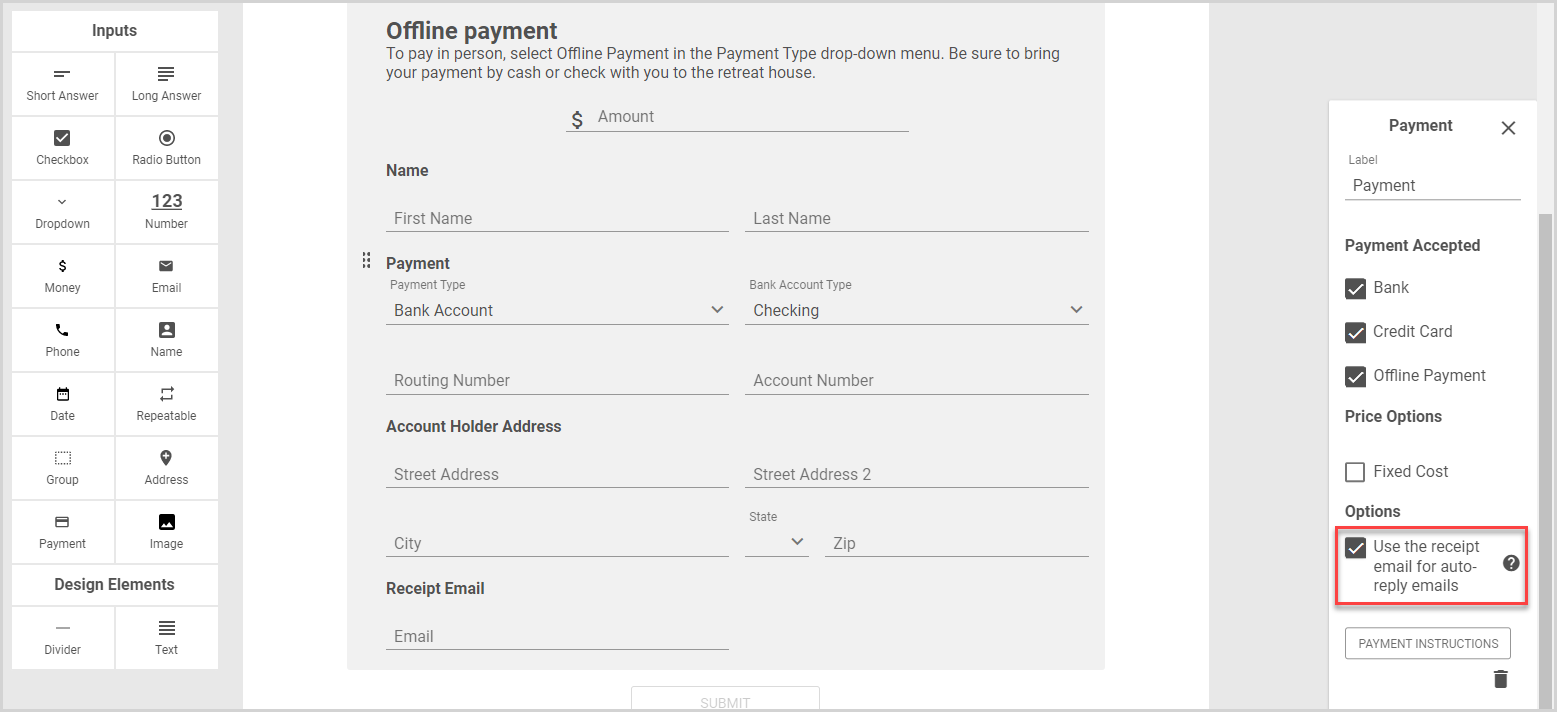
Respondents are required to input a receipt email address when submitting a form payment. Select the checkbox in the options panel if you would like the receipt email address to receive the Auto Reply Email message you set when you Configure the Form Options.
