


Donor List Report
This article provides steps to run a report that generates a list of donors who give to the church based on multiple criteria.
There a many reasons an administrator might want to run a donor list report.
Based on the selected filters, the report provides a list of all the new donors added to the system during a chosen timeframe for all selected funds and donor types.
Filtering by the donor type, the Donor List report can also provide a list of new guest accounts or donors who set up accounts.
To find all donors who are actively contributing to the church to thank them through a separate mailing, run the report selecting all funds, all donor types, all dates and by selecting the Active Contributor status.
To locate those who are no longer actively giving money to the church to send a mailing asking them to give, use the Inactive Contributors filter.
Complete the following steps to run the Donor List report:
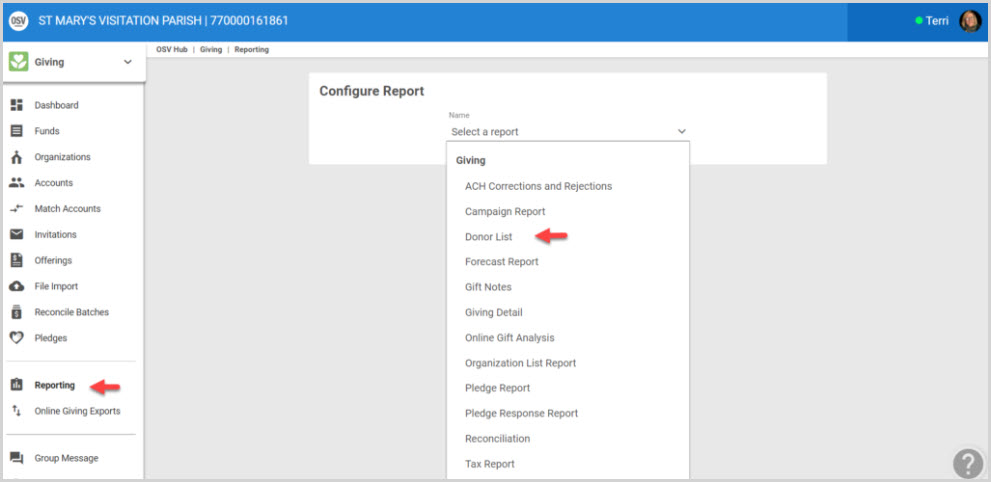
1. From Giving go to Reports.
2. To begin configuring the report select Donor List from the drop down.
Configure the report:
Click on each arrow to view a drop-down menu and make selections to configure the report.
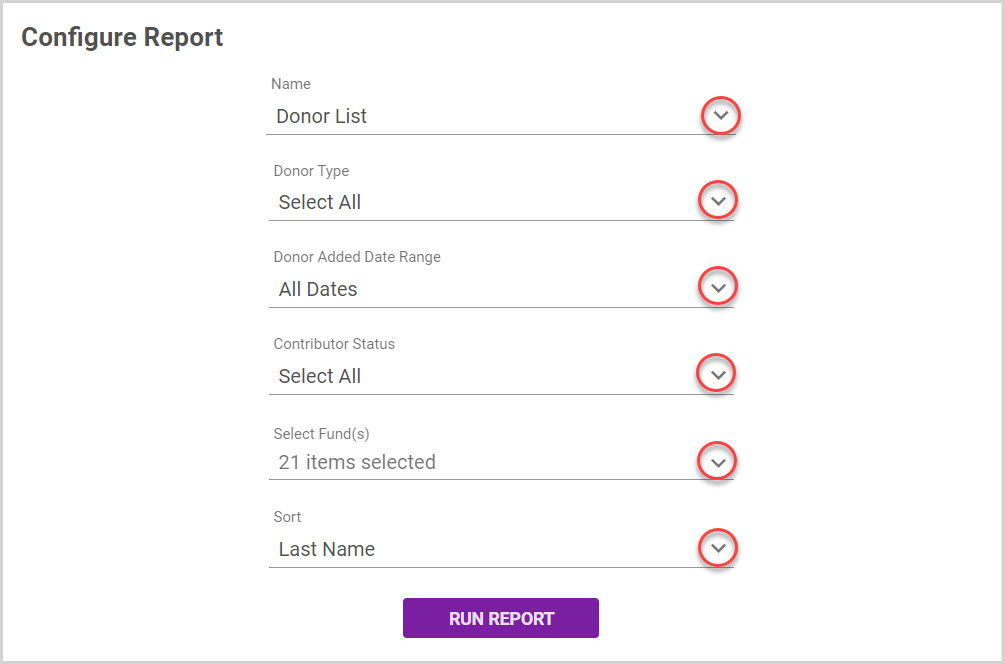
3. Select the Donor Type as Account or Guest Donor for desired results. Choosing Select All will capture the information for both types of Donors.
4. Select the desired ContributorStatus which could be Active Contributors or Inactive Contributors. Choosing Select All will capture the information for both statuses. Note* In Online Giving a family must have given a gift within the last 90 days to be considered active. If you are using Directory and have specified active users as being within 180 days or 365 days, this will reflect that specified time frame.
5. Select the Donor Added Date Range which will filter the report to show only donors who have been added to the system during the specified dates. (The choices include the Last 7 Days, Last 30 Days, Year To Date, Last Year, or by choosing a Custom Date Range and use the calendar to set the dates.)
6. Select the desired Funds.
7. Select the sort order. (Last Name, Date Added, Email, or Envelope Number)
8. Click on Run Report to Process.
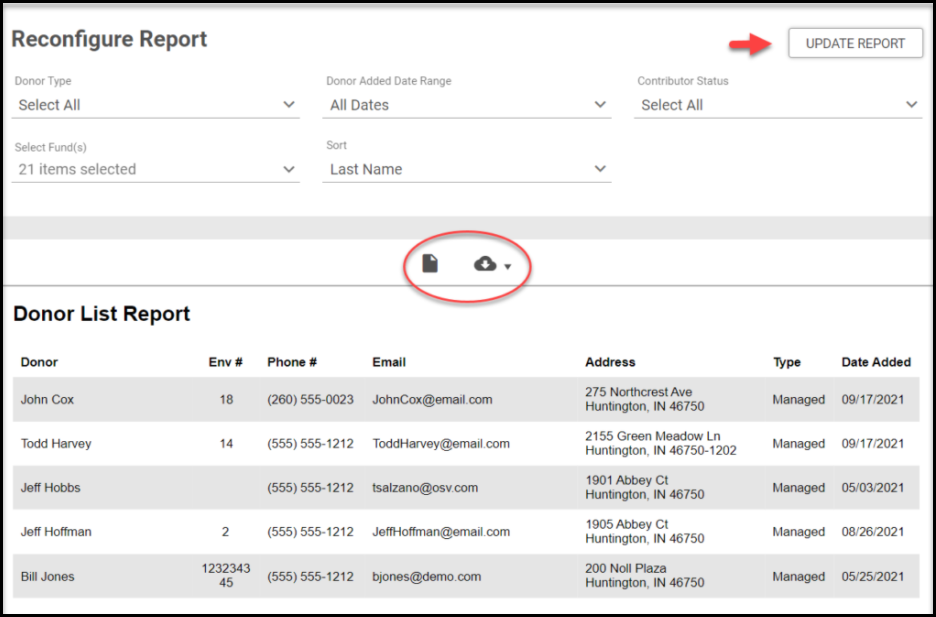
The Report can be updated by selecting new drop down components and selecting Update Report.
The Report results can be printed or Exported using PDF, CSV or Excel from the cloud icon dropdown and forwarded to others.
Note* Visual steps are best viewed at full screen. Click Esc on your keyboard when you are finished viewing.