


Edit Managed Account Settings
This article provides steps to enable or disable the Managed Account feature.
A managed account is an donor account that your organization manages on behalf of a donor. Donors may request that you Add a Managed Account for them if, for example, they cannot physically donate money each week or cannot use the Online Giving system to donate. In order to add a managed account, you must first enable managed accounts in Giving Settings. You can enable, disable, or edit the default email address for managed accounts in Giving Settings at any time.
Note* A Managed Account is unable to be deactivated if there are managed gifts in the system.
Complete the following steps to enable or disable the Managed Account feature:
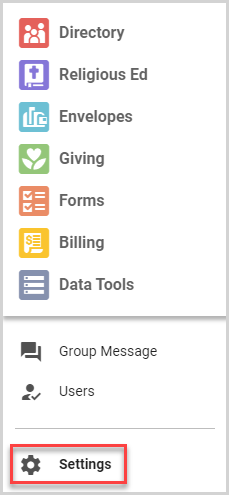
1. In the main menu, select Settings.
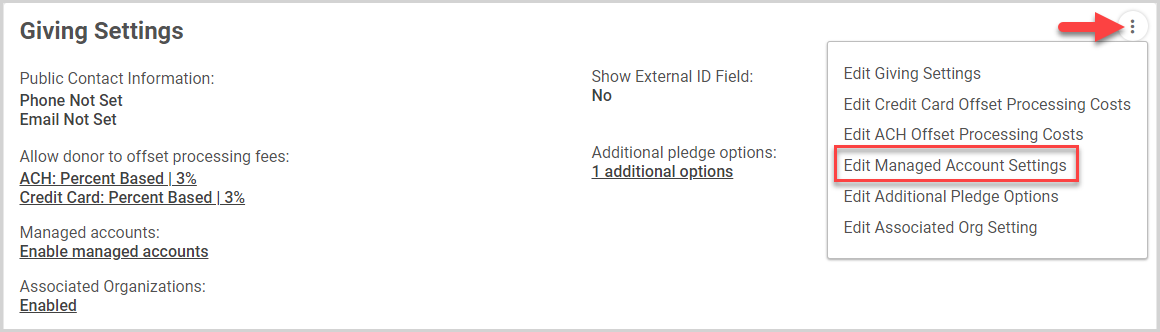
2. On the Giving Settings card, click the ellipsis to view the drop-down menu.
3. From the drop-down menu, select Edit Managed Account Settings.
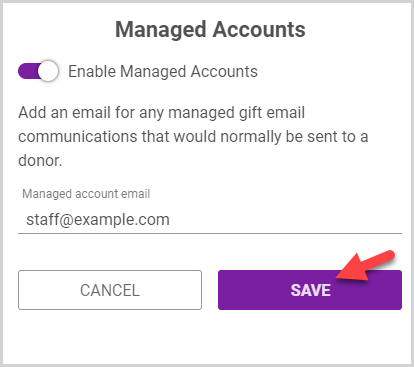
4. On the Managed Accounts side sheet, turn the Enable Managed Accounts toggle to the on position to activate.
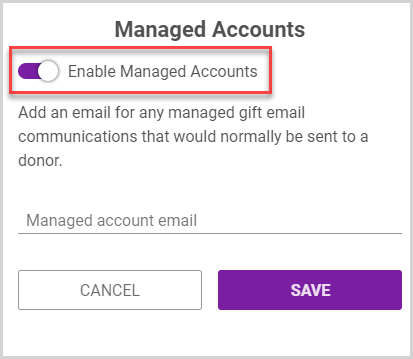
5. Enter a Managed Account Email address. The Managed Account Email is the default email address that is used for all Managed Accounts unless the administrator overrides the email on the account with the donor's personal email at request.
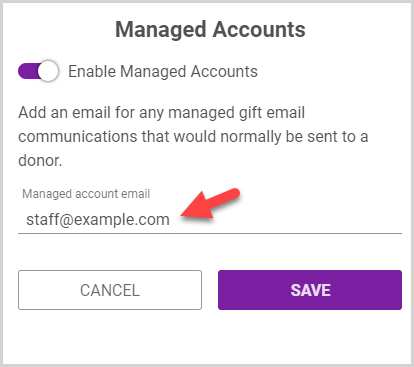
6. Click the Save button to enable managed accounts.
Note* The video is best viewed at full screen. Press Esc on your keyboard when you are finished viewing.