


Customize the Welcome Section
This article provides steps on how to customize the welcome section which includes a title, description, an image and two buttons to link to additional information.
An administrator can customize the Welcome section of the Instant Website at anytime.
Complete these steps to customize the Welcome section:
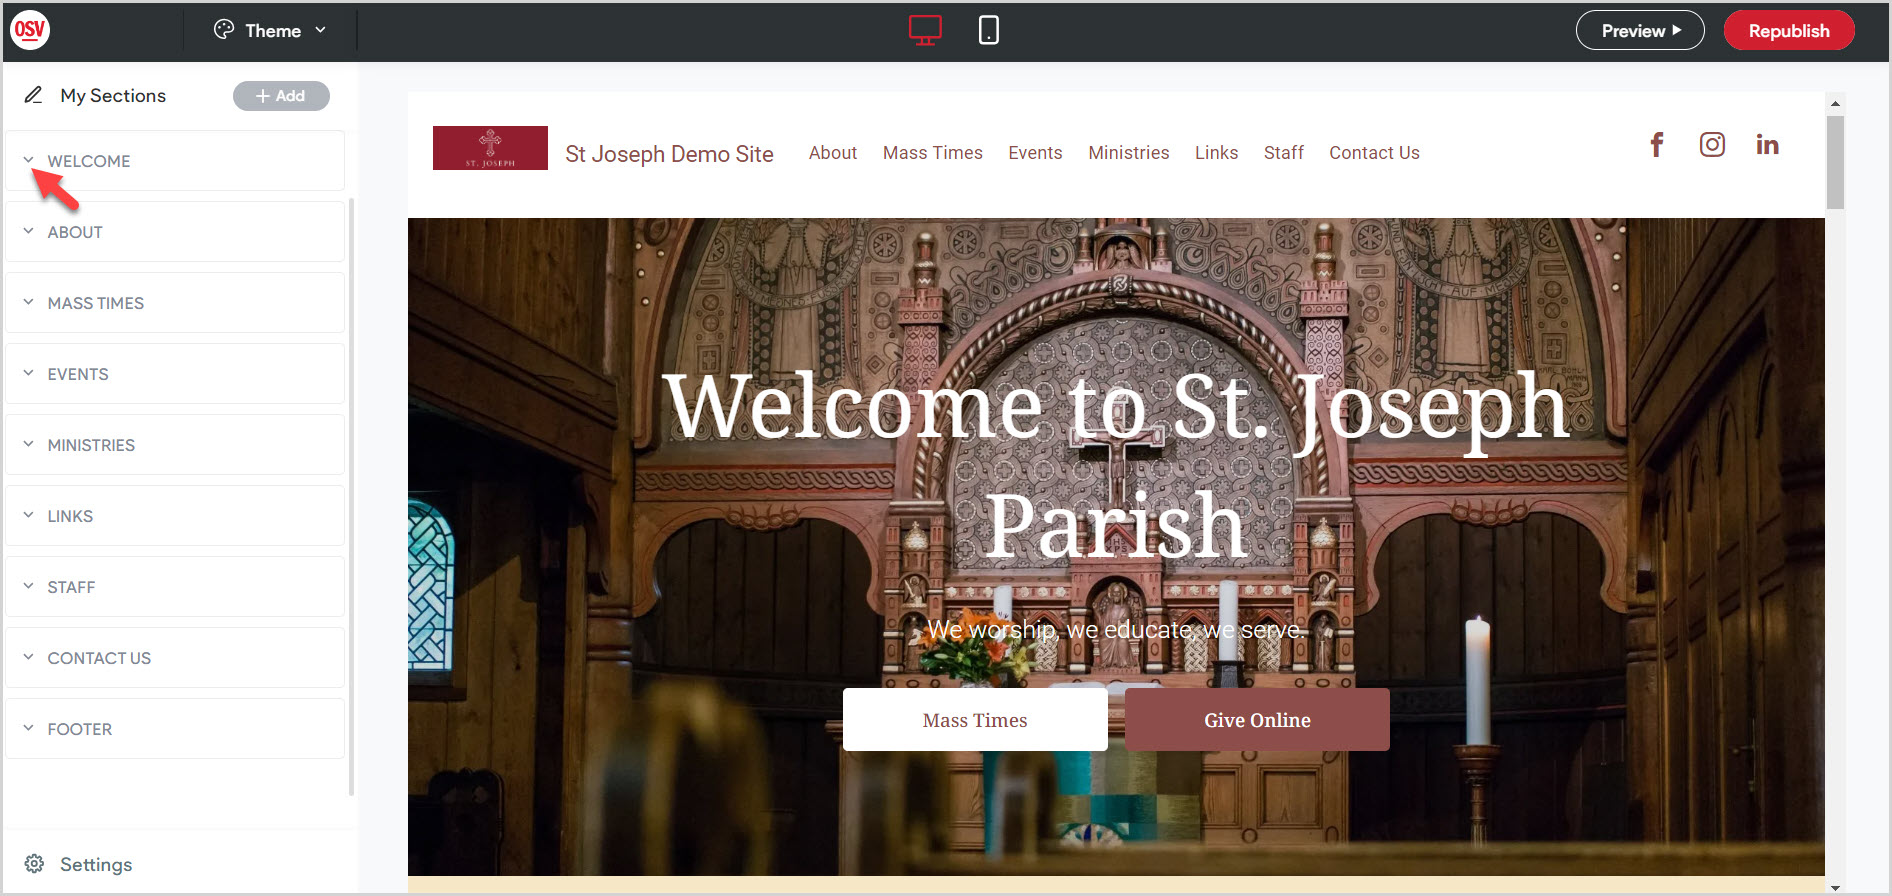
Welcome
1. In the main menu click on the Welcome drop-down to view the selections for this section, a title, description, a background image for the organization and two buttons to link to additional information.
Title
2. Enter a title. The title can be added, deleted or edited at any time. Turning the toggle switch to the off position hides the title. Turning it to the on position allows it to be viewed on the site.

Description
3. Enter a description. The description can be added, deleted or edited at any time. Some organizations place their mission statement here. Turning the toggle switch to the off position hides the description. Turning it to the on position allows it to be viewed on the site.
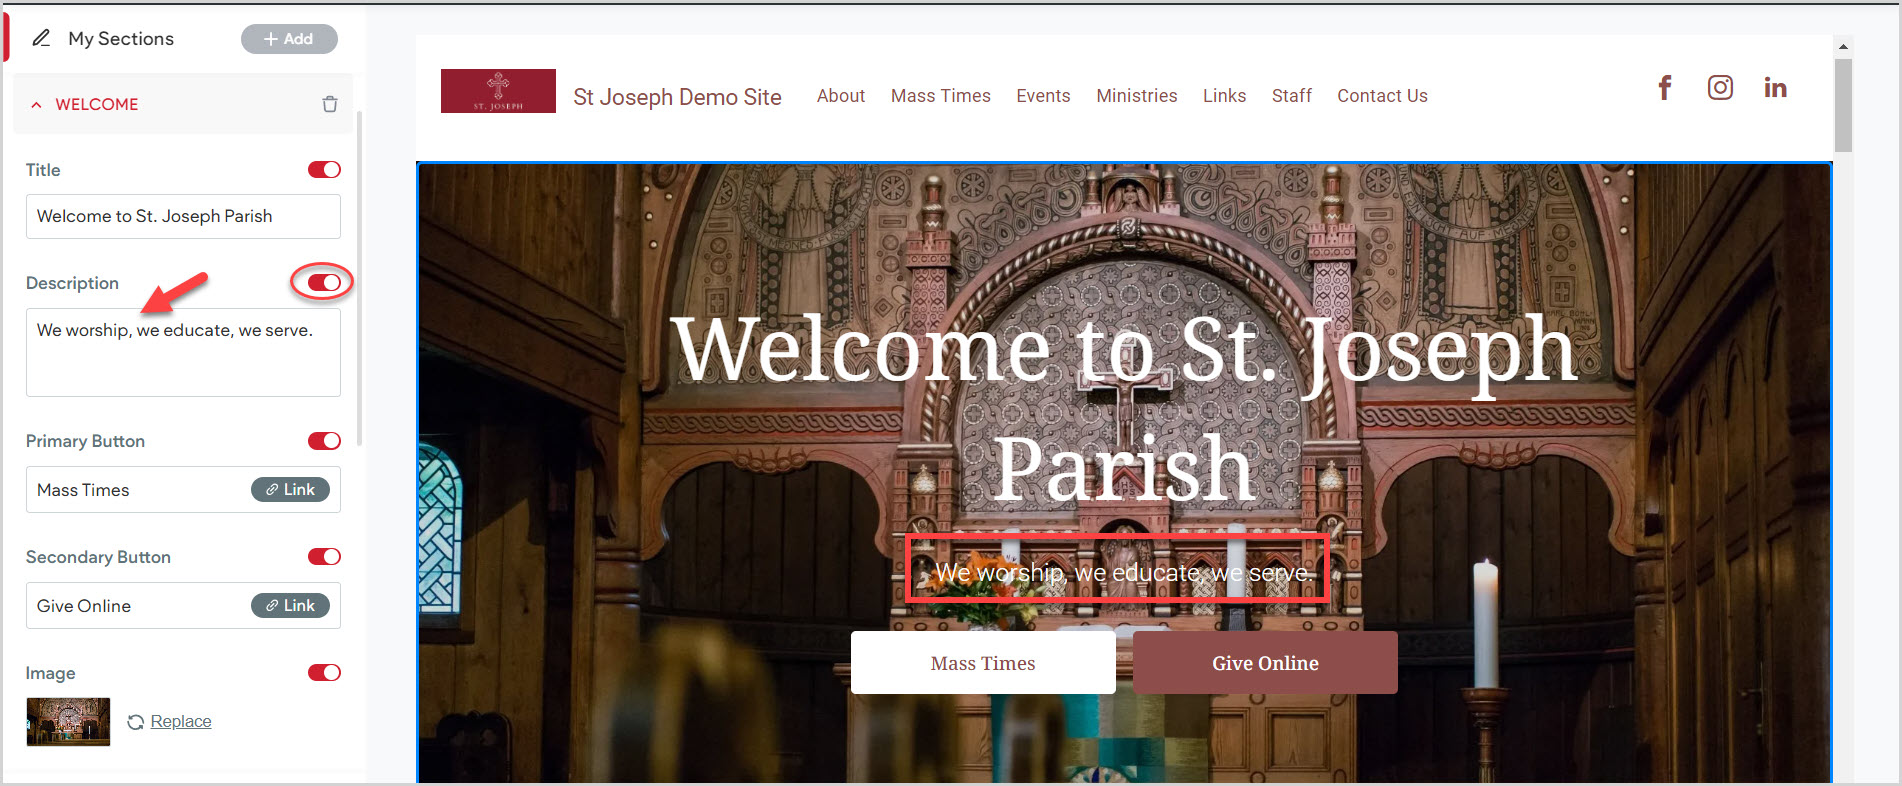
Add Links
The Welcome section provides two buttons that can be labeled and linked to other information internally or externally. A button can be replaced at any time. Turning the toggle switch to the off position hides the button from the Welcome section. Turning it to the on position allows it to be viewed on the site.
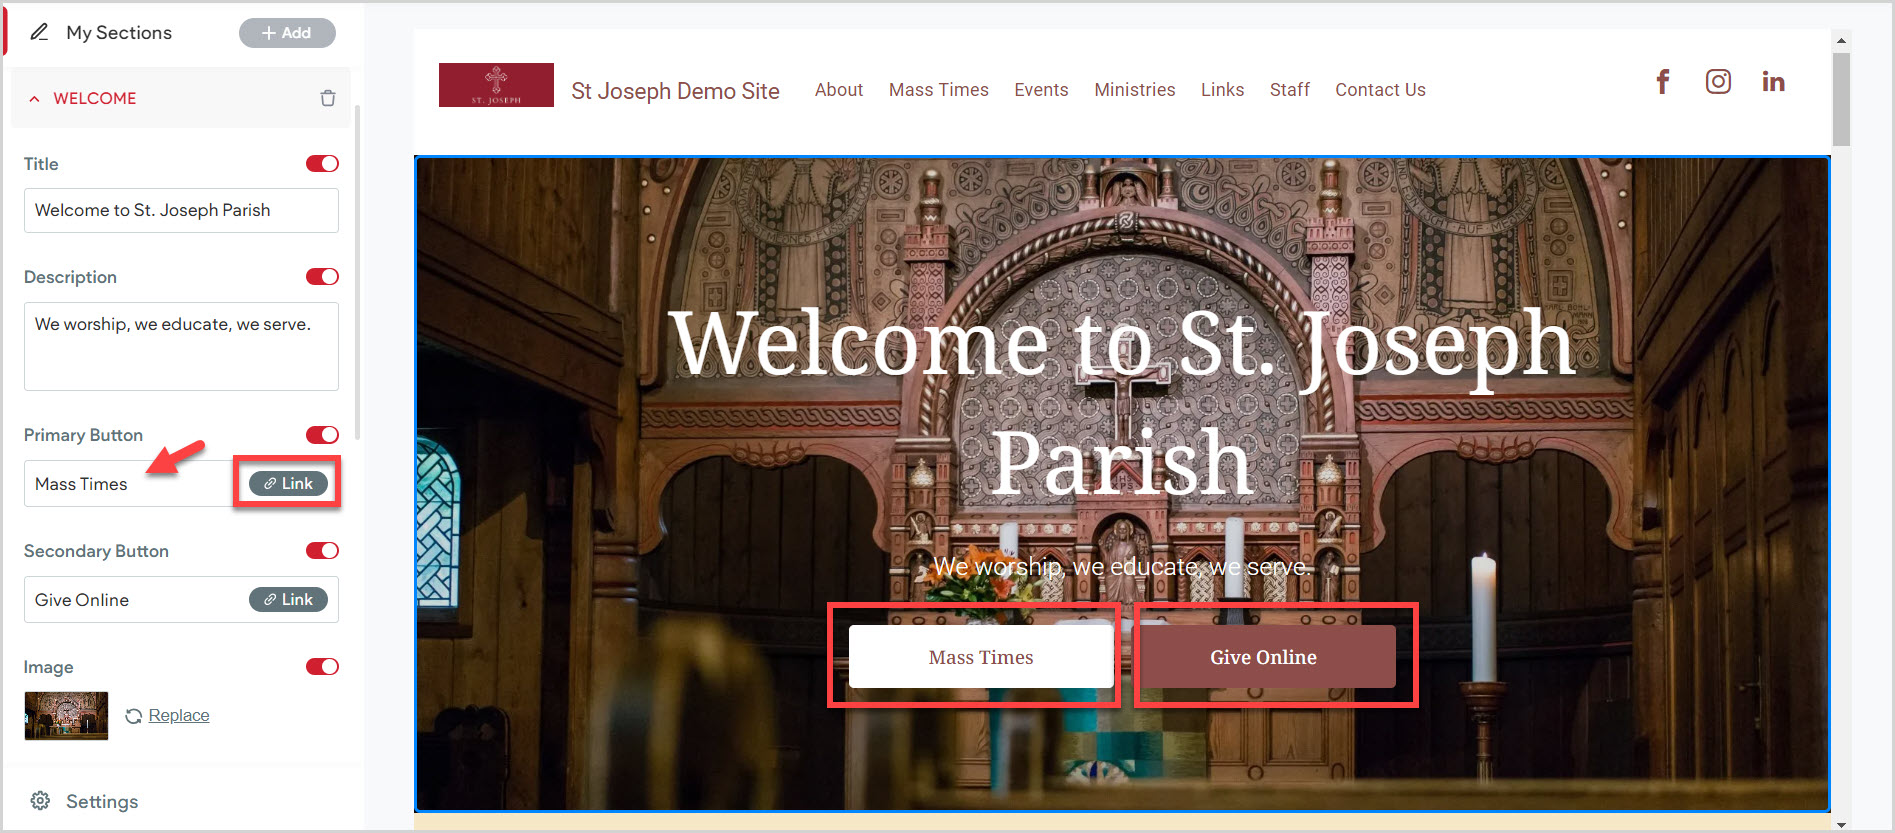
4. Enter the button label.
5. Click on Link.
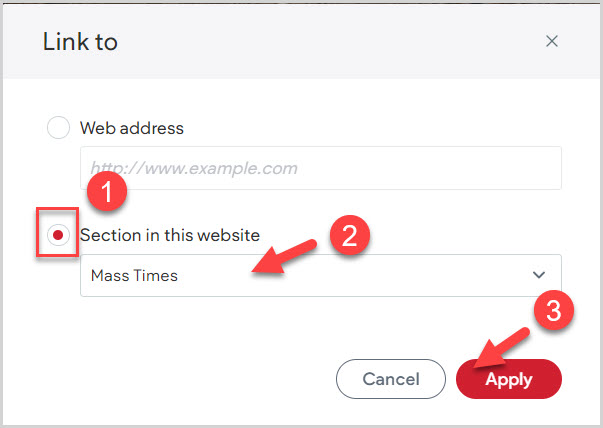
For an Internal Link
6. Click the radio button titled Section in this website for an internal link.
7. Enter the desired website Section title. (Example: Mass Times)
8. Click on Apply.
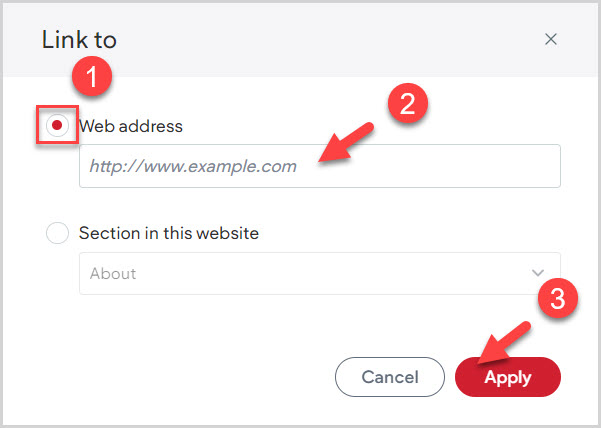
For an External Link
9. Click on the radio button titled Web address for an external link.
10. Enter the desired web address. (Example: An Online Giving web address)
11. Click Apply.
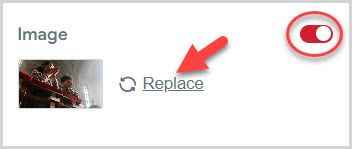
Upload an Image
12. Click on Replace to upload a background image for the Welcome section. The image can be replaced at any time. Turning the toggle switch to the off position hides the image. Turning it to the on position allows it to be viewed on the site.
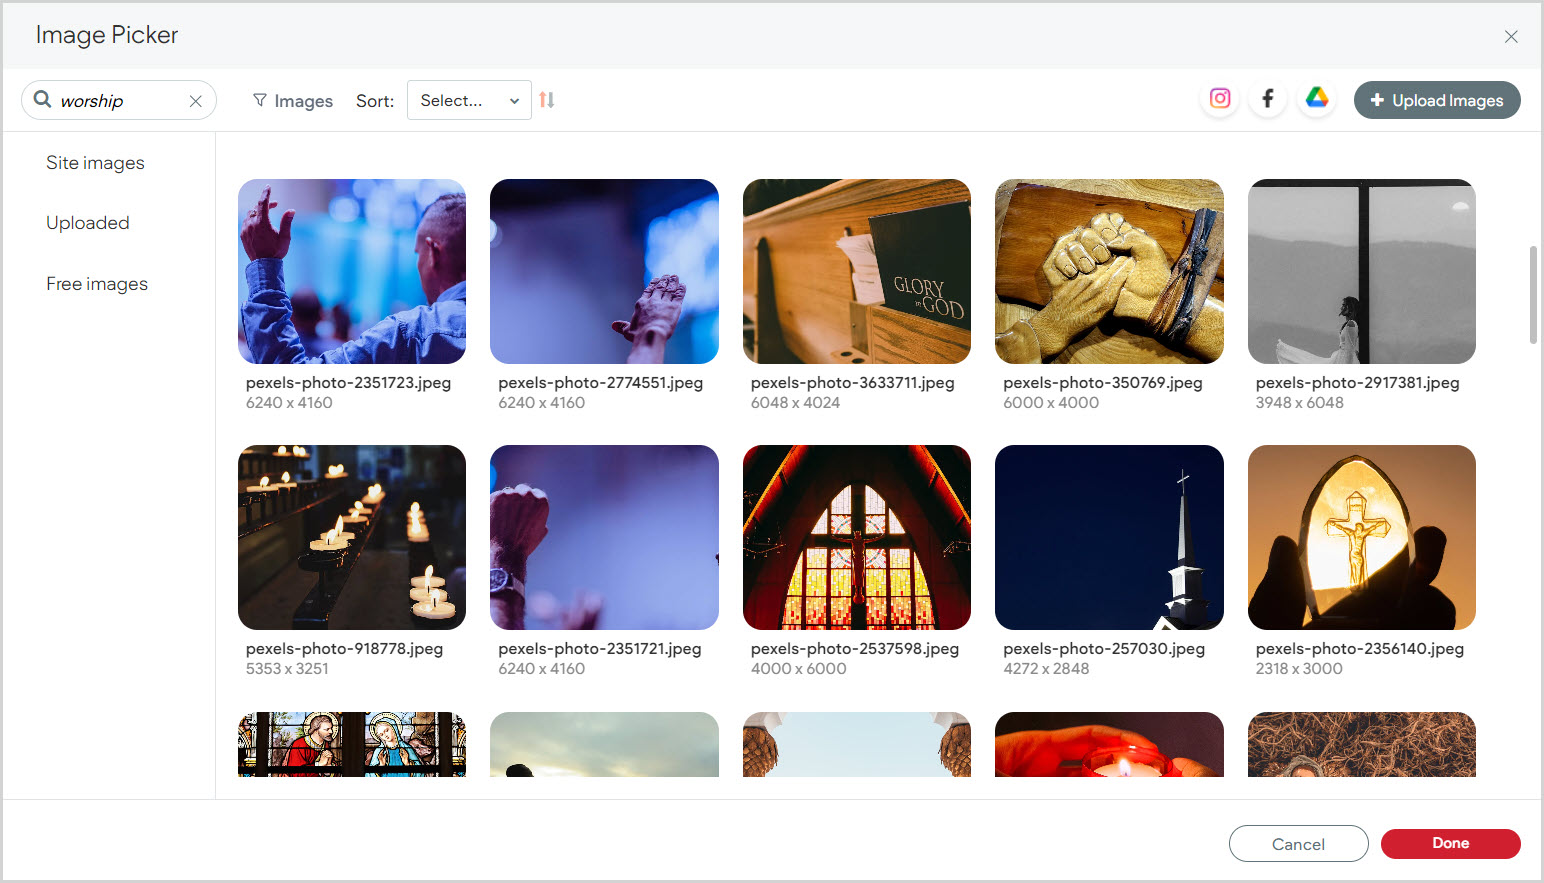
13. Locate your desired image. It will be assumed that you own the rights to the image. Check this out for information on how to Upload an image from the image picker.
14. Click on Done.
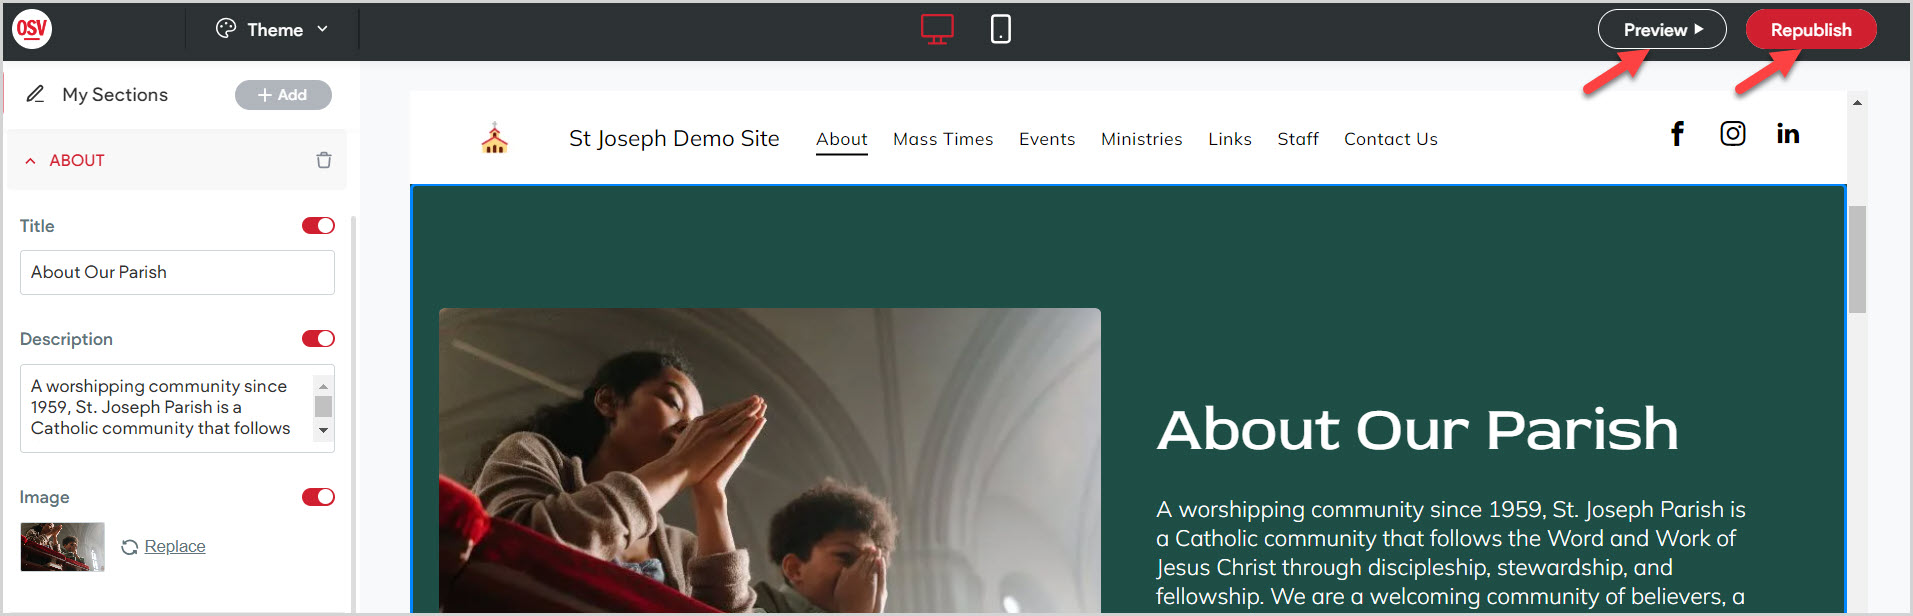
15. Click Preview or Republish to save the information to the site.
Note* The video is best viewed at full screen. Press Esc on your keyboard when you are finished viewing.