


Create a New Term
This article provides steps to create a new term in Religious Education with an opportunity to add discounts.
A Religious Education term is the foundational structure that keeps your religious education module organized. Creating a term is the first step in administering your religious education programs through the Religious Education module. Once you have created a term, you can register students for the term, create classes, assign students to a class, and assign teachers to a class, among other important actions.
You can create discounts to apply to registrations for the term. Discount codes can be used to encourage early sign up so you can get a headcount and materials ordered quickly. Multi-student discounts, whether flat rate or tiered, can help prevent hardships for larger families.
When creating a term, you can also set a Family Out-of-pocket Maximum. It is a limit on the amount of money a family will owe when registering for a term.
Complete the following steps to create a new term with discounts and out of pocket limits in Religious Education:
Term Configuration
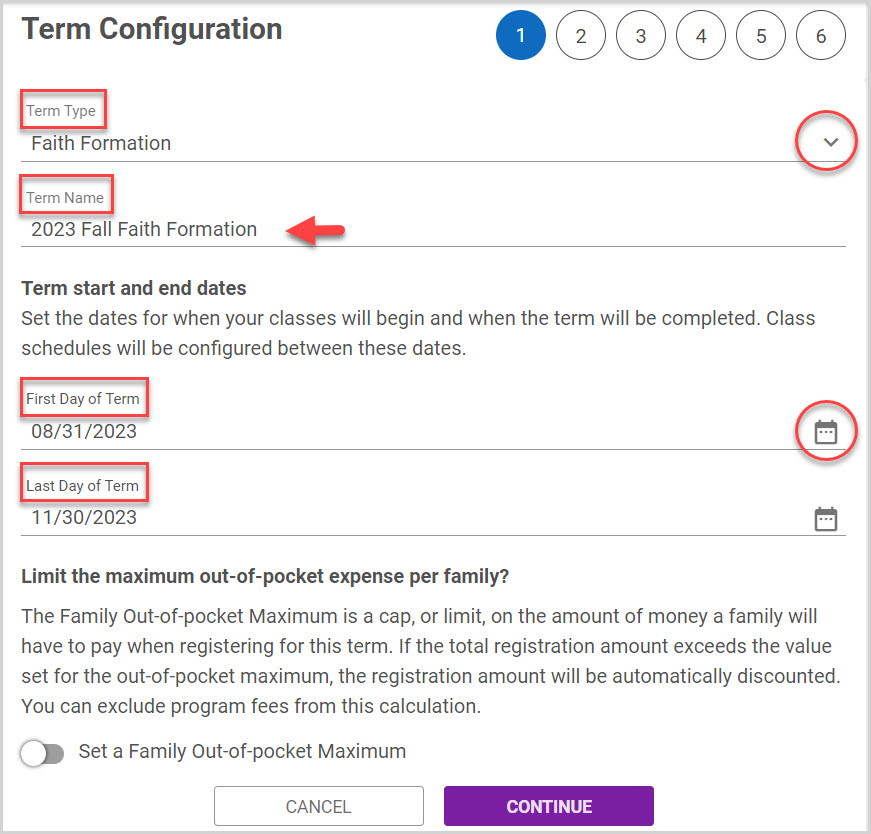
In Term Configuration, you set the term type, name the term, and set the first and last day of the term. The first and last day of the term correspond to the first and last class sessions; the class schedule is based on these dates. Registration dates are set later in the process.
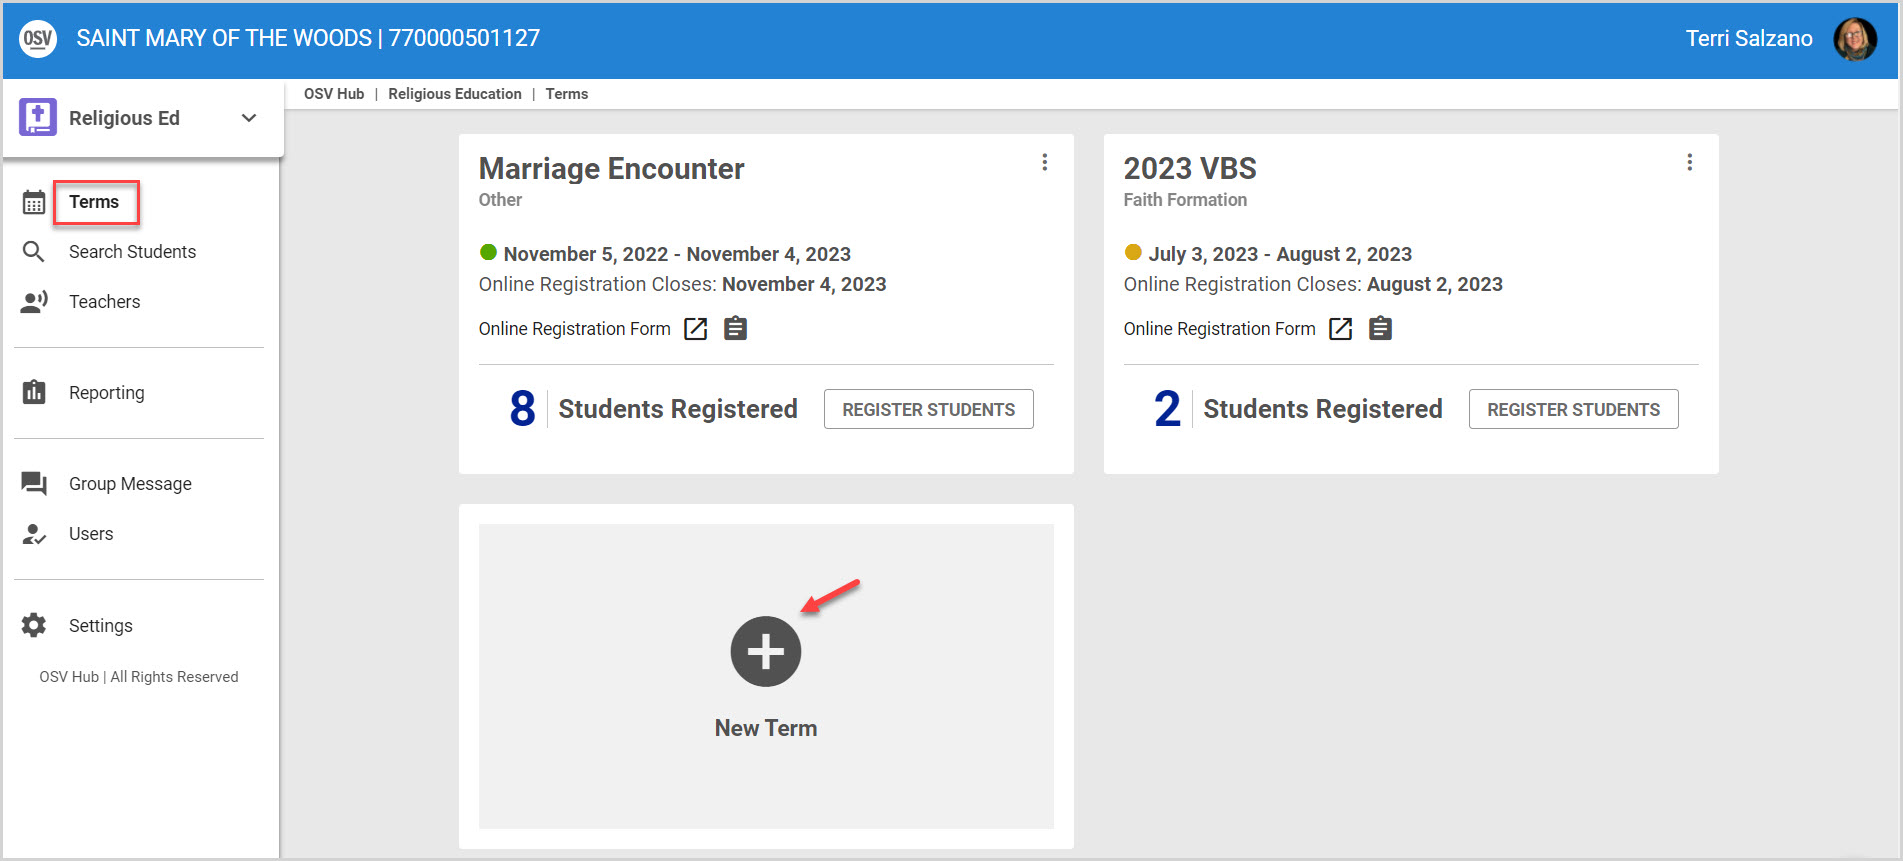
1. In Religious Education, go to Terms.
2. On the Terms page, click the New Term icon. The Term Configuration card becomes viewable.
3. Select the Term Type from the drop-down menu: Faith Formation, Vacation Bible School (VBS), Rite of Christian Initiation of Adults (RCIA), or Other.
Note* The selected term type may impact the setting and options available for the term.
4. Enter the Term Name.
5. Set the First Day of Term and Last Day of Term by selecting the dates on the calendar input or by entering the date in the MM/DD/YYYY format.
Family Out-of pocket-Maximum
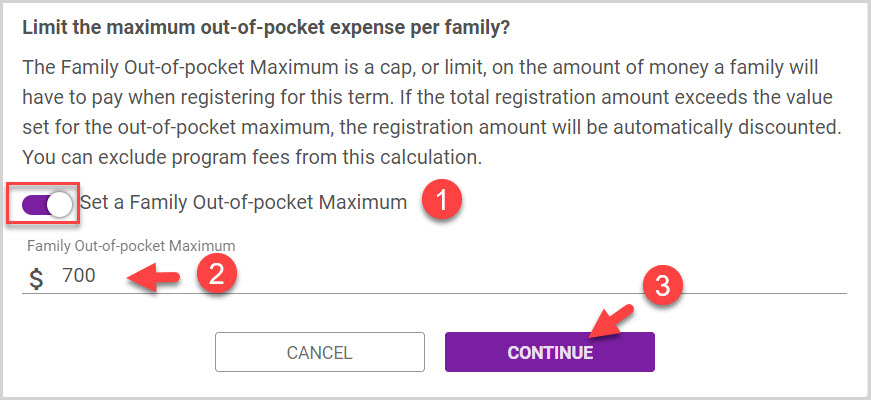
The Family Out-of-pocket Maximum is a cap, or limit, on the amount of money a family has to pay when registering for a term.
1. Turn the toggle on to set a Family Out-of-pocket Maximum.
2. Enter the amount of the family Out-of-pocket Maximum.
3. Click on the Continue button.
Online Registration
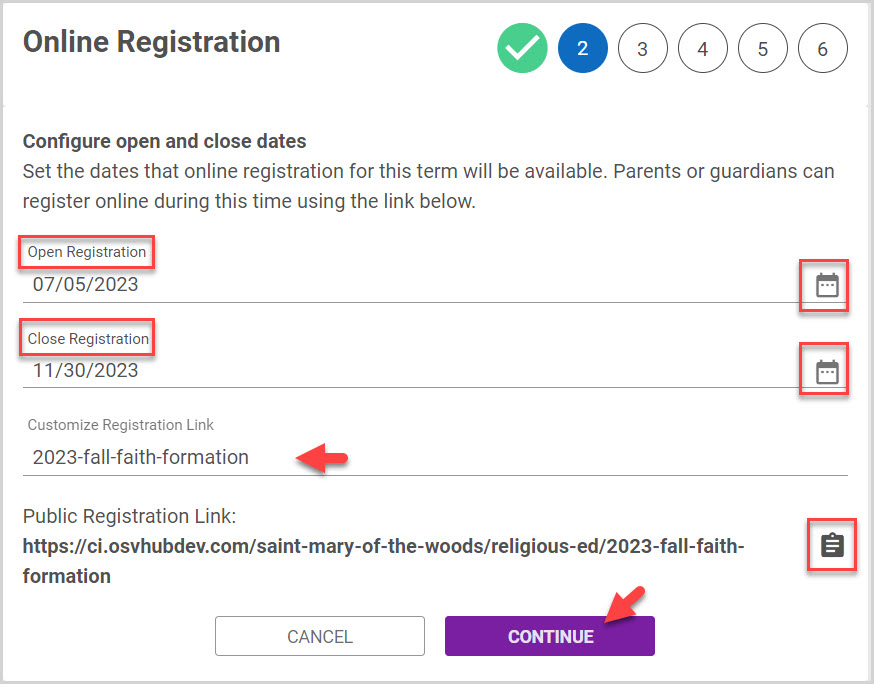
The next section of the Term setup relates to online registration. You set the open and close dates for registration, making the online registration link available on the open date, and unavailable following the close date. If you desire, you can also customize the public registration link.
1. The Open Registration date defaults to the current date, and the Close Registration date defaults to the Last Day of Term date. To choose new dates, select the date on the calendar input, or enter the date in MM/DD/YYYY format.
2. A default registration link based on the term name is provided. If you choose, you can Customize the Registration Link: enter your desired text in the Customize Registration Link field.
Note* The registration link must only contain letters, numbers, and dashes. There should be no spaces. To copy the Public Registration Link, click the clipboard icon.
3. Click the Continue button.
Program Options
Programs are the groups within a term for which classes are created. For a given term, you may choose to have a number of programs available. In a single Faith Formation term, for example, you could create separate programs for K-3rd grade and 4th-6th grade students. The program name, grades, fee, and discount eligibility are set separately for each program. Students may sign up for multiple programs, as long as their grade is applicable.
1. Enter the Program Name.
2. In the drop-down menu, select the applicable Grades.
3. Enter the program Fee. To create a free program, leave the field blank.
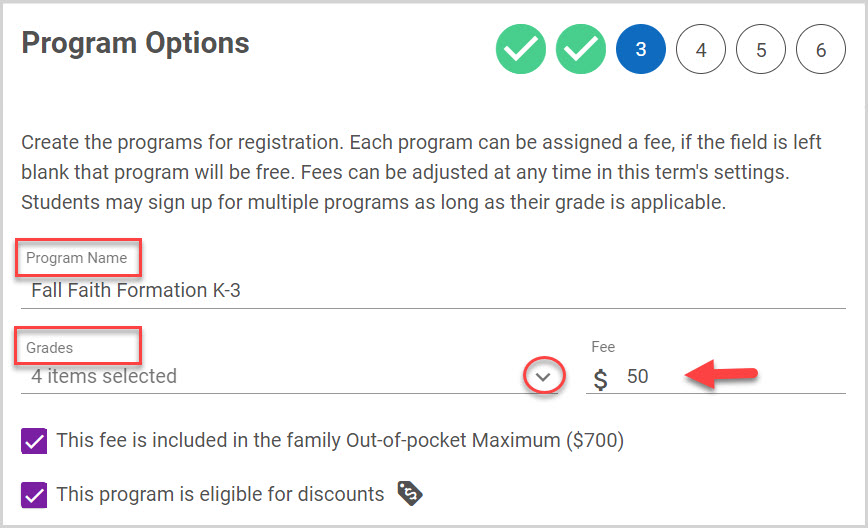
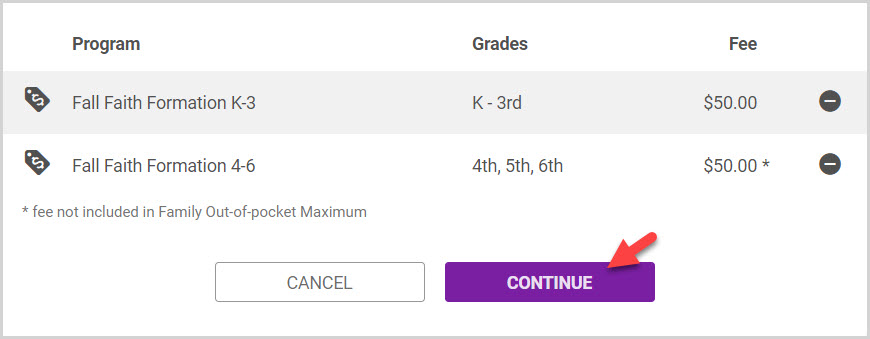
4. The default setting is a checkmark in the box for the fee to be included in the Family Out-of pocket Maximum for programs. (In this example $700.00 has been chosen as the maximum.) Remove the checkmark if not desired.

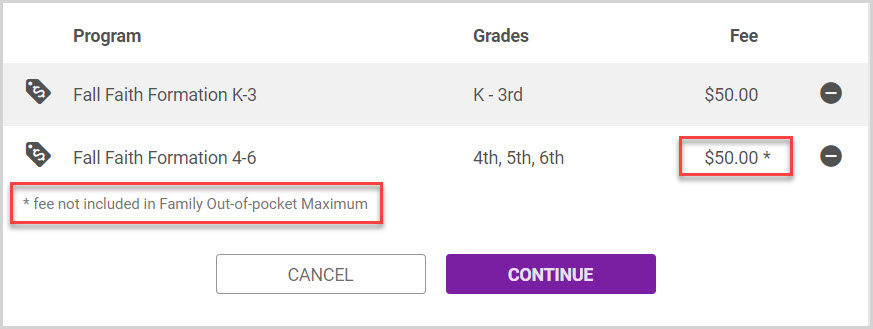
Note* When a program is not included, it has an asterisk to indicate that the fee is not eligible for Family-Out-of-pocket Maximum.
5. If you want to make the program eligible for a discount, select the checkbox. Programs eligible for discounts are indicated by tag icon. (The actual discount(s) are created in the next portion of the term setup.)
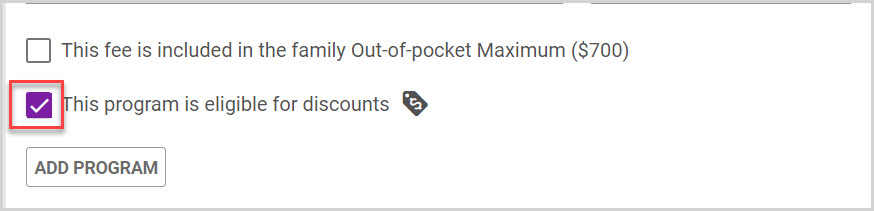
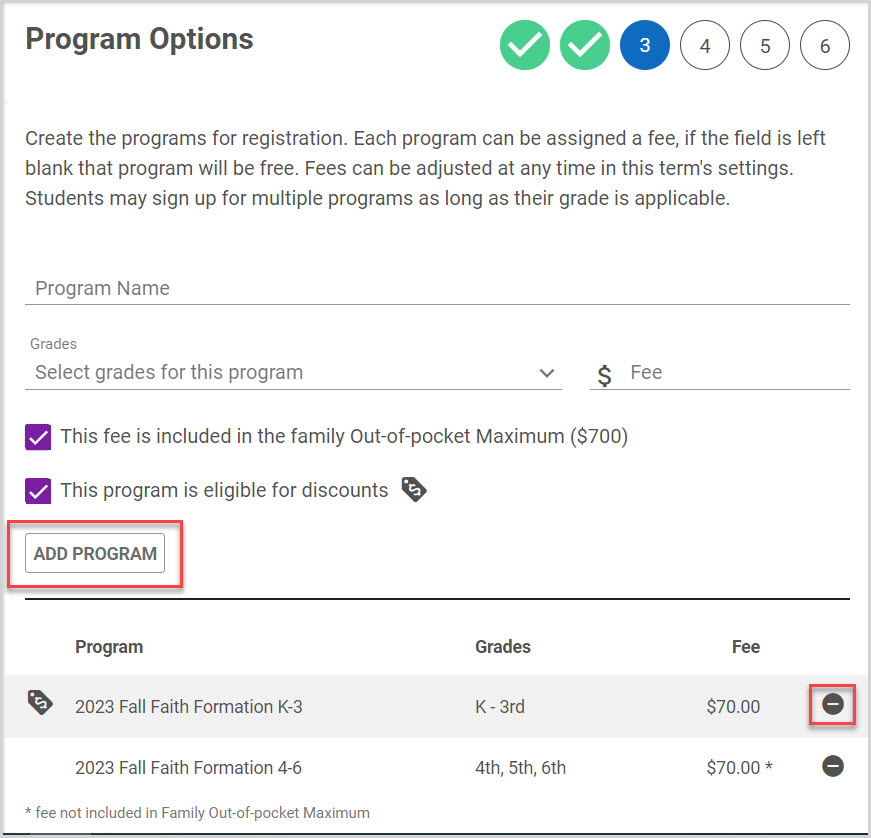
6. Click Add Program. to add another program. You can add as many programs to the term as you need.
Note* You can remove a program by clicking the minus icon.
7. Click Continue.
Discounts
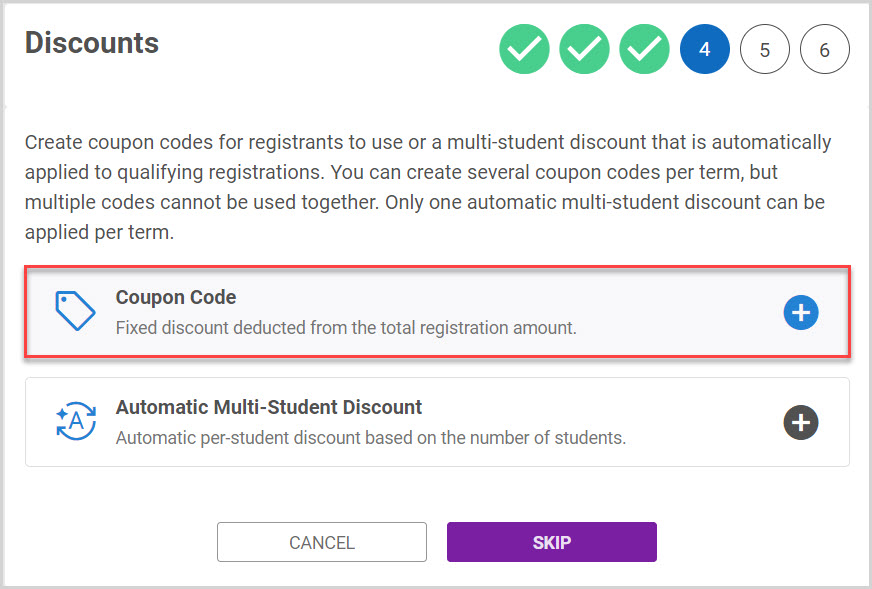
Three discount types are available: Fixed Coupon Code, Percent Coupon Code, and Automatic Multi Student. You can share the discount codes with parents, so they can apply the discount as the parents register students online. Discount codes are valid through the registration period by default, but you can edit or remove a discount code from the term at any time.
Note* Because discounts are listed on the payment page of an online registration, parents registering students online are only able to apply discounts if your organization is an Online Giving customer. You can still apply discounts to completed registrations at any time in the Religious Education Module.
Coupon Code
The discount code is deducted from the total registration amount. Programs not eligible for discounts are excluded from the discount calculations.
1. Click on Coupon Code.
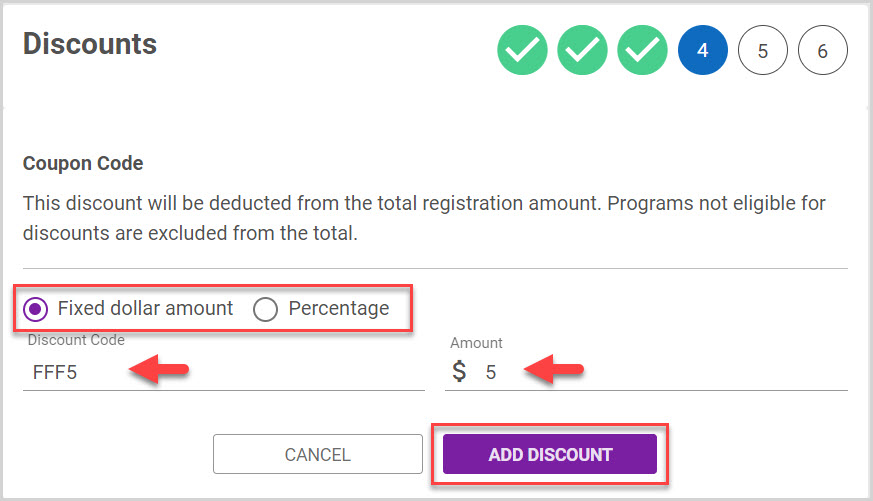
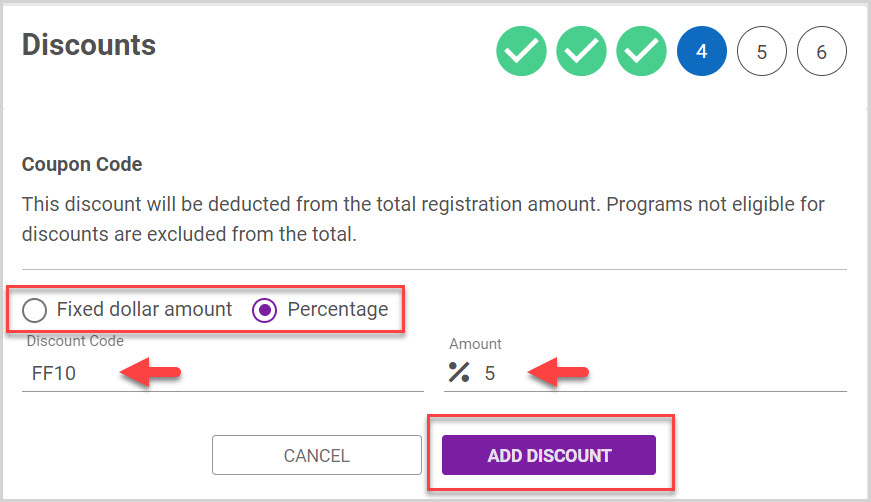
2. Select the Coupon Code Discount: Fixed Dollar Amount or Percentage.
3. If you are using the Fixed or Percent Coupon Code discounts, enter Discount Code. Discount codes may contain letters and numbers up to 12 characters without spaces. Each coupon must be unique and not duplicated.
4. Enter the Amount or Percent, depending on the type of coupon you have selected.
5. Click the Add Discount button.
Fixed Dollar Amount Discount
Percentage Discount
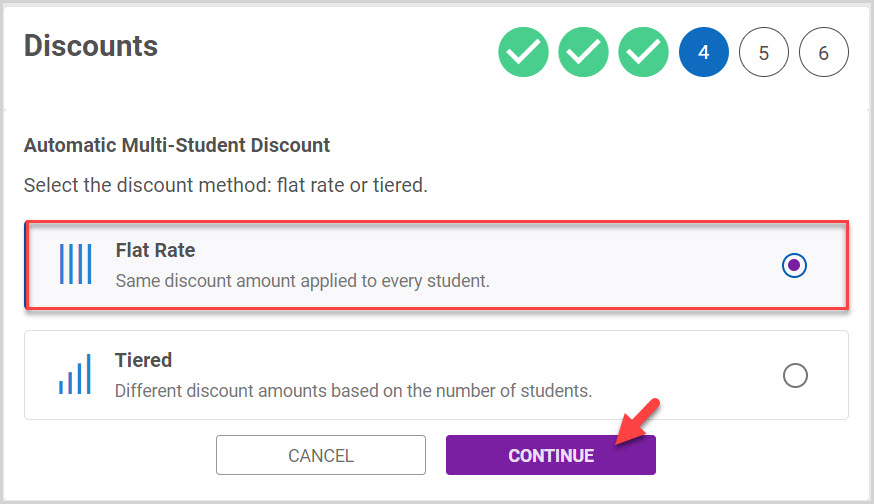
Automatic Multi-Student Discount
Automatic Flat Rate and Tiered Multi-student discounts are automatically applied to qualifying registrations.

Automatic Flat Rate Multi-Student Discount Example:
1. For the Automatic Flat Rate Multi-Student Discount, select Flat Rate. (See the second example for the Tiered discount.)
2. Click on the Continue button.
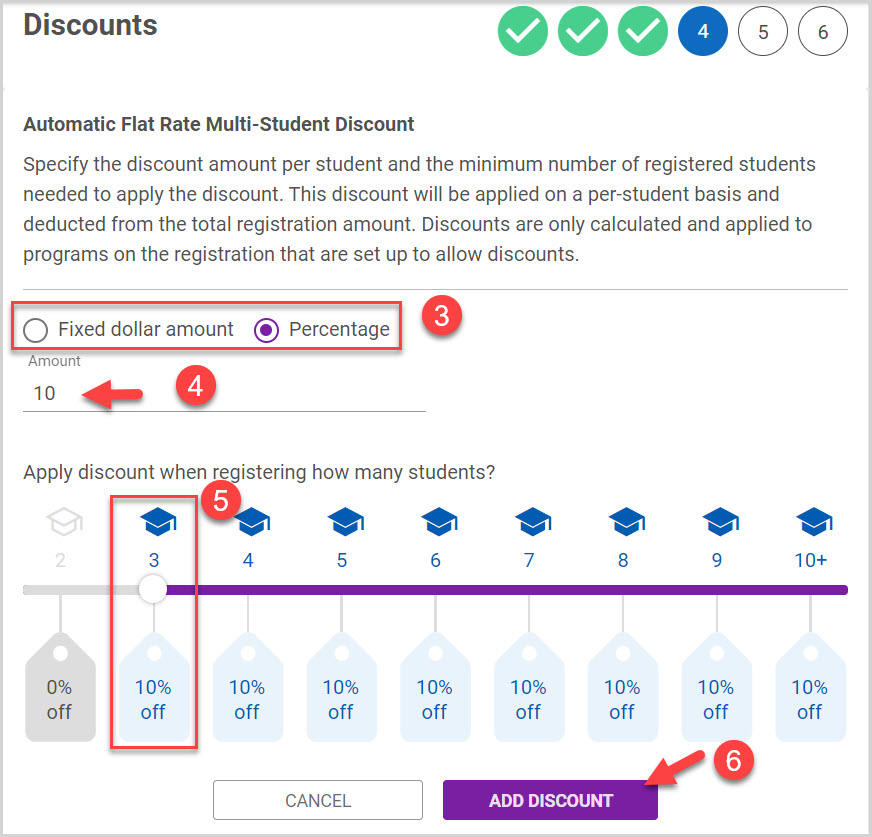
3. Select Fixed Amount or Percentage.
4. Enter the discount amount per student.
5. Specify the number of registered students needed to apply the discount by clicking or using the slide bar.
6. Click Add Discount.
Note* You can create several coupon codes per term, but multiple codes cannot be used together. Only one automatic multi-student discount can be applied to a registration per term.
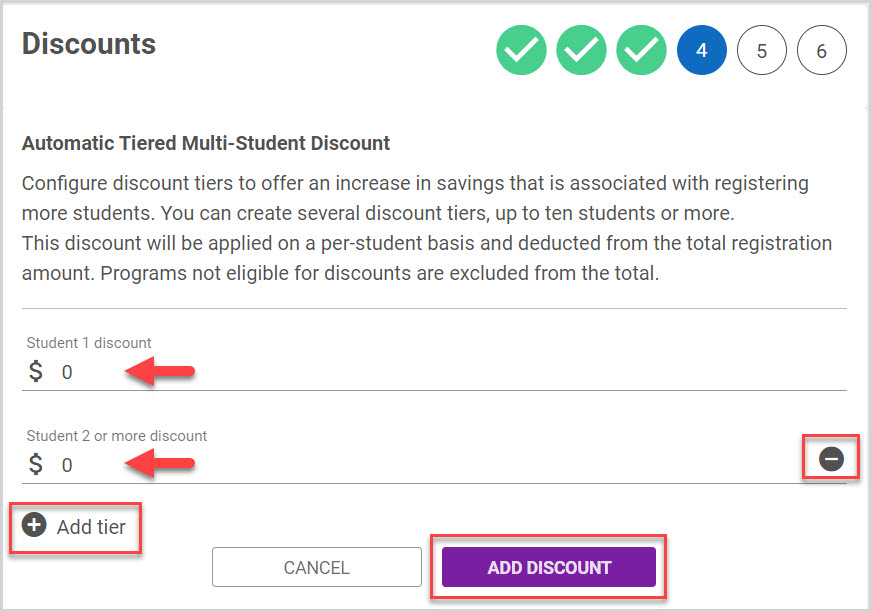
Automatic Tiered Multi-Student Discount Example:
1. For the Automatic Tiered Multi-Student Discount, select Tiered.
2. Click on the Continue button.

Configure discount tiers to offer an increase in savings that is associated with registering more students. You can create several discount tiers, up to ten students or more.
The discount is applied on a per-student basis and deducted from the total registration amount. Programs not eligible for discounts are excluded from the discount calculations.
3. Enter the amount for the Student 1 discount. (0 or more)
4. Enter the number of Students necessary to receive a discount.
Note* Click on the plus sign to add another tier and click on the minus sign to delete a tier.
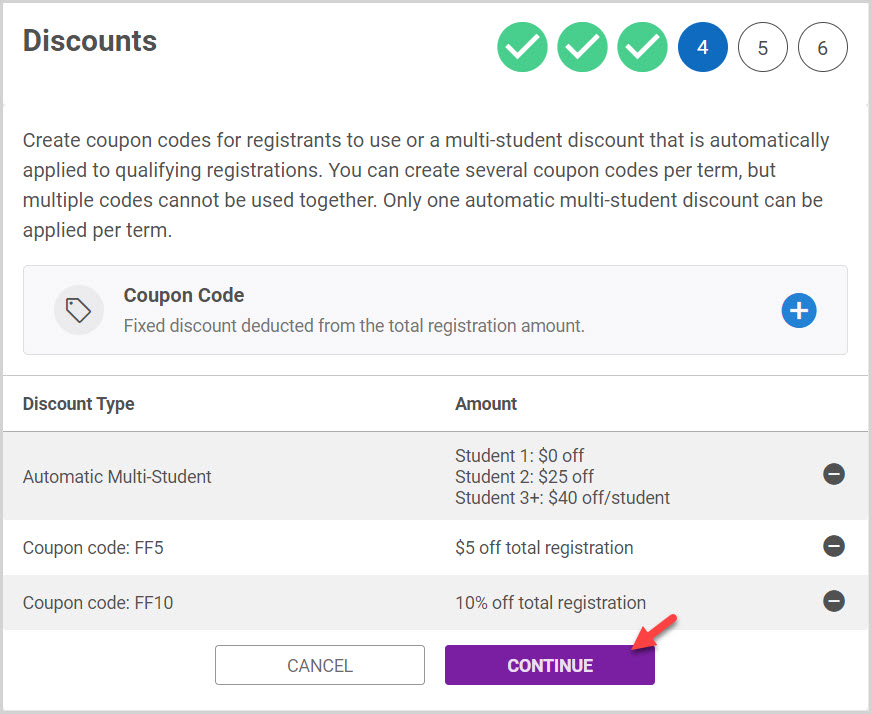
In this example of the Automatic Tiered Multi-Student Discount, for a family of five, Student 1 would pay the full price. Student 2 would receive a $25.00 discount and Students 3 and on would each receive a $40.00 discount.
5. Click on Add Discount to see a Summary view of the tiered discount values for this term.
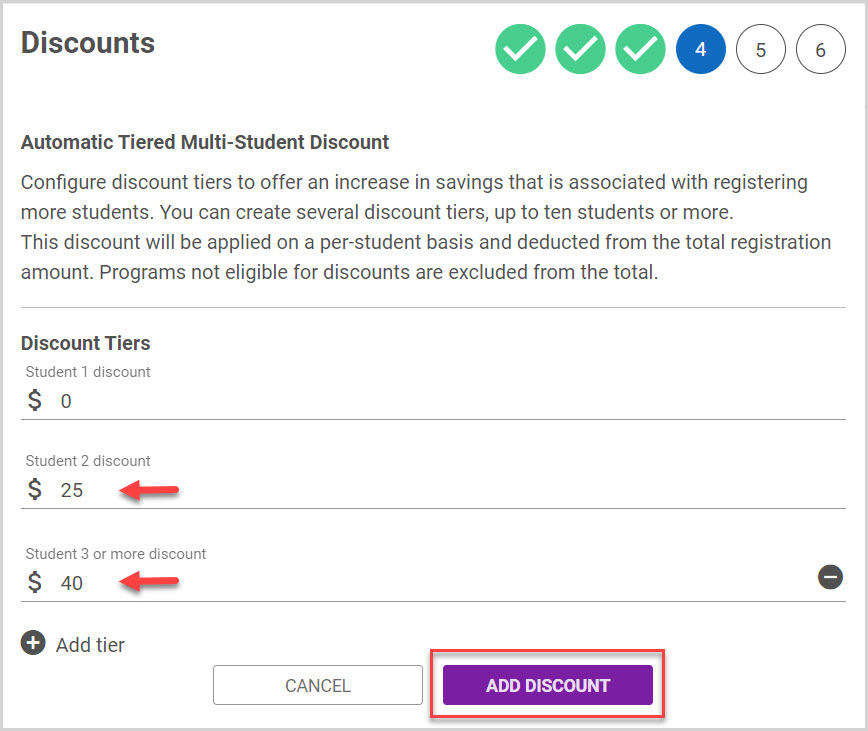
6. Click on Continue to view Payment Options.
Payment Options
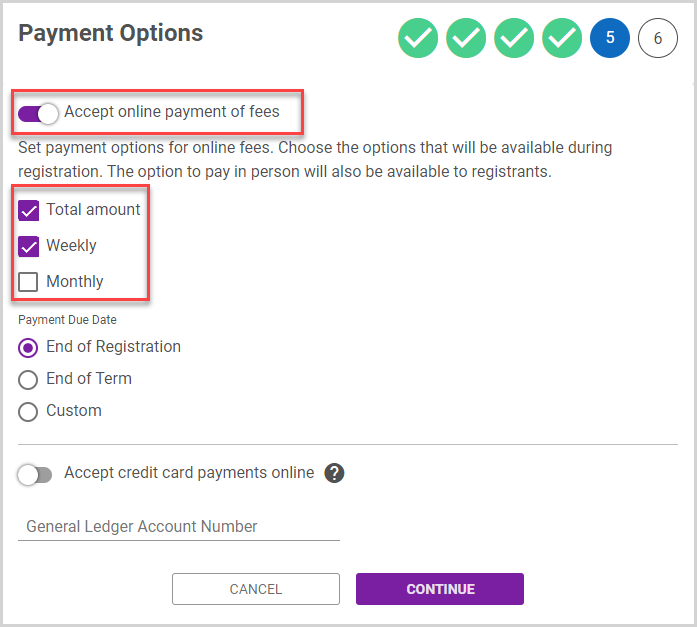
In the Payment Options section, you can set whether you will accept online payment of fees, the allowed schedule of payments, the payment due date, and whether you will accept credit card payments.
Note* Payment Options are only available if you are an Online Giving customer, as they allow registrants to pay their fee online. The offline payment option (pay-in-person) is always available whether online payments are accepted or not.
1. By default, Accept online payment of fees is activated. You can toggle this setting on or off as needed.
2. Select the appropriate checkbox or checkboxes to determine them allowed schedule of payments: Total amount, weekly, and/or monthly. You can select more than one option.
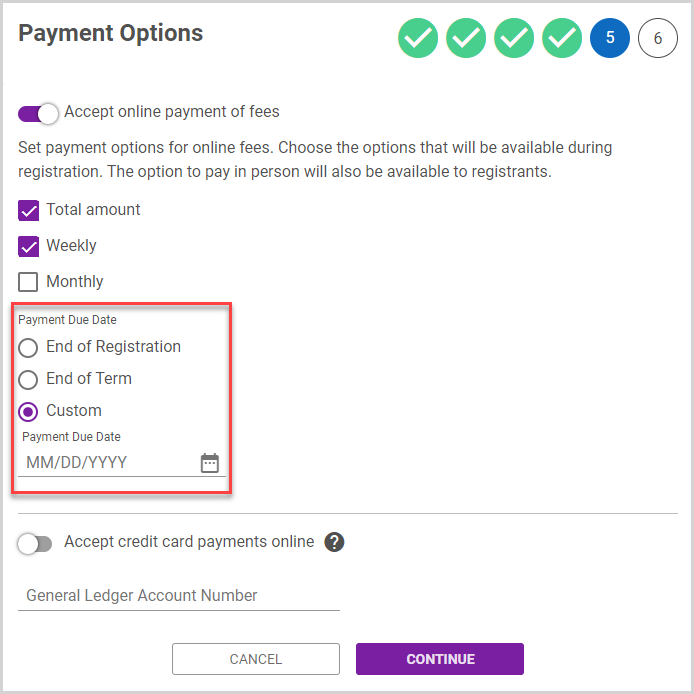
3. Select the Payment Due Date: End of Registration, End of Term, or a custom date.
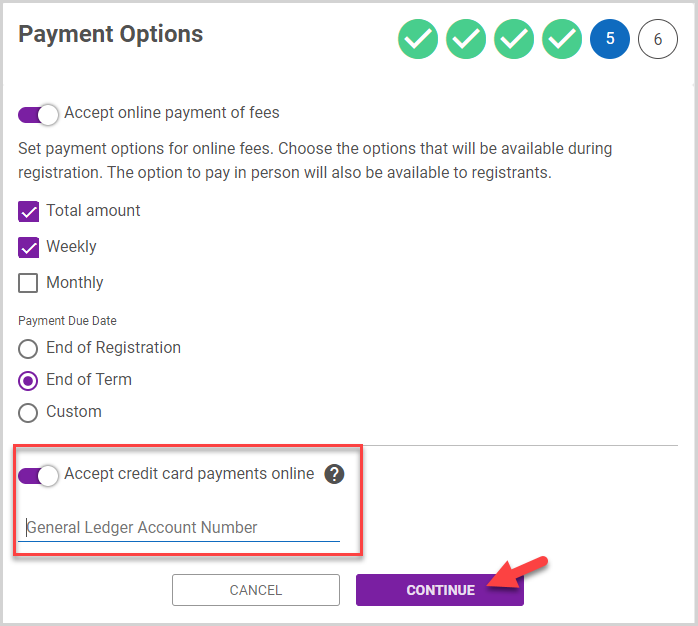
4. If you choose, you can accept credit card payments online: click the toggle to activate this option. ACH or offline payment will still be available for online registrations if this option is disabled.
5. If you choose, enter a General Ledger Account Number for your accounting exporting needs.
6. Click Continue to move on to the last section.
Communication
In the final section of the term setup, Communication, you can set a registration welcome message, as well as customize the terms and conditions messaging.
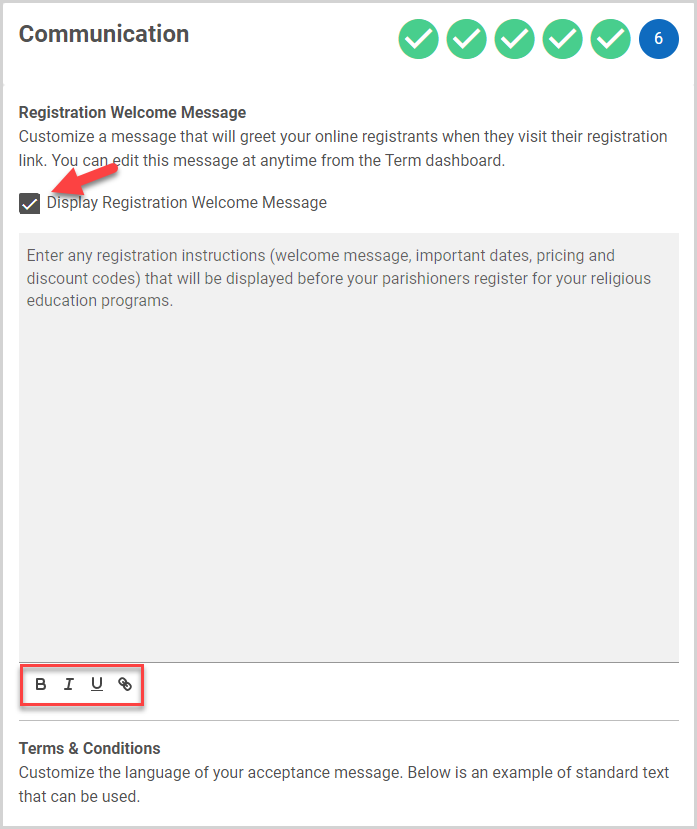
1. To Display Registration Welcome Message, select the checkbox. Enter your customized message, which will appear when registrants visit the registration link. You can format the message and add links to additional websites/documentation using the rich text editing tools.
Note* The maximum character length for the Registration Welcome Message is 4,000 characters.
2. To Display Terms & Conditions, select the checkbox. If you wish, you can customize the text. You can also format the message and add links to additional websites/documentation using the rich text editing tools.
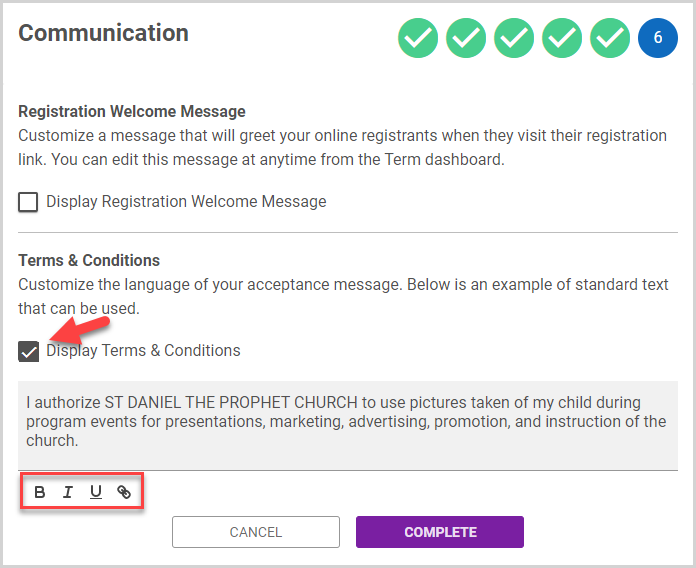
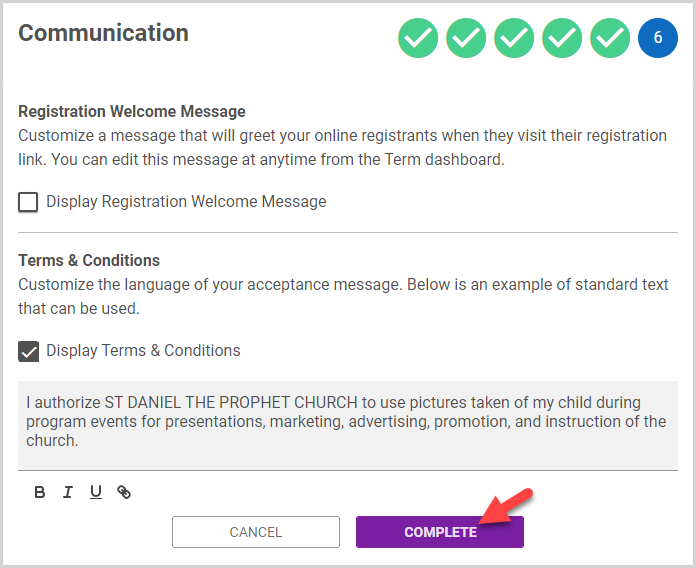
3. Click the Complete button to finish the term setup.
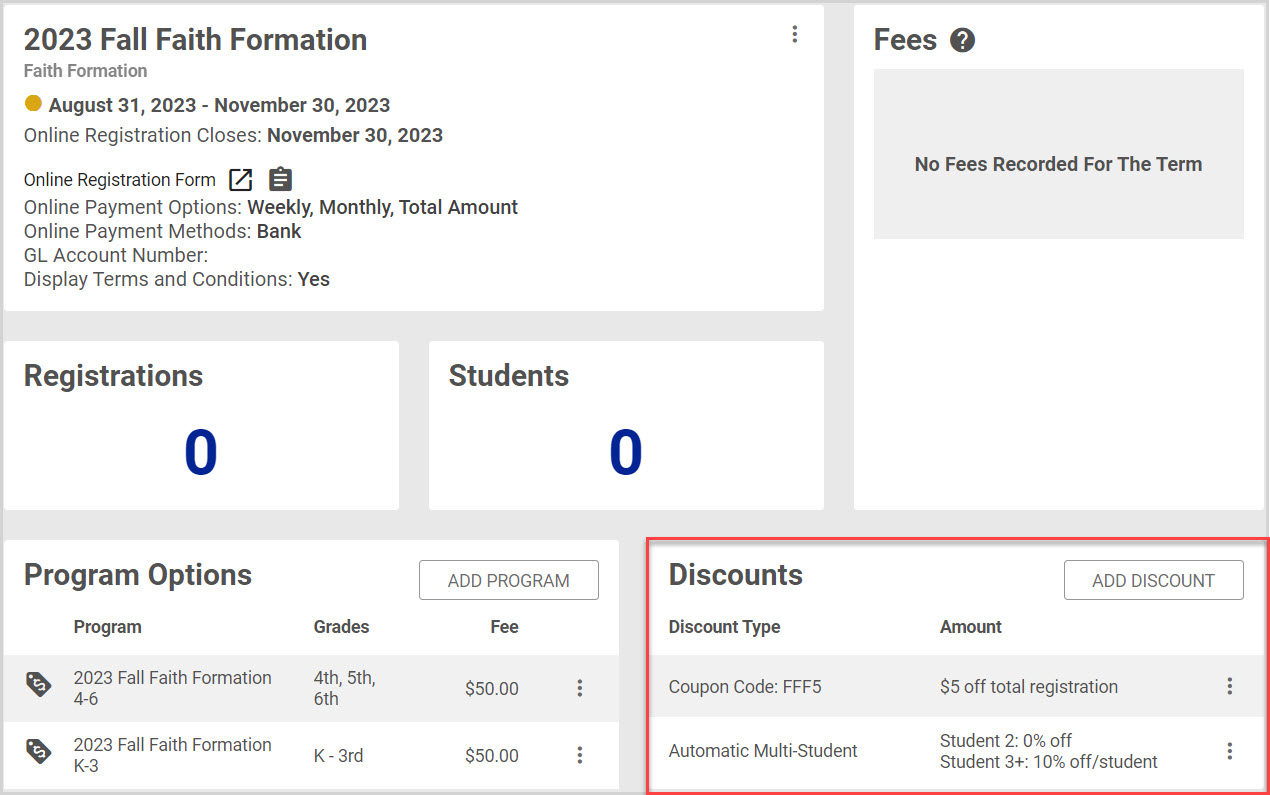
The new term is displayed on the Terms page.

The details of the new term are viewable on the Term Details page, including the discounts.

Note* The video is best viewed at full screen. Press Esc on your keyboard when you are finished viewing.