


Create a Directory Custom Field
This article provides steps to create a custom field for family and member records in Directory.
Creating a Directory Custom Field allows you to gather additional data specific to your organizational needs. You can create custom fields to record information for Directory families or Directory members. Once you have created a custom field, you can input the specific information for a family or member by Updating the Custom Field in Directory. Additionally, you can set custom fields to appear on your Public Registration form when you create or Edit a Directory Custom Field, so new parishioners can update the information as they register.
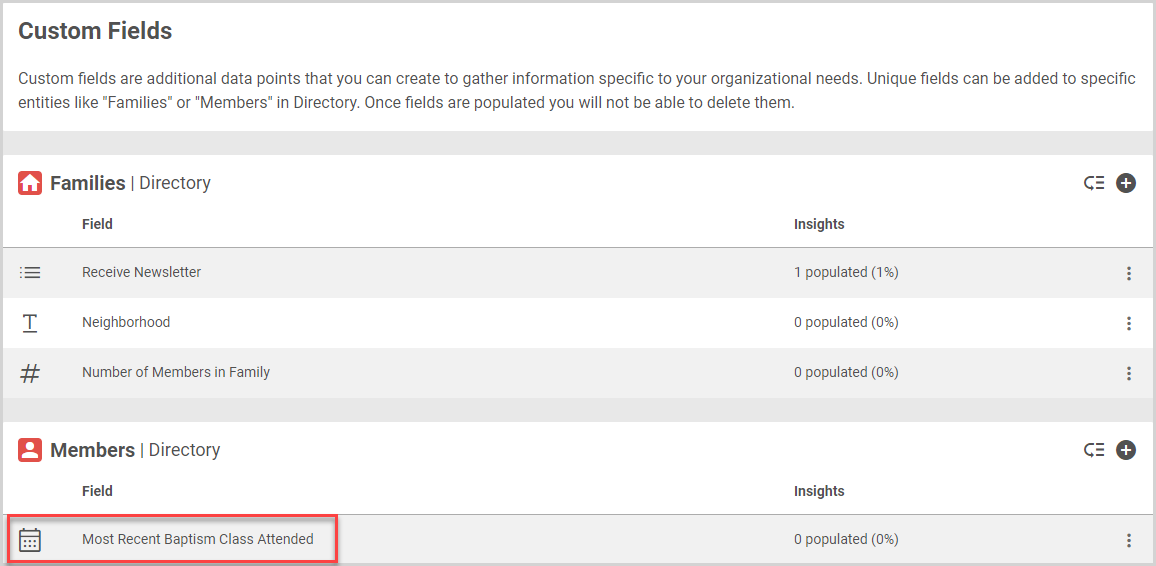
All custom fields you create, whether they appear on the public registration form or not, are available on the Additional info cards in Directory. All activity related to creating, editing, or deleting custom fields in the system is recorded on the Custom Fields Activity page. Directory Custom Fields information is available in csv download of the Family List Report and Member List Report.
Complete the following steps to create a custom field for families or members in Directory:
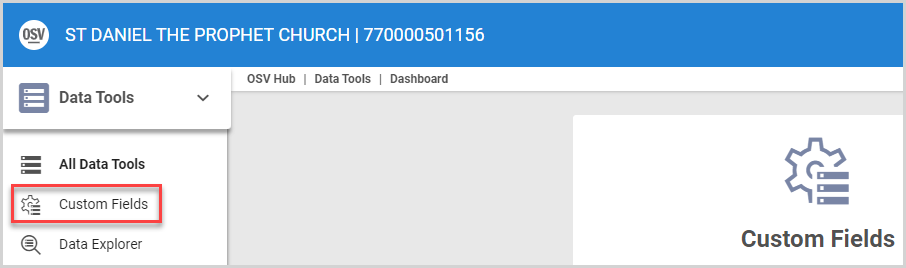
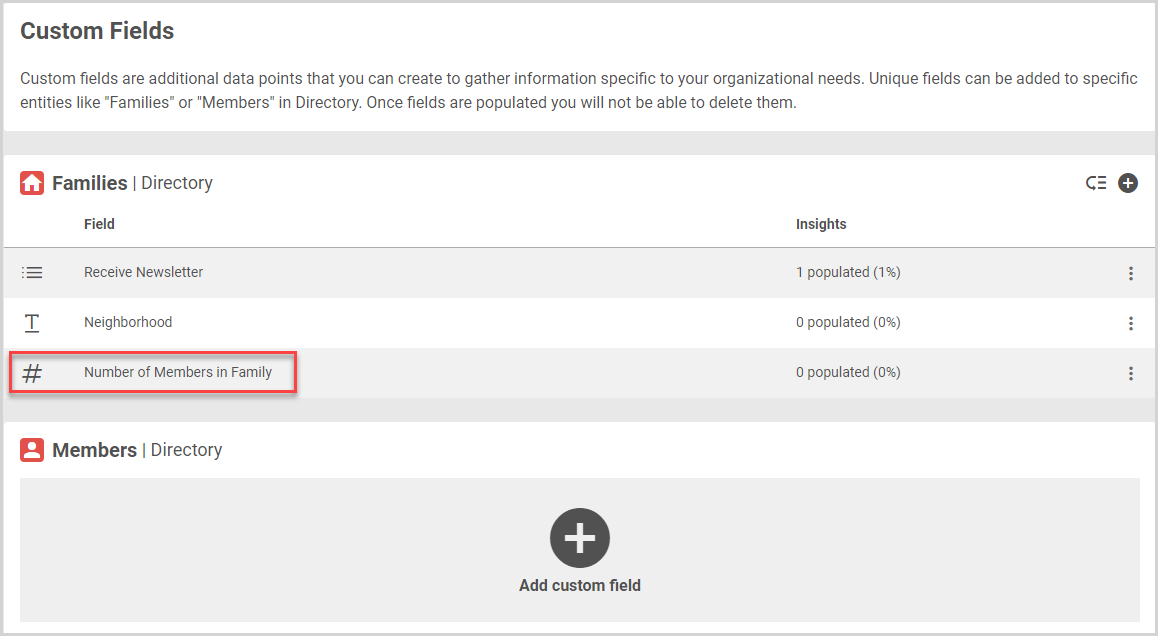
1. In Data Tools, select Custom Fields in the main menu.
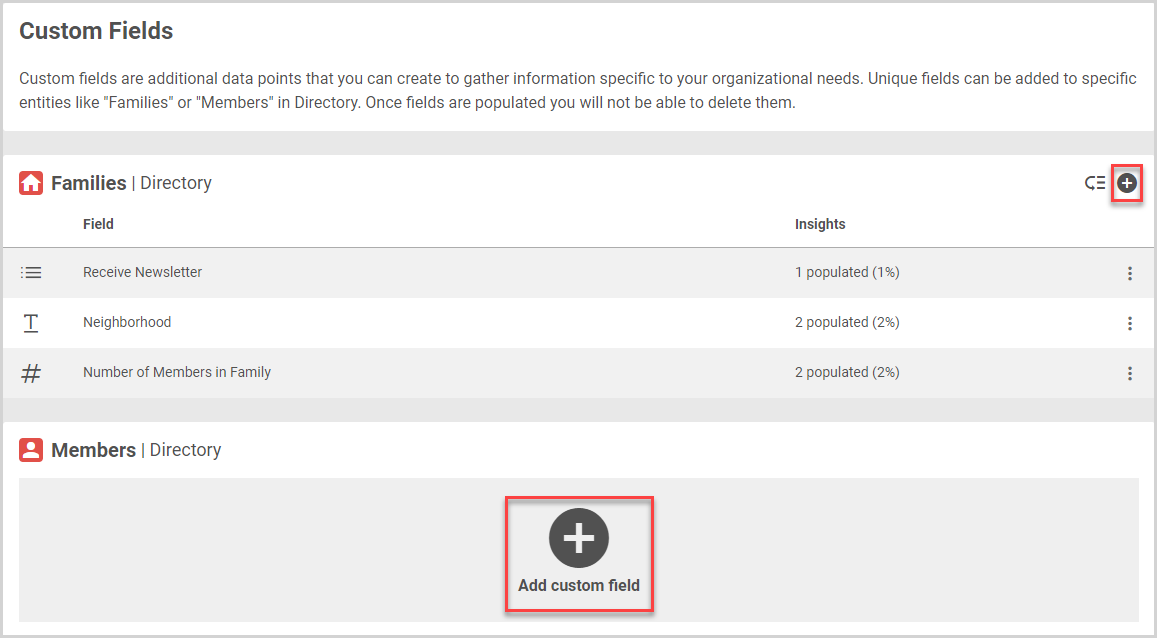
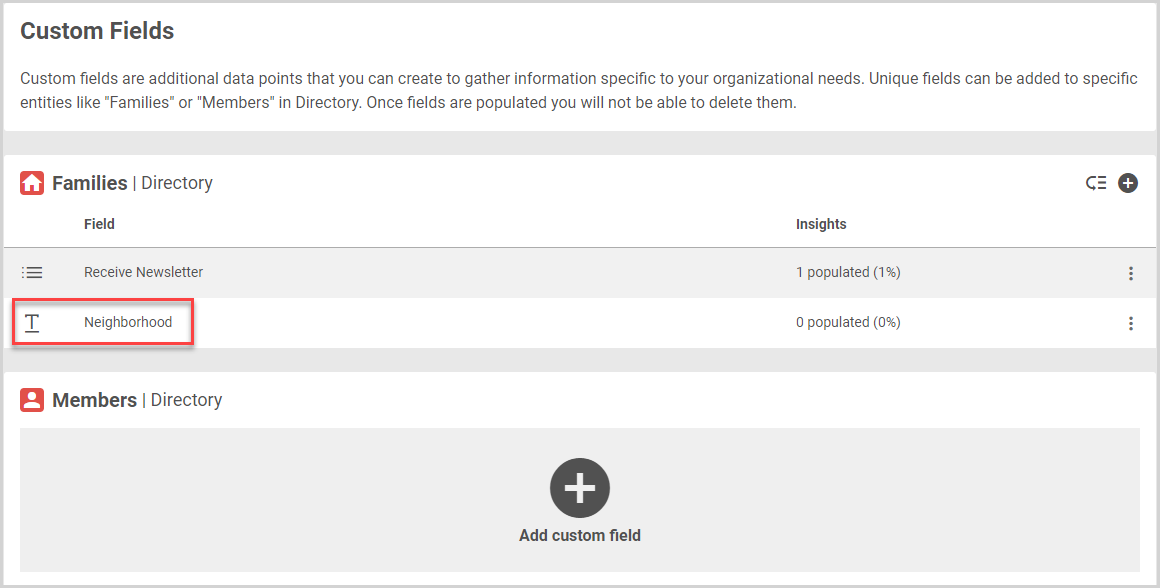
2. On the Custom Fields page, select the Add Custom Field icon (plus sign icon) on the Families or Members card.
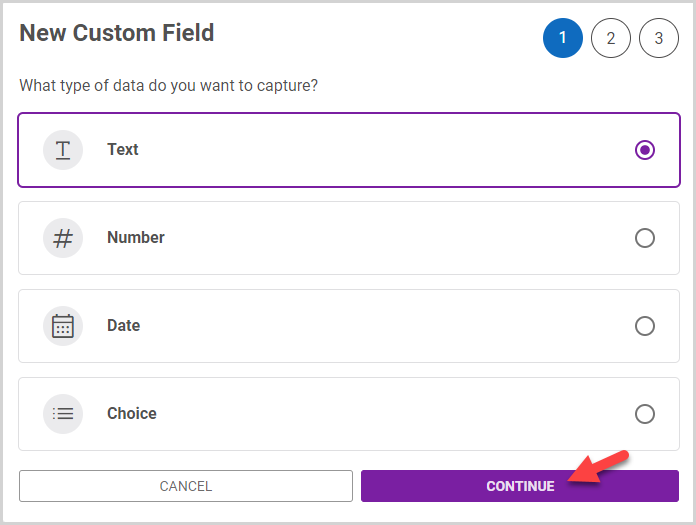
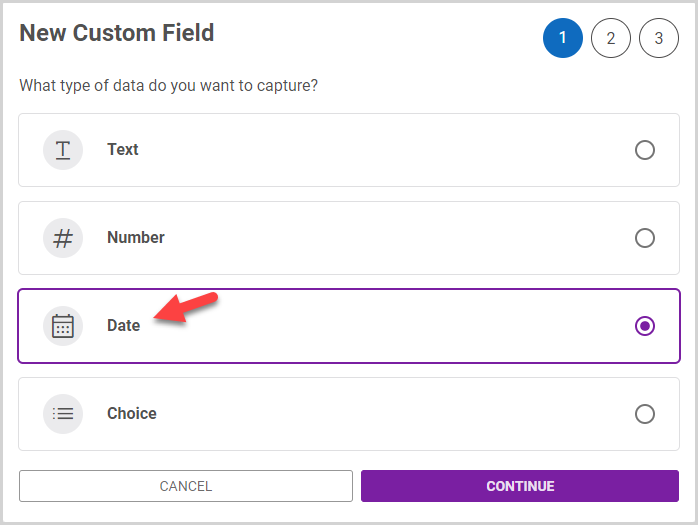
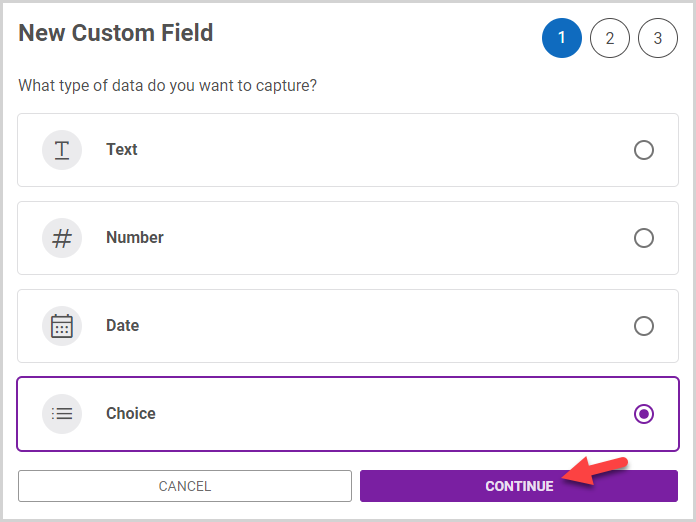
3. On the New Custom Field card, select the desired custom field type. (Text, Number, Date, or Choice.)
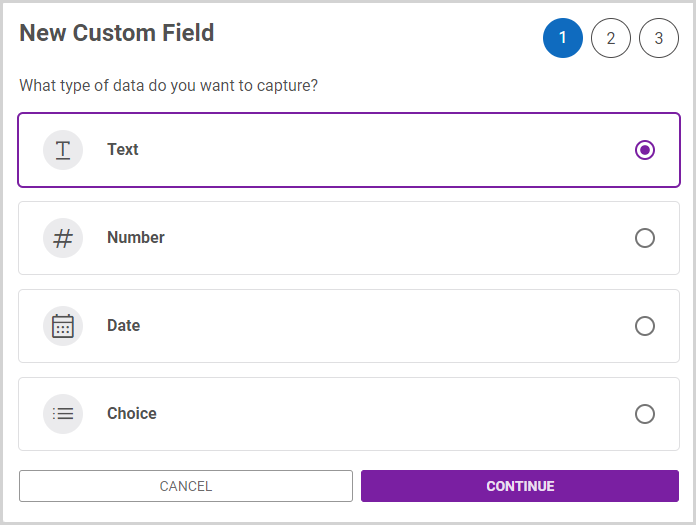
Note* There are specific instructions for each custom field type (Text, Number, Date, and Choice) in the following sections. Click the custom field type to view directions for each one.
Text
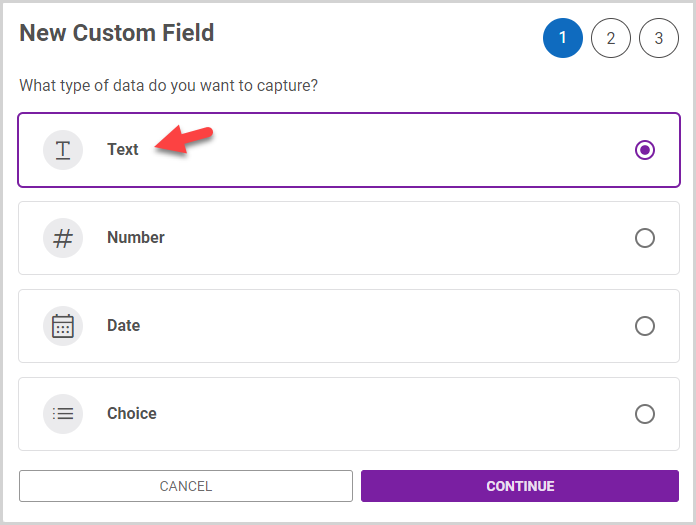
1. Select Text on the New Custom Field card.
2. Click the Continue button.
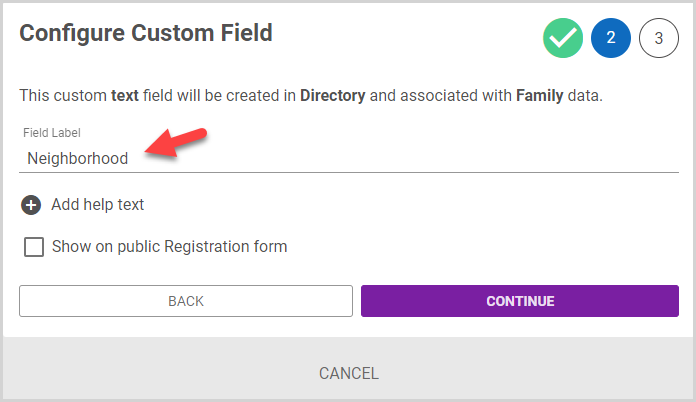
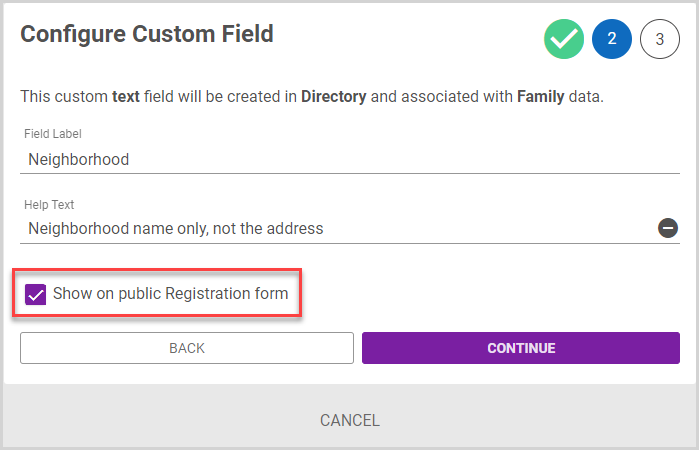
3. Enter a custom label in the Field Label. This text will be the information you wish to capture (e.g., parishioners' Neighborhoods).
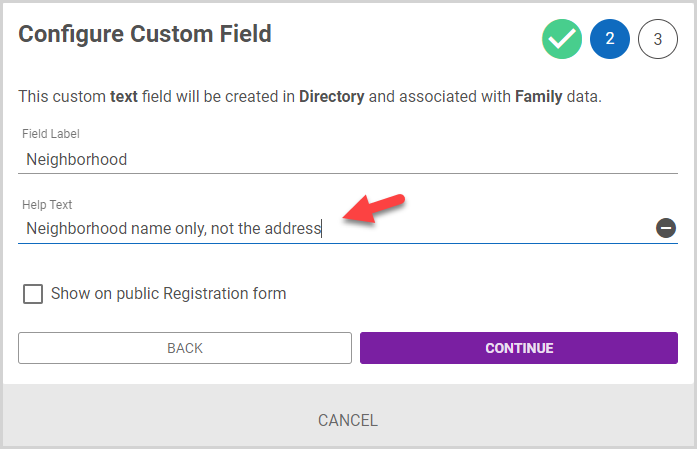
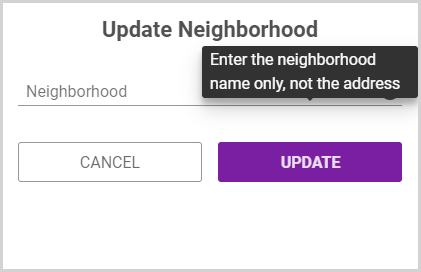
4. Optionally, click the Add help text icon (plus sign icon) and enter Help Text - explanatory notes or instructions to aid in entering the correct information. For example, you might use “Neighborhood name only, not the address” as Help Text for a "Neighborhood" custom field.
If you enter help text, a tooltip is displayed when a user Updates a Custom Field in Directory.
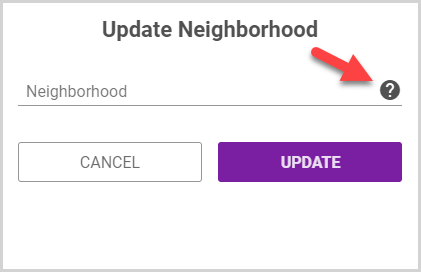
Hover over the tooltip to view the help text.
5. If you wish to display the custom field on your public registration form, select the Show on public Registration form checkbox. If you choose to show a custom field on the public registration form, the the Help Text tooltip will also appear on the registration form to guide your new members in completing the custom field.
Note* Any custom fields added to the public registration form appear on the form in the same order as they appear on the Custom Fields page. To update the order of custom fields on the public registration form, you can Set the Order of the Custom Fields.
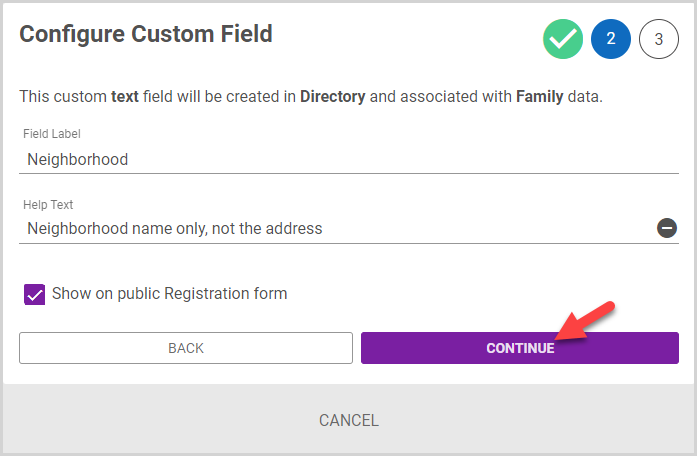
6. Click the Continue button.
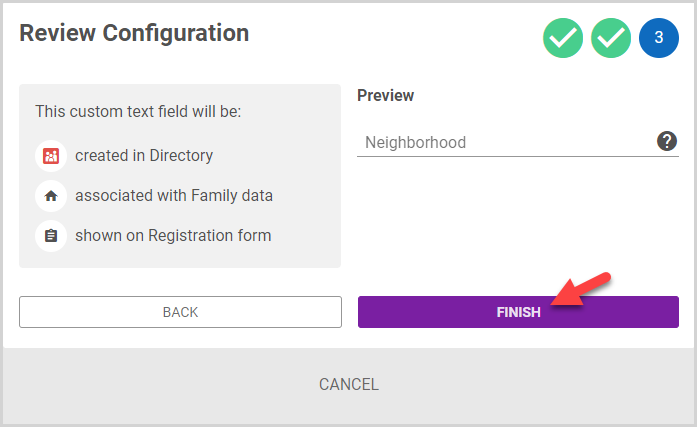
7. Review the custom field configuration details and preview to ensure they are accurate. The configuration details provide a summary regarding the application of the custom field in the system, and the preview provides a fully interactive view of how the custom field will look and behave when you Update the Custom Field.
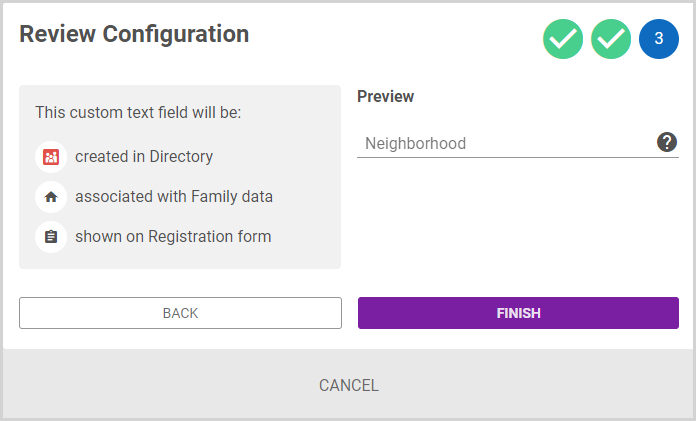
Note* Entering text in the preview does not populate data anywhere in the system.
8. Click the Finish button to create the custom field.
The custom field appears in the Families or Members custom field cards on the Custom Fields page. On the Custom Fields page, you can Edit the Custom Field or Set the Order of the Custom Fields. You can also Delete the Custom Field on the Families or Members Custom Fields cards, provided it does not have data populated in the system.
Custom fields information created for families appears on the Additional Info card on the Family Detail page.

Note* To record specific information for a family custom field, Update the Custom Field in Directory.
Custom fields information created for members appears on the Additional Info card on the Member Detail page.

Note* To record specific information for a family custom field, please see Update the Custom Field in Directory.
Number
1. Select Number on the New Custom Field card.
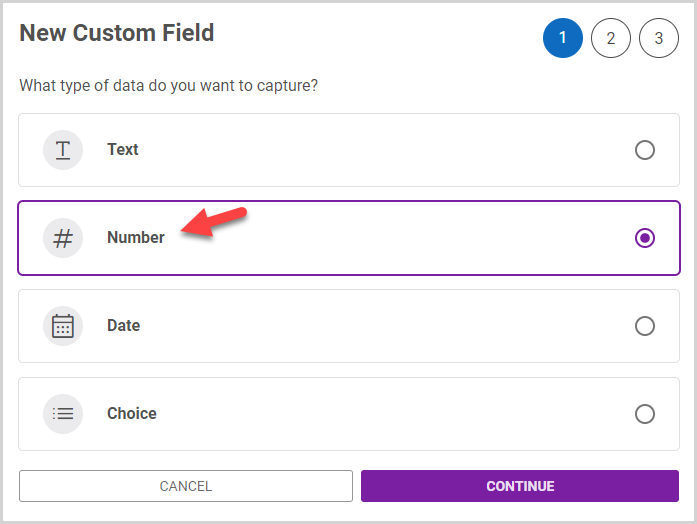
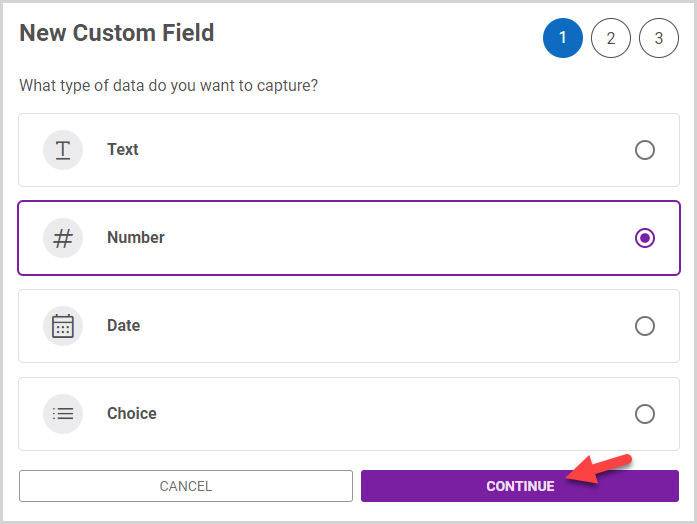
2. Click the Continue button.
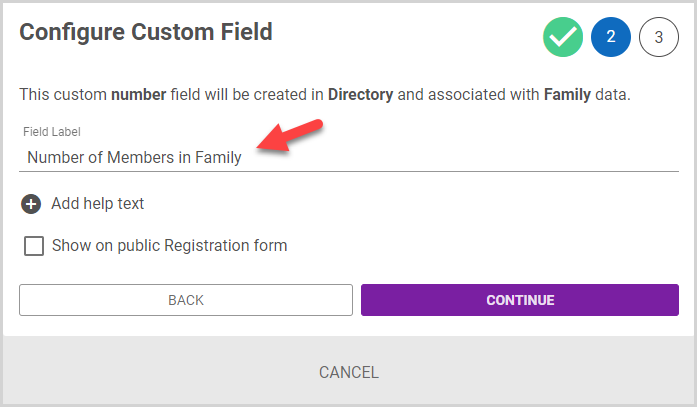
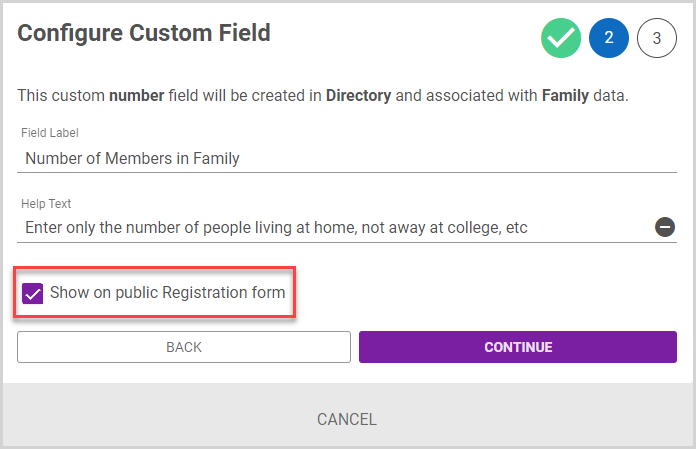
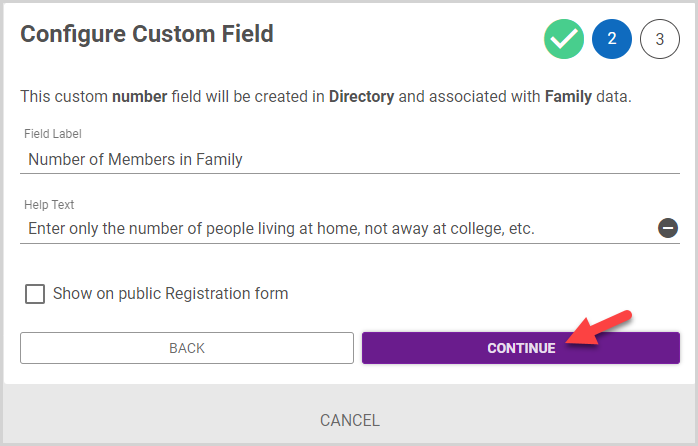
3. Enter a custom label in the Field Label. This text will be the information you wish to capture (e.g., Number of Members in Family).
Note* For the number custom field, only numerical values (including negative values and decimal places) are allowed as inputs when you Update the Custom Field in Directory.
4. Optionally, click the Add help text icon (plus sign icon) and enter Help Text - explanatory notes or instructions to aid in entering the correct information. For example, you might use “Enter only the number of people living at home, not away at college, etc.” as Help Text for a "Number of Members in Family" custom field.
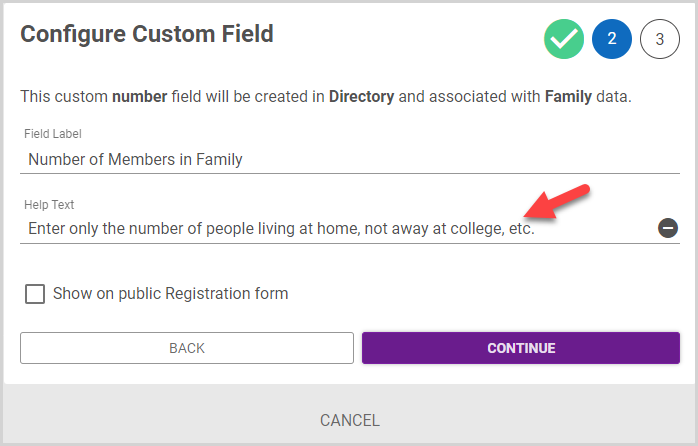
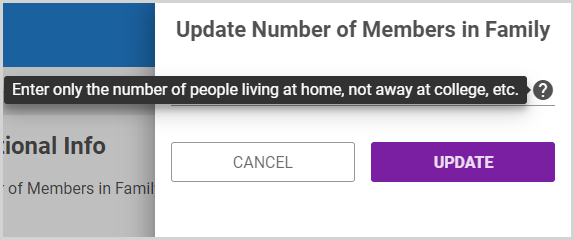
If you enter help text, a tooltip is displayed when a user Updates a Custom Field in Directory.
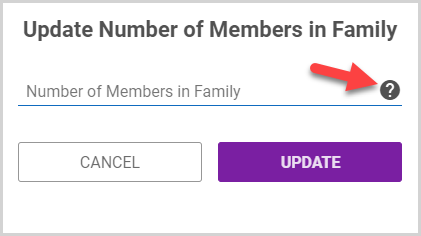
Hover over the tooltip to view the help text.
5. If you wish to display the custom field on your public registration form, select the Show on public Registration form checkbox. If you choose to show a custom field on the public registration form, the the Help Text tooltip will also appear on the registration form to guide your new members in completing the custom field.
Note* Any custom fields added to the public registration form appear on the form in the same order as they appear on the Custom Fields page. To update the order of custom fields on the public registration form, you can Set the Order of the Custom Fields.
6. Click the Continue button.
7. Review the custom field configuration details and preview to ensure they are accurate. The configuration details provide a summary regarding the application of the custom field in the system, and the preview provides a fully interactive view of how the custom field will look and behave when you Update the Custom Field.
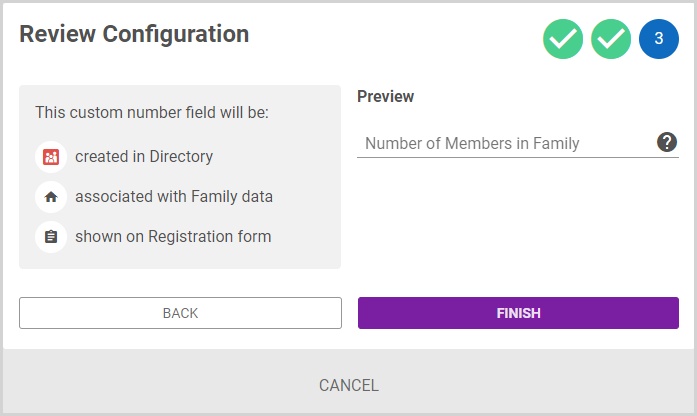
Note* Entering numbers in the preview does not populate data anywhere in the system.
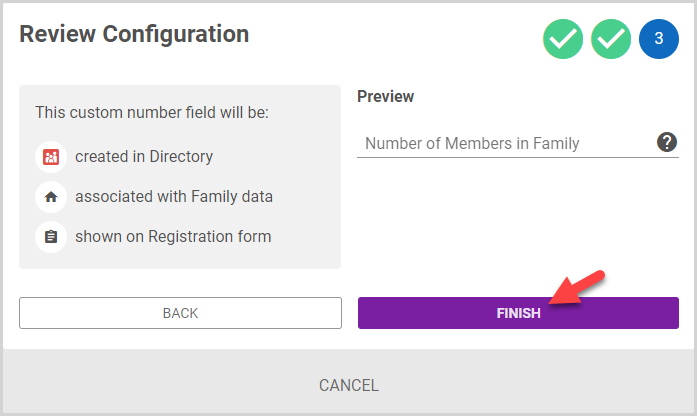
8. Click the Finish button to create the custom field.
The custom field appears in the Families or Members custom field cards on the Custom Fields page. On the Custom Fields page, you can Edit the Custom Field or Set the Order of the Custom Fields. You can also Delete the Custom Field on the Families or Members Custom Fields cards, provided it does not have data populated in the system.
Custom fields information created for families appears on the Additional Info card on the Family Detail page.

Note* To record specific information for a family custom field, Update the Custom Field in Directory.
Custom fields information created for members appears on the Additional Info card on the Member Detail page.

Note* To record specific information for a family custom field, please see Update the Custom Field in Directory.
Date
1. Select Date on the New Custom Field card.
2. Click the Continue button.

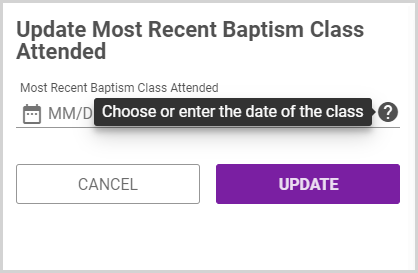
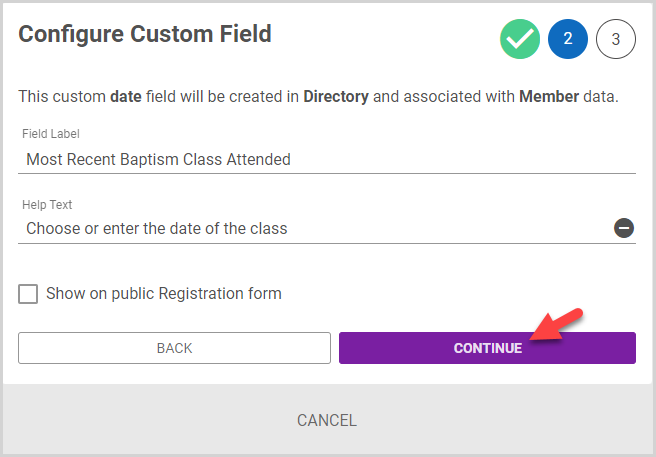
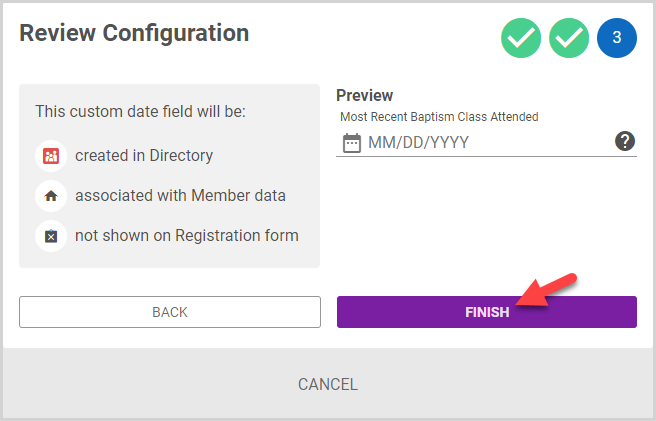
3. Enter a custom label in the Field Label. This text will be the information you wish to capture (e.g., Most Recent Baptism Class Attended).
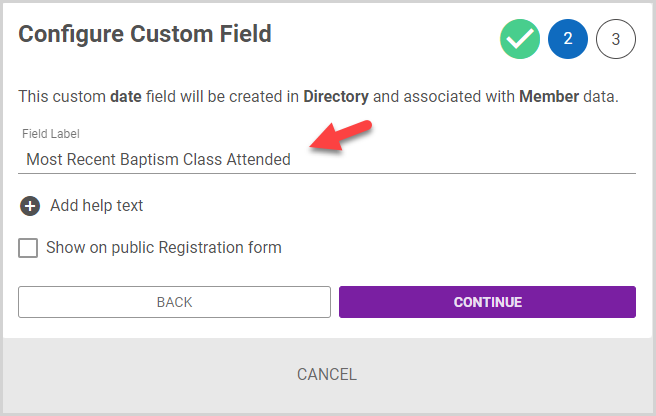
4. Optionally, click the Add help text icon (plus sign icon) and enter Help Text - explanatory notes or instructions to aid in entering the correct information.

If you enter help text, a tooltip is displayed when a user Updates a Custom Field in Directory.
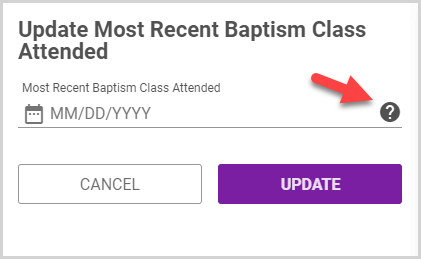
Hover over the tooltip to view the help text.
5. If you wish to display the custom field on your public registration form, select the Show on public Registration form checkbox. If you choose to show a custom field on the public registration form, the the Help Text tooltip will also appear on the registration form to guide your new members in completing the custom field.
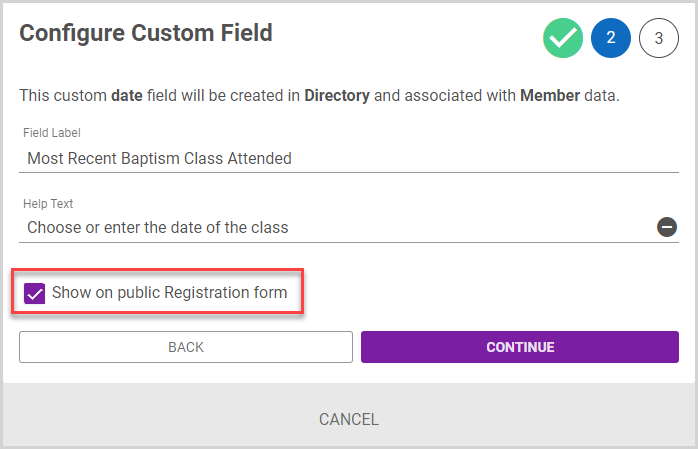
Note* Any custom fields added to the public registration form appear on the form in the same order as they appear on the Custom Fields page. To update the order of custom fields on the public registration form, you can Set the Order of the Custom Fields.
6. Click the Continue button.
7. Review the custom field configuration details and preview to ensure they are accurate. The configuration details provide a summary regarding the application of the custom field in the system, and the preview provides a fully interactive view of how the custom field will look and behave when you Update the Custom Field.
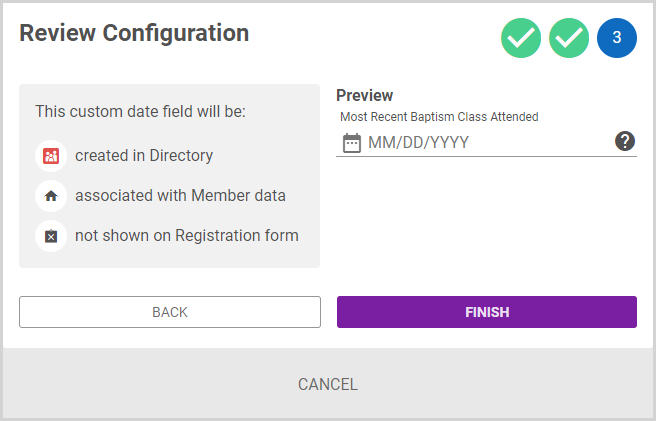
Note* Entering a date in the preview does not populate data anywhere in the system.
8. Click the Finish button to create the custom field.
The custom field appears in the Families or Members custom field cards on the Custom Fields page. On the Custom Fields page, you can Edit the Custom Field or Set the Order of the Custom Fields. You can also Delete the Custom Field on the Families or Members Custom Fields cards, provided it does not have data populated in the system.
Custom fields information appears on the Additional Info card on the Family Detail page or Member Detail page.

Note* To record specific information for a custom field, Update the Custom Field in Directory.
Choice
1. Select Choice on the New Custom Field card.

2. Click the Continue button.
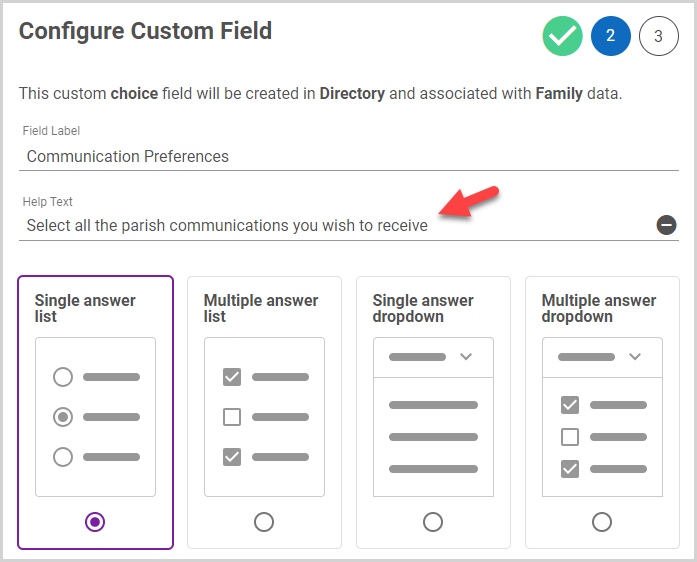
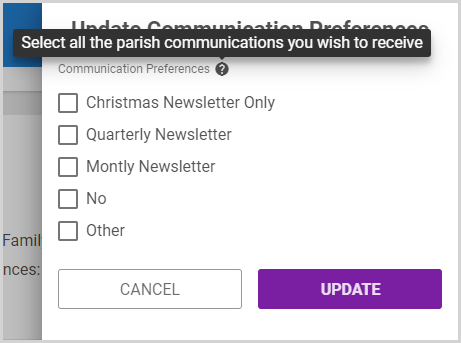
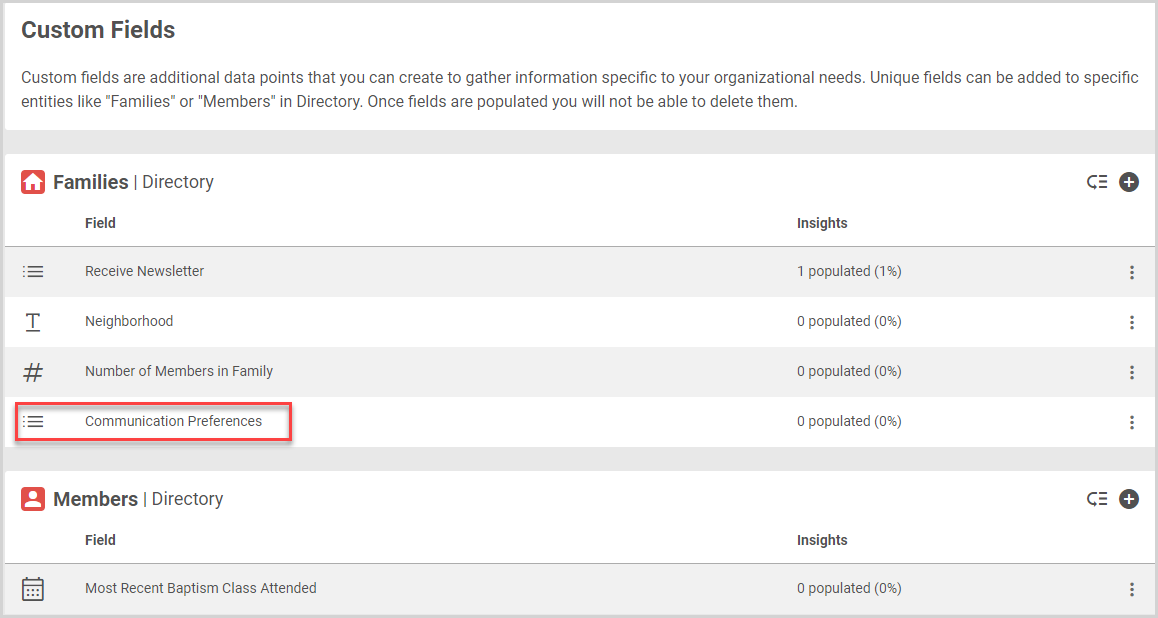
3. Enter a custom label in the Field Label. This text is the information you wish to capture (e.g., Communication Preferences).

4. Optionally, click the Add help text icon (plus sign icon) and enter Help Text - explanatory notes or instructions to aid in entering the correct information. If you enter help text, a tooltip will display if a user Updates a Custom Field in Directory.
If you enter help text, a tooltip is displayed when a user Updates a Custom Field in Directory.
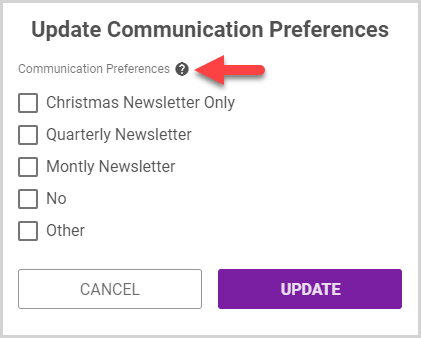
Hover over the tooltip to view the help text.
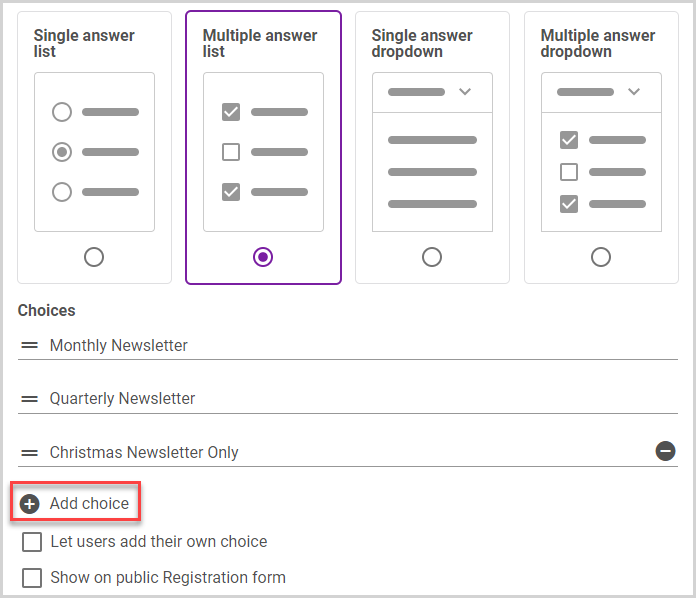
5. Select choice type and style you want to use. There are four options available:
- Single answer list - users can select only one option from a list presented to them.
- Multiple answer list - users may select one or more options from a list presented to them.
- Single answer dropdown - users can select only one option from a drop-down menu.
- Multiple answer dropdown - users may select one or more options from a drop-down menu.
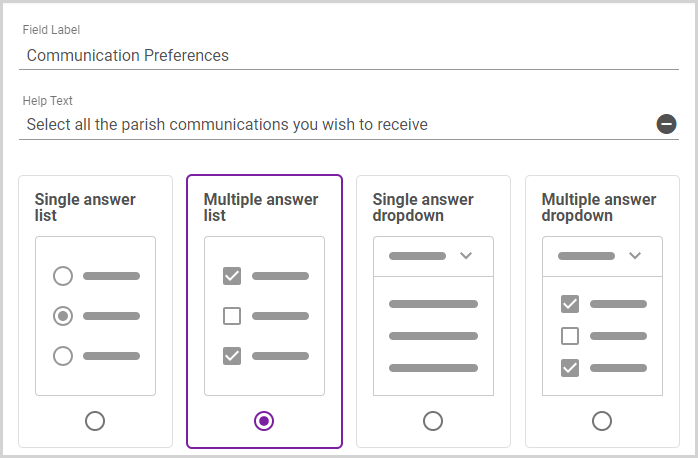
Note* Users can only select one answer for single answer choice types, but users can select more than one answer for multiple answer choice types.
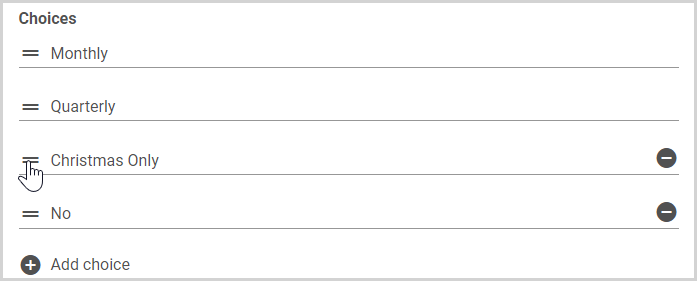
6. Enter the choices you want available for selection. You must enter at least two choices. (There is no limit for the number of choices.)
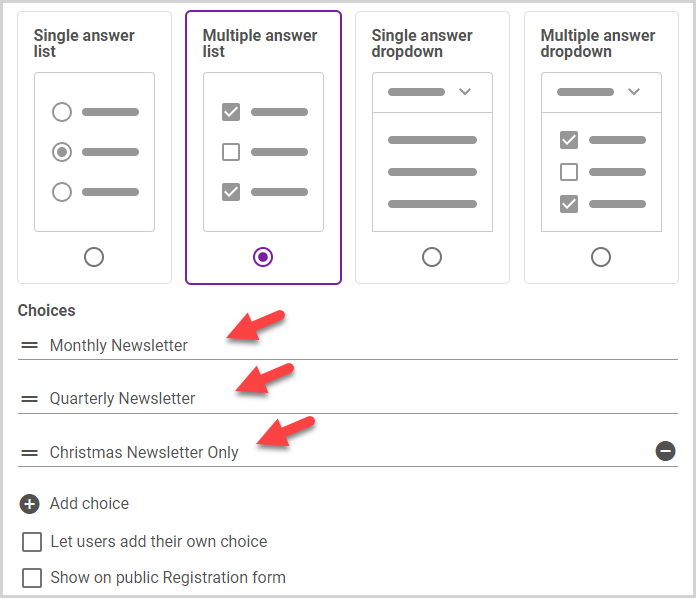
To add more choices, click the Add choice (plus sign) icon.
You can rearrange the choices to appear in the order you want. Click and hold the drag handle, and then drag and drop the choices into the order you desire.
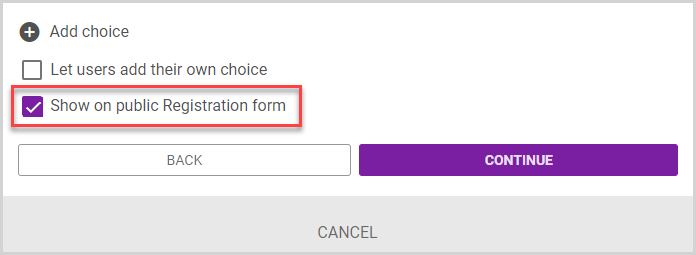
7. If you would like to offer users the option to add their own custom choice as an answer, select the Let users add their own choice checkbox.

8. If you wish to display the custom field on your public registration form, select the Show on public Registration form checkbox. If you choose to show a custom field on the public registration form, the the Help Text tooltip will also appear on the registration form to guide your new members in completing the custom field.
9. Click the Continue button.

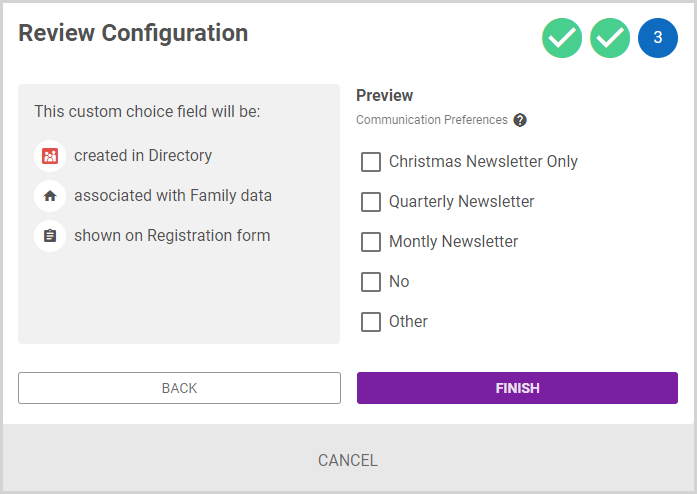
10. Review the custom field configuration details and preview to ensure they are accurate. The configuration details provide a summary regarding the application of the custom field in the system, and the preview provides a fully interactive view of how the custom field will look and behave when you Update the Custom Field.
Note* Selecting a choice in the preview does not populate data anywhere in the system.
11. Click the Finish button to create the custom field.
The custom field appears in the Families or Members custom field cards on the Custom Fields page. On the Custom Fields page, you can Edit the Custom Field or Set the Order of the Custom Fields. You can also Delete the Custom Field on the Families or Members Custom Fields cards, provided it does not have data populated in the system.
Custom fields information appears on the Additional Info card on the Family Detail page or Member Detail page.

Note* To record specific information for a family custom field, Update the Custom Field in Directory.
Note* The video is best viewed at full screen. Press Esc on your keyboard when you are finished viewing.