


Add a Discount to an Existing Term
This article provides steps to add a discount code to a Religious Education term.
An administrator can add a discount code to a Religious Education term when creating the term, and can also add a discount code after the term has been created. Discount eligibility is set on a program by program basis when the admin creates a program within the term.
The admin can create discounts that are fixed or percentage based, and multi-student discounts for a term and apply them to a registration. Discount codes can be used to encourage early sign up so you can get a headcount and materials ordered quickly. Multi-student discounts can help prevent hardships if possible for larger families.
If the organization has Online Giving, discounts can be applied to the registration by parents when they register their children for the term. If the organization does not have Online Giving, a discount can still be applied to the registration through the Religious Education module.
Complete the following steps to add a discount code to an existing Religious Education term:
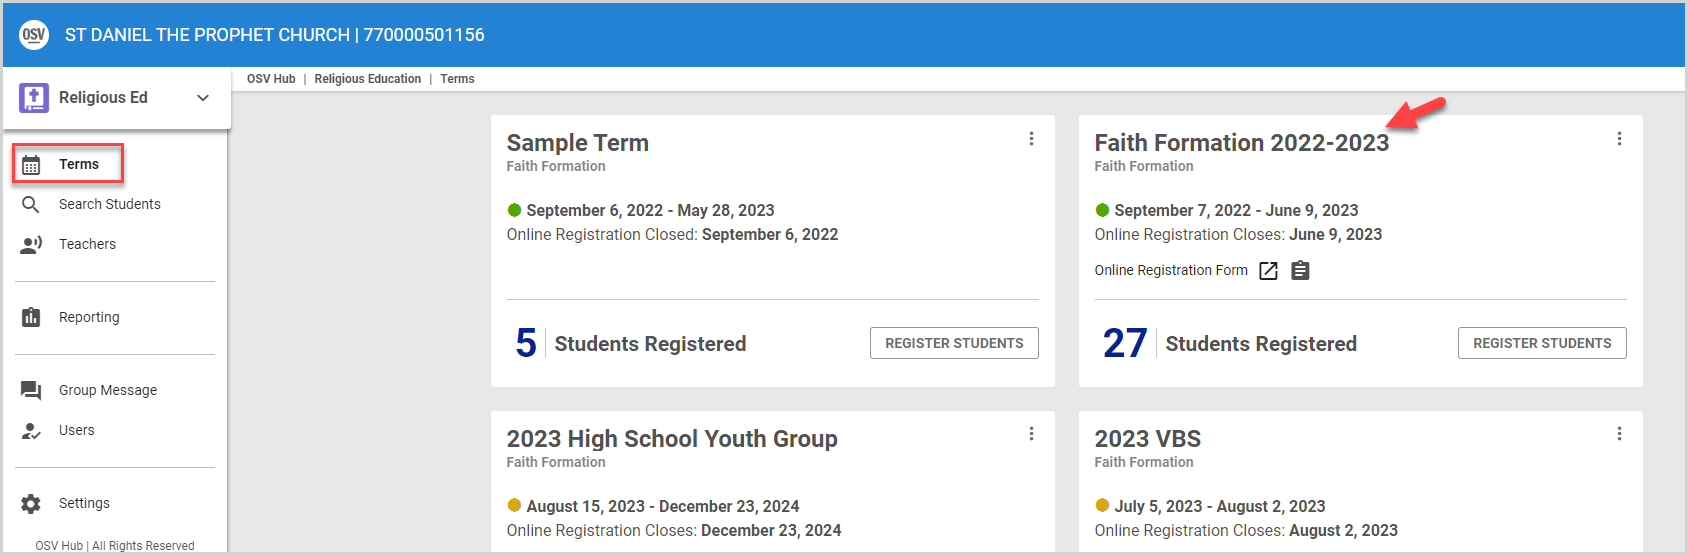
1. In Religious Education, go to Terms.
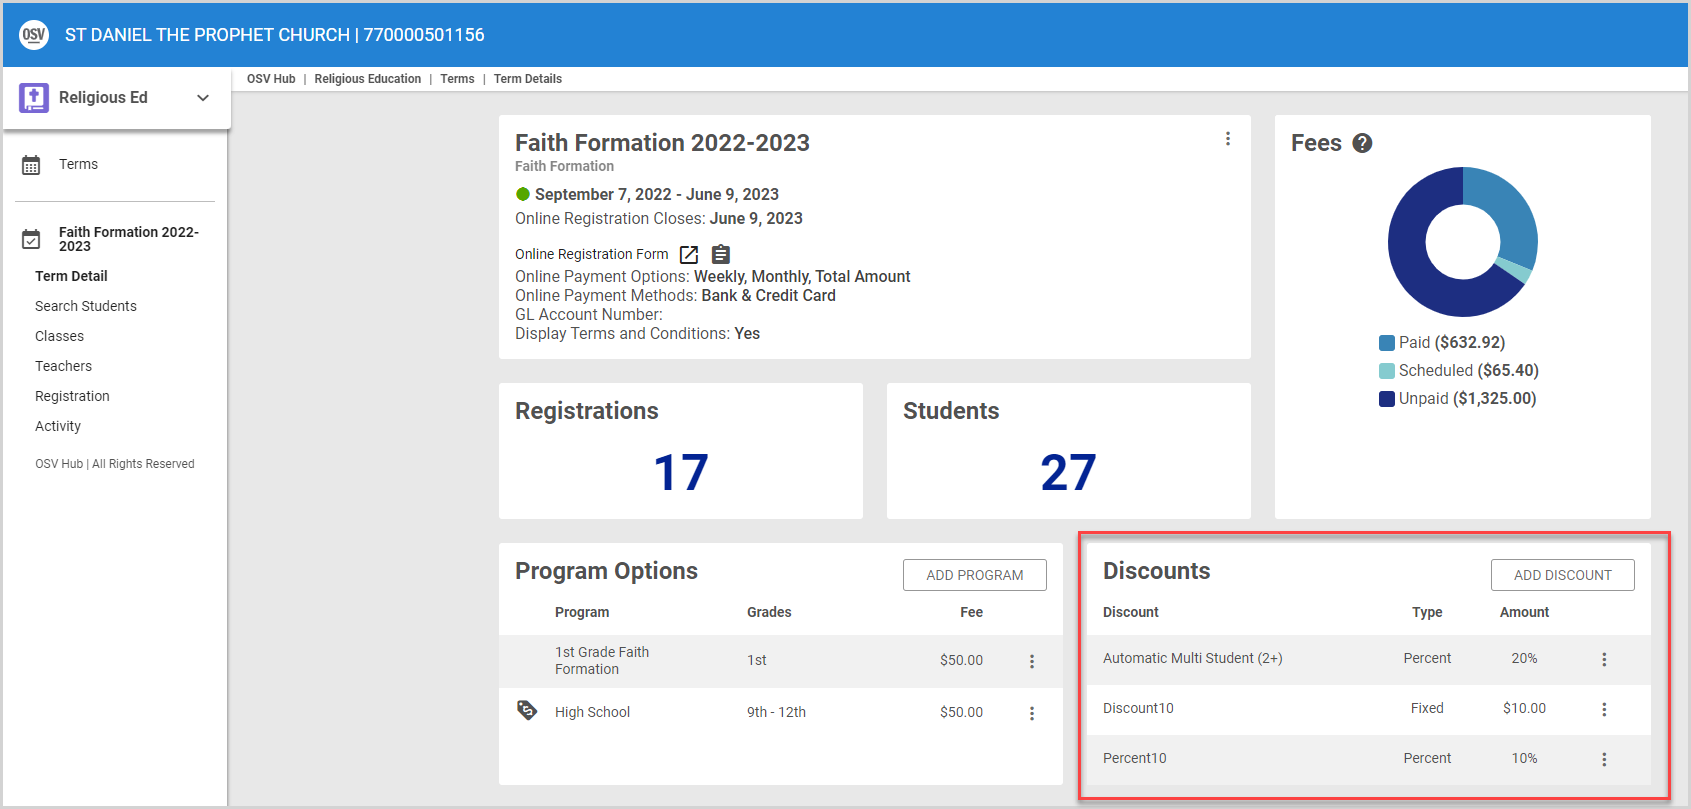
2. Click the term name to view the term details page.
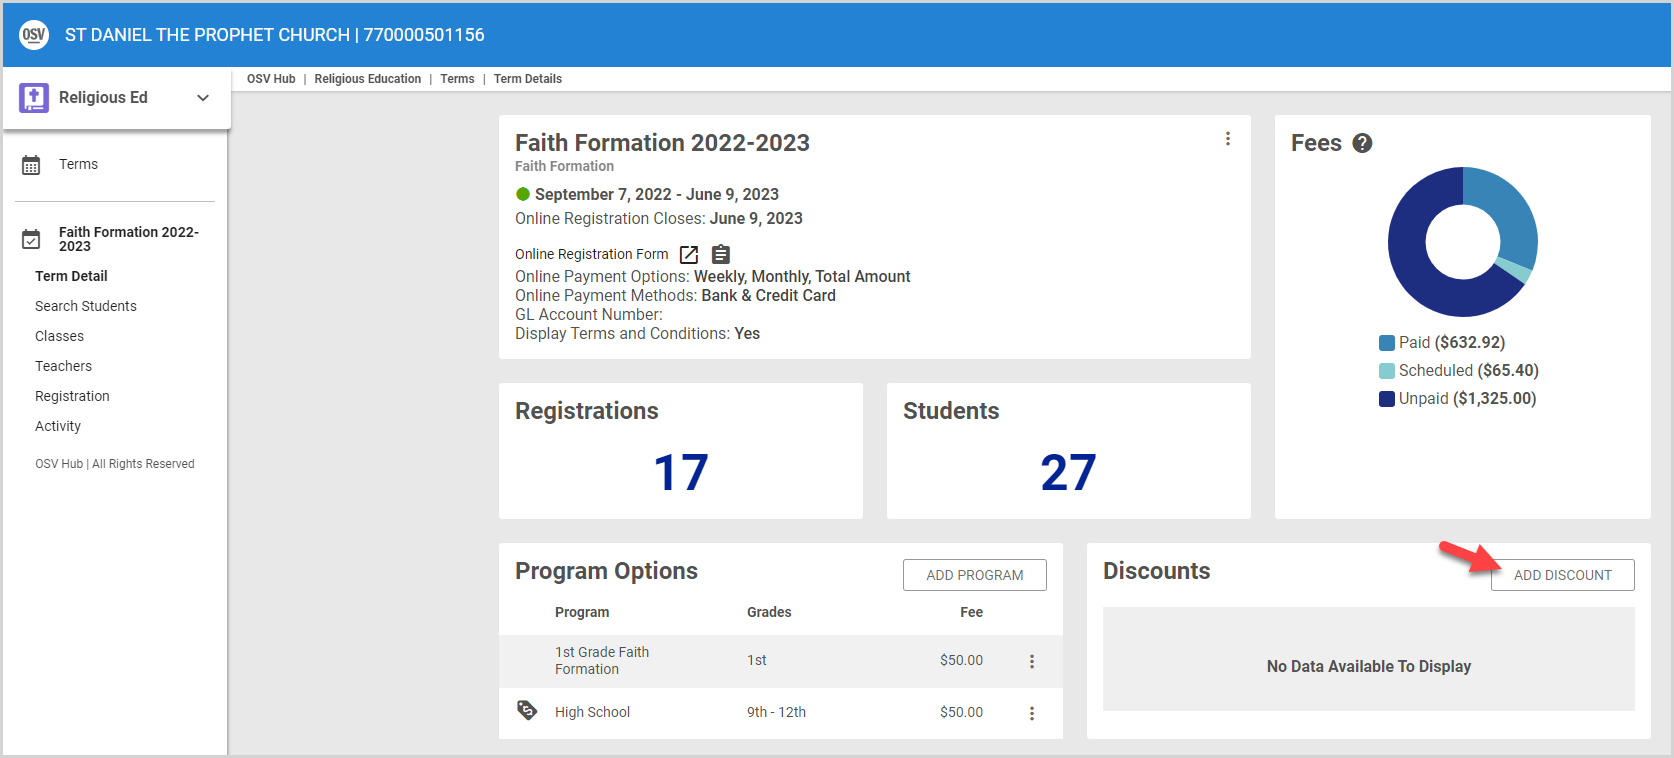
3. On the Term details page, click the Add Discount button.
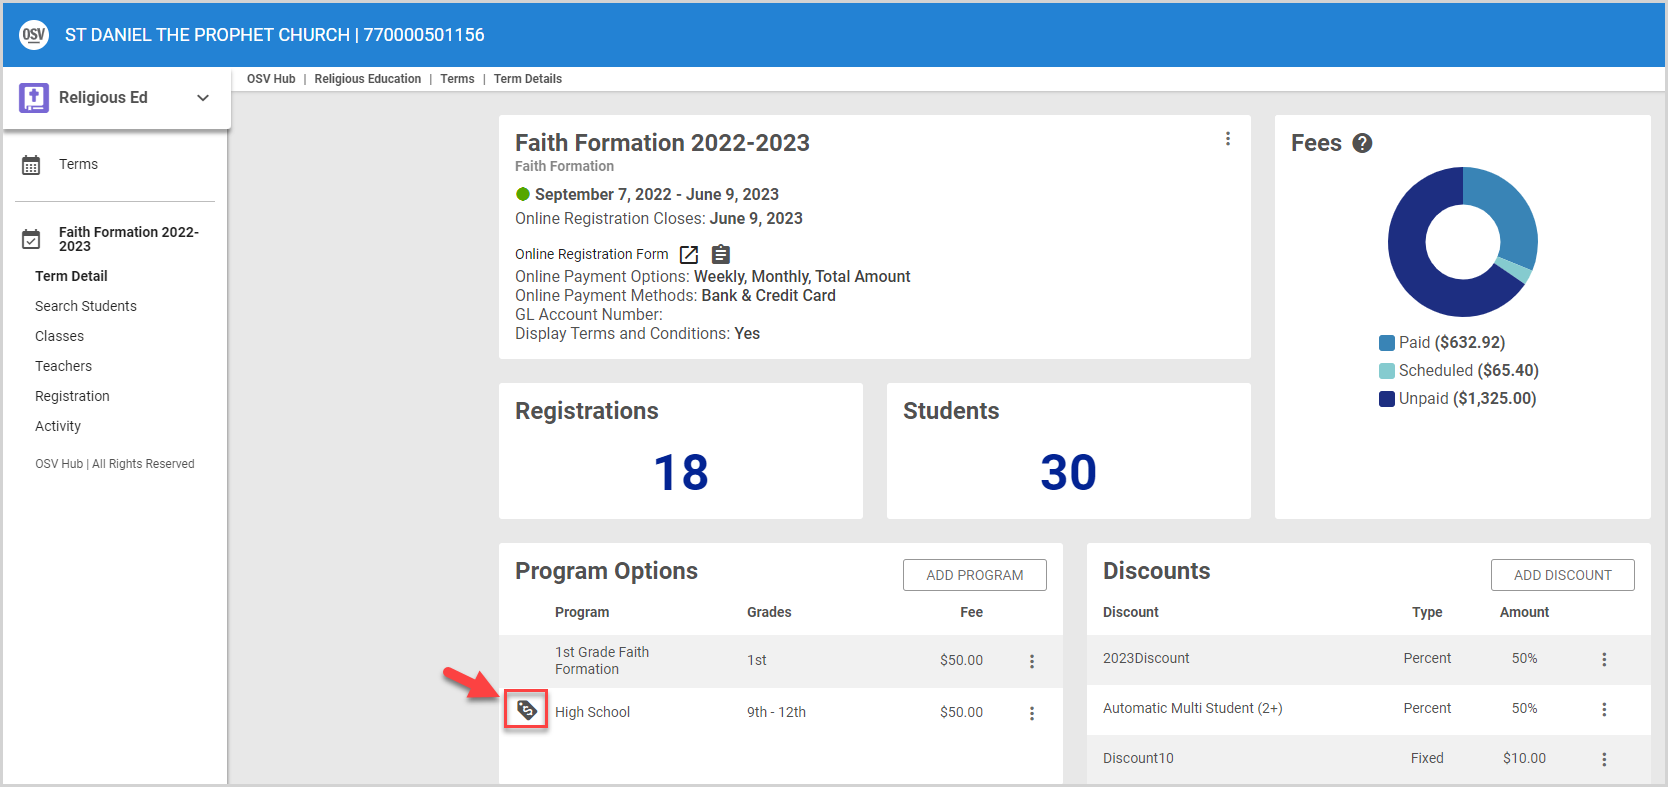
Note* Discounts are only calculated and applied to programs on the registration that are set up to allow discounts. Programs eligible for discounts are indicated by the tag icon on the Program Options card. You can set program discount eligibility when you Add a Religious Education Program for a Term or Edit a Religious Education Program.
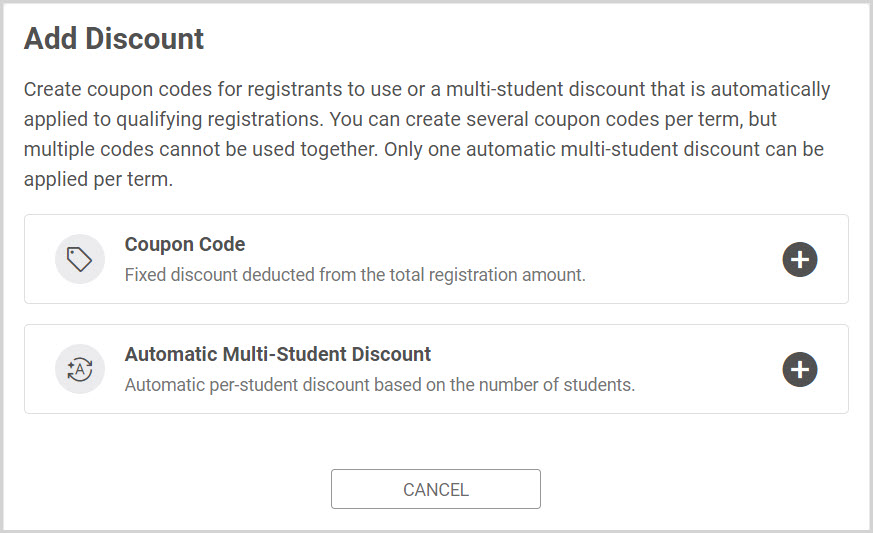
4. Select the desired Discount Type: Coupon Code or Automatic Multi Student discount.
5. Enter / Select the applicable information for the discount type:
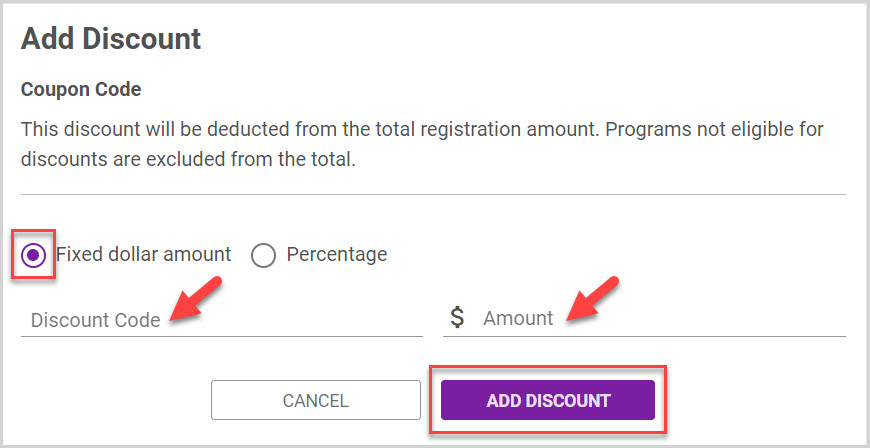
Fixed Coupon Code
1. Select Fixed dollar amount.
2. Enter the Discount Code. The code can be up to 12 characters, must contain only letter and numbers (no spaces or special characters are allowed), and must be unique for the term (cannot have the same code for multiple discounts).
3. Enter the amount of the discount.
4. Click the Add Discount button to add the discount to the term.
Percent Coupon Code
1. Select Percentage.
2. Enter the Discount Code. The code can be up to 12 characters, must contain only letter and numbers (no spaces or special characters are allowed), and must be unique for the term (cannot have the same code for multiple discounts).
3. Enter the percentage amount of the discount.
4. Click the Add Discount button to add the discount to the term.

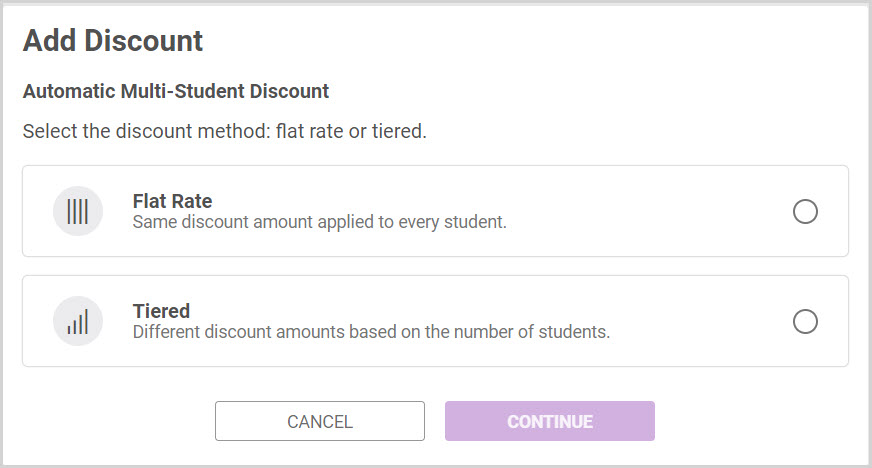
Automatic Multi Student (2+) Discount
Select either a Flat Rate or Tiered Discount Type.
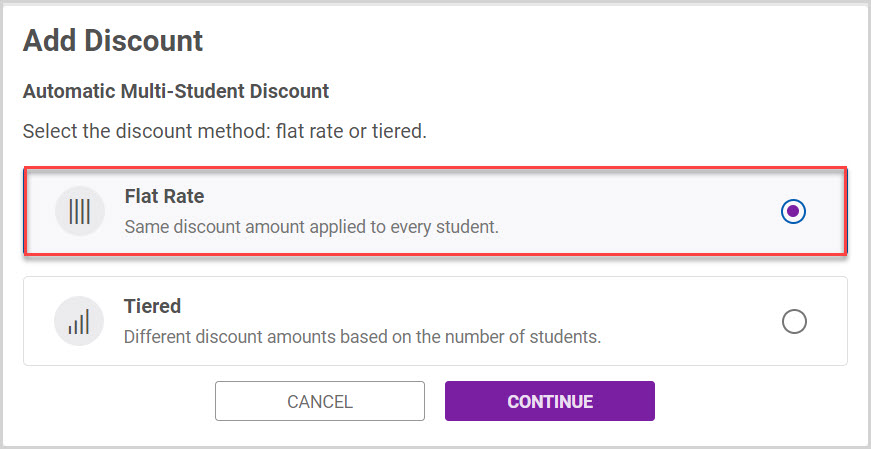
Flat Rate
1. Select Flat Rate as the discount type.
2. Click Continue.
Fixed Dollar Amount or Percentage
1. Select the Fixed Dollar Amount or Percentage radio button.
2. Enter the Amount.
3. Enter the the number of students required to apply the discount. (Push the slide selector under the appropriate number.)
4. Click the Add Discount button to add the discount to the term.

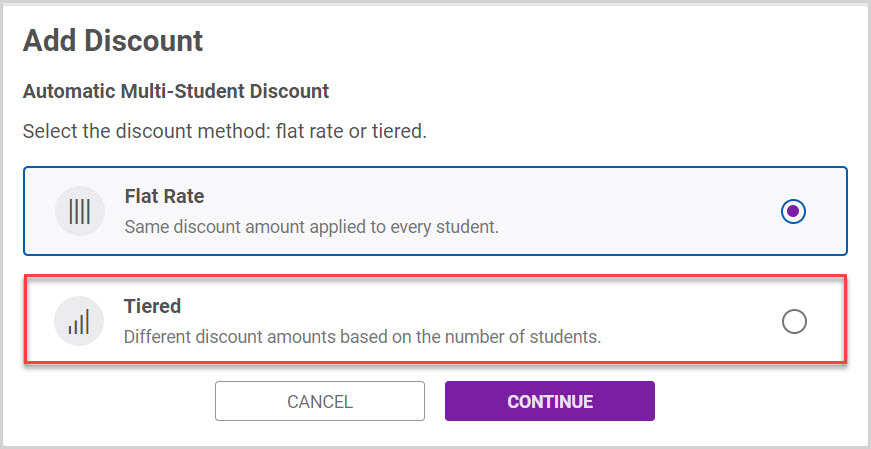
Tiered
1. Select Tiered as the discount type.
2. Click Continue.
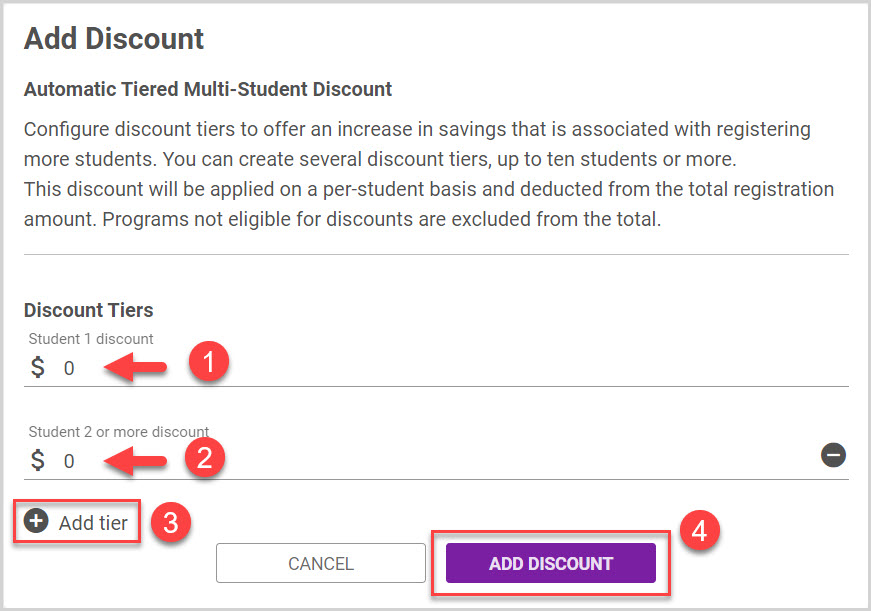
Configure discount tiers to offer an increase in savings that is associated with registering more students. You can create several discount tiers, up to ten students or more. This discount is applied on a per student basis and deducted from the total registration amount. Programs not eligible for discounts are excluded from the total.
1. Enter the first student discount amount.
2. Enter the discount amount for two or more students.
Note* At least one tier must have a discount.
3. Click the plus sign to add additional tiers.
4. Click the Add Discount button to add the discount to the term.
Note* Although multiple discount options can be created for a term, only one discount can be applied to a registration for the term.
You can view the Discounts you have created on the Discounts card.
Note* The video is best viewed at full screen. Press Esc on your keyboard when you are finished viewing.