


Set up a New Online Fund
This article provides steps and information to fill out the fund set up form to complete the process of adding a new online fund.
An organization can set up an online fund to collect donations. There is no limit to the number of funds you can create. If you wish, you can feature a fund to give it greater prominence for donors on your fund page.
Complete the following steps to set up a new fund:
Fund Set Up
1. In Giving, select Funds in the main menu.
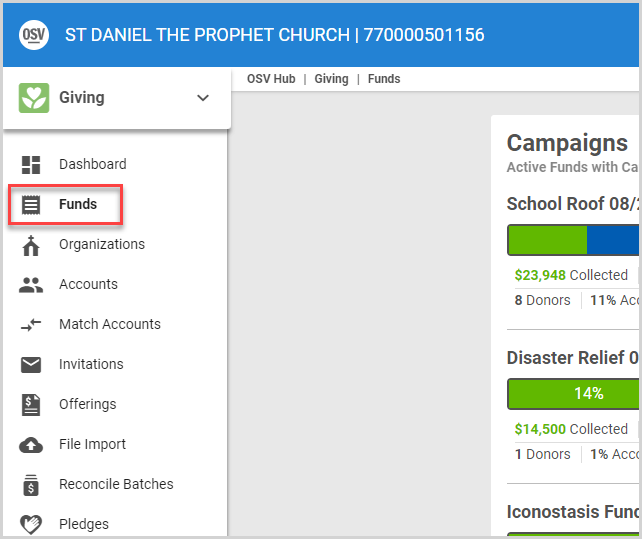
2. On the Online Funds card, click the New Online Fund button.

Fund Settings
3. Enter the Fund Name. The Fund Name you enter will be the name the donors see. (If you are using Parish Data Systems for your Church Management Software, this needs to be the Activity Name to be able to import into your system.)
4. Enter the Fund Number, if applicable. This only needs to be completed if you are going to import your file from another Church Manager System (CMS). The Fund Number is how you tie this particular fund to your CMS.
5. If the fund is tax deductible, select the Fund is Tax Deductible checkbox. (Funds that are not tax deductible will be excluded from the Tax Report.)

Associated Organization
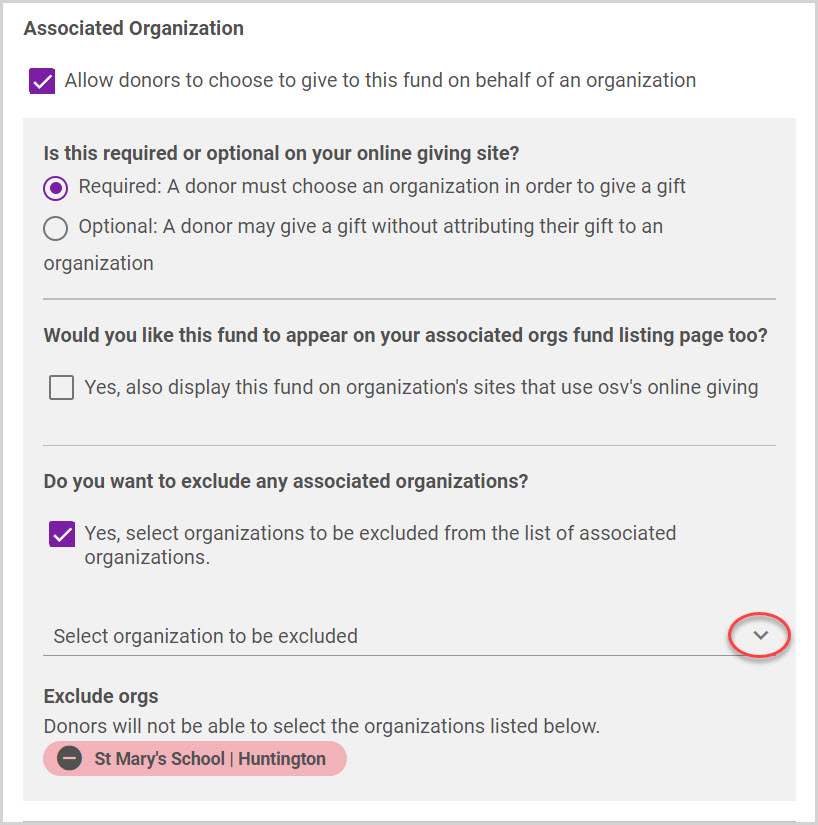
6. If you have Associated Organizations enabled (typically used by Dioceses), you can select to allow donors to choose to give to the fund on behalf of an Associated Organization. It can be marked as required or optional. If desired, check the box to display this fund on a parishes Online Giving site as well.
Administrators have the flexibility to determine which associated organizations are restricted for donors to select from when contributing to funds. When asked if you would like to exclude any associated organizations, click on the drop-down arrow to make your selections. The list of excluded organizations will become viewable to you below, and donors will not be presented with those organizations as a selection when making their gift.
General Ledger Numbers
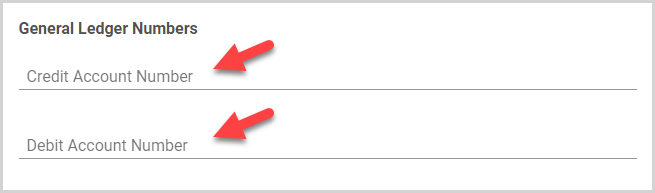
7. If you wish, you can set a specific Credit Account Number and Debit Account Number for the fund to make exports easier. You can Update the Fund General Ledger Numbers at any time.
Gift Settings
8. Select Accepted Payment Types. The available payment types are visible because the organization enabled them. Select which of the available payment options you would like to accept for the fund. The accepted payment methods can be edited. 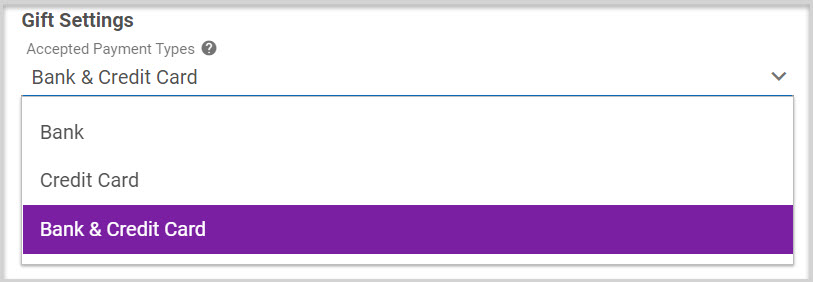
9. Gift Frequency Options. Staff can control the frequency presented to donors.
10. Optionally, you can enable the option for donors to increase their donations to help offset credit card fees (funds that accept credit card payments) and ACH fees (funds that accept bank payments). You must first Set Credit Card Processing Cost Offset and ACH Processing Cost Offset options in Giving settings for these options to appear in the fund set up.

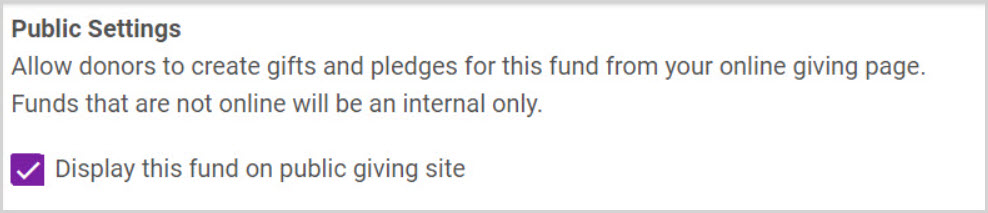
Public Settings
11. Select to display the fund on a public giving site. This allows donors to create gifts and pledges for this fund from the online giving page. Funds that are not online will be considered internal only funds. Check this out for more information to Set Up Fund to Enable Donors to Make Online Pledges.
12. Select the public Gift Options from the drop-down menu to accept gifts only, accept pledges only or to accept pledges and gifts. This may be a helpful feature for some of the diocese who use pledges as a way to track money flowing in.

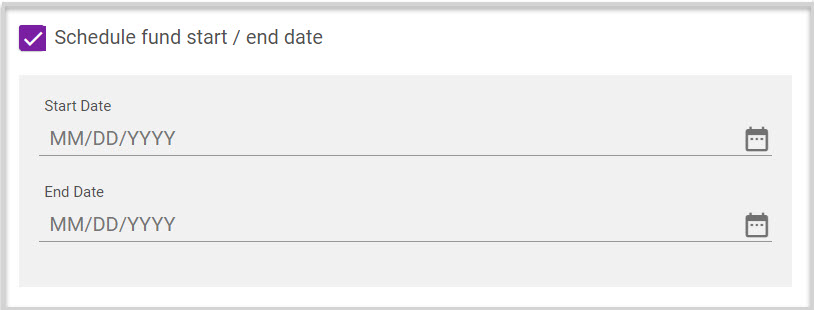
13. Schedule Fund Dates. A fund beginning or end date is not needed unless the fund should start or stop on a particular day. The beginning and end dates allow you to schedule when to accept donations. If the current date is before or after your scheduled fund date, the fund will not display in the public fund list. If you want the fund to be available right away, do not check the box. A fund must be live to be activated on the scheduled start date; a fund in “draft” status will not be activated. A live fund with no dates is visible immediately on the donor page.
14. If you have enabled Text to Give, you can optionally enter Text to Give Fund Code for donors to easily reference the fund when sending text gifts. Code must start with a letter, be alphanumeric, and contain no spaces. For more information, please see About the Text to Give Fund Code.
Note* In order to utilize text to give, the frequency selected when setting up the fund must include One Time Gift. If the frequency selection one time gift is removed from the fund, the user experiences a warning alert that the Text to Give code will be removed.

15. Click Continue to process and move forward through the form.

Pledge and Campaign Settings
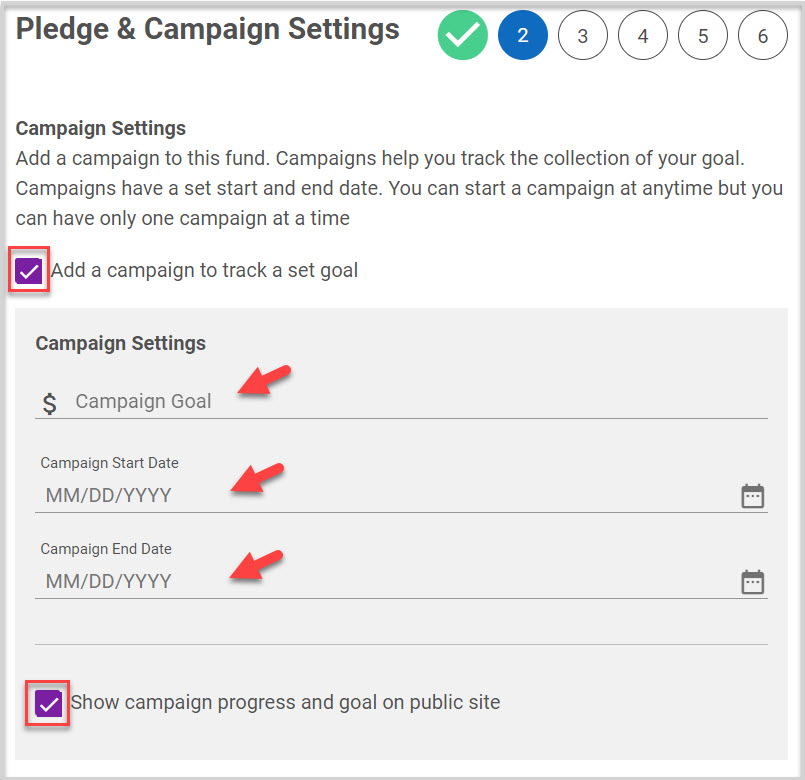
1. Select if you would like to Add a Campaign to track a set goal. Campaigns help track the collection of a goal.
2. If adding a campaign, enter the goal start date, and end date. The campaign can begin anytime but there can only be one campaign at a time.
3. Check the box to show campaign progress and goal on the public site, if desired.
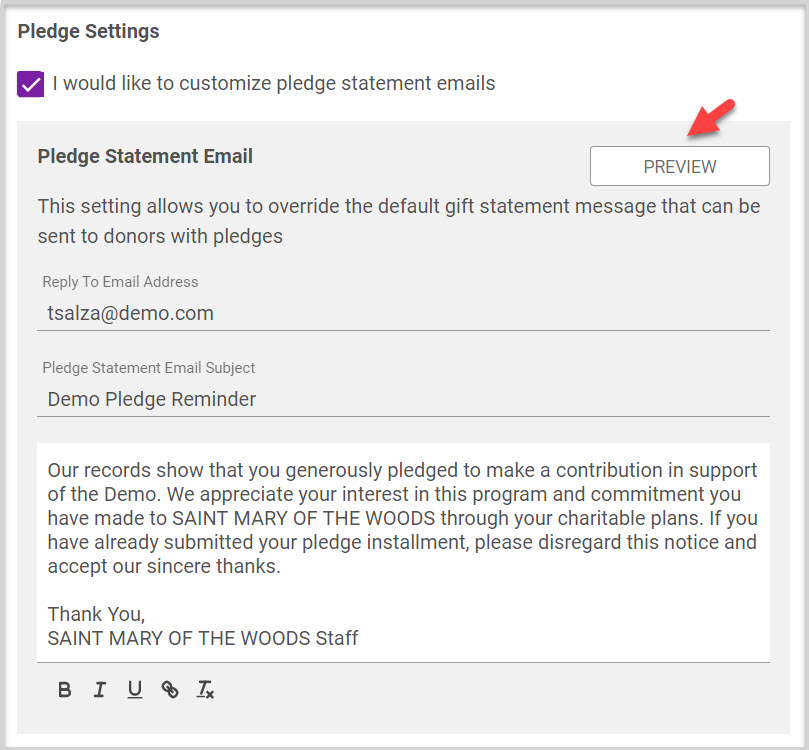
4. Select I would like to customize pledge statement emails to send customized pledge statement emails which override the default gift statement message that can be sent to donors with pledges. Verify the reply to email, enter a subject line and craft the custom message utilizing rich text formatting tools.
Sending donors customized pledge statements is a common practice for many organizations. A staff member can send a customized pledge statement to a donor to remind them of the pledge or just to let them know the state of their pledge.
Click on Preview to see how it looks. Click on Close Preview to close preview and continue.
Check this out for more information about customized pledge statements.
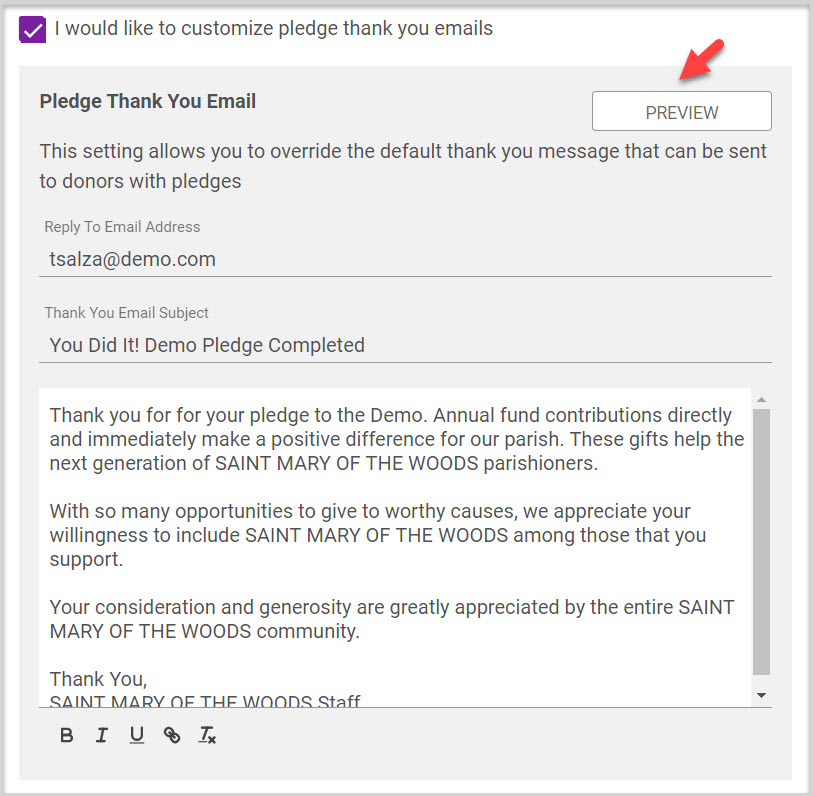
5. Select I would like to customize pledge thank you emails which override the default thank you message that can be sent to donors with pledges. Verify the reply to email, enter a subject line and craft the custom message utilizing rich text formatting tools.
Click here for more information about customized pledge thank you emails.
Click on Preview to see how it looks. Click on Close Preview to close preview and continue.
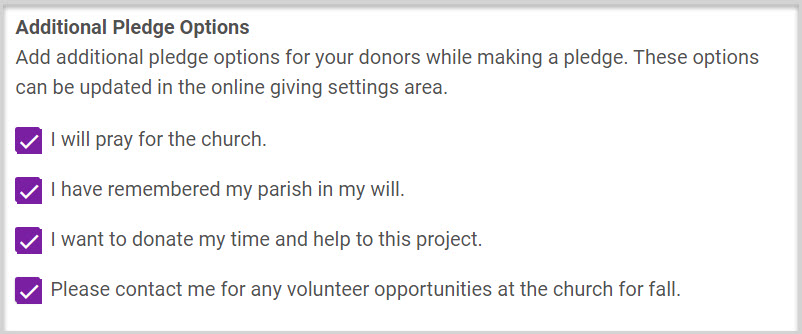
6. If enabled, add Additional Pledge Options by selecting the box of the desired options.
7. Click the Continue button.

Public View Settings
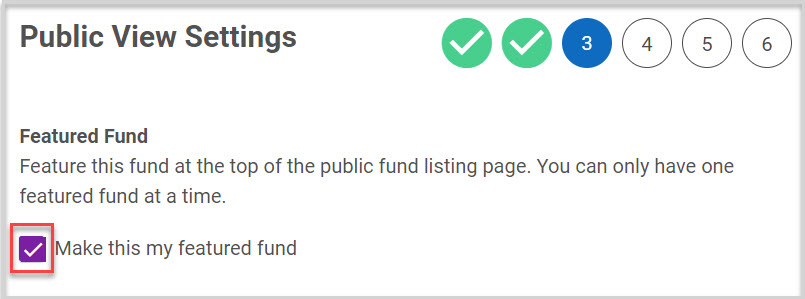
1. Select if this is a Featured Fund. Featured funds have additional visual highlighting to draw attention to them. There can only be one featured fund at a time.
2. Upload Fund Image. By uploading an image, you state that you own or otherwise control all the rights to the image.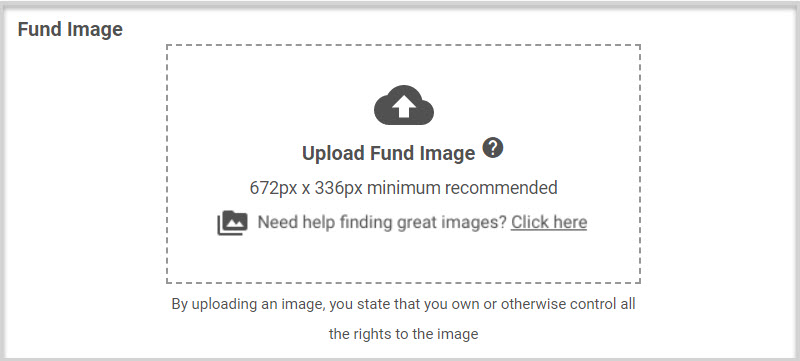
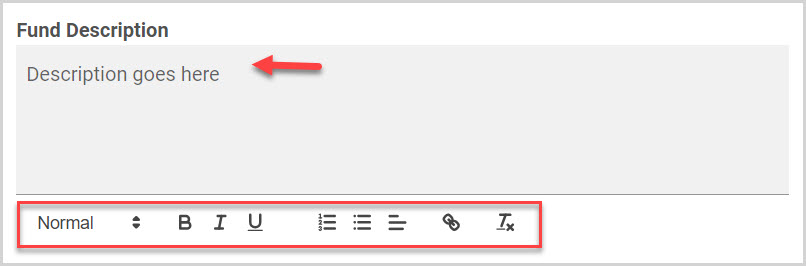
3. Enter a brief Description about the fund utilizing rich text formatting tools.
4. Enter Suggested Gift Amounts. Enter the amount, click on the plus sign, or press enter, and the amount will populate in the box.
Note* Suggested gift amounts can be edited later.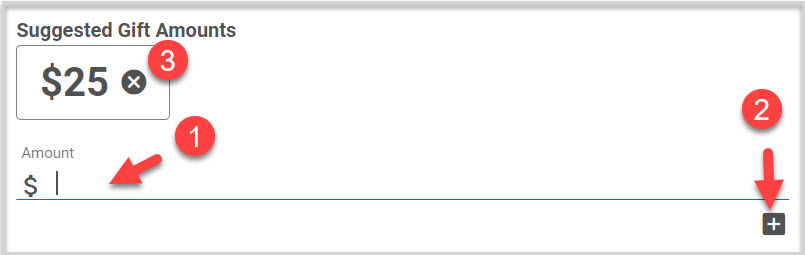
5. Select the box to provide a special note input area for the donor to create notes on a Gift or Pledge. (e.g., in memory of…)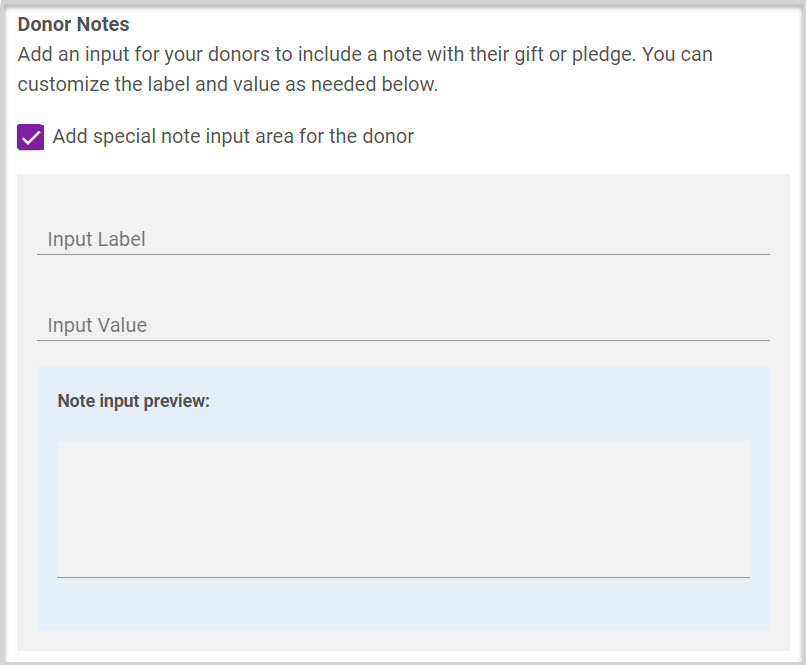
6. Click Continue.

Communication Settings
1. If desired, check Add custom confirmation message. The message will greet your online donors once they have set up their online gift. It can be edited anytime from the fund detail screen. Create a custom message using the rich text formatting tools.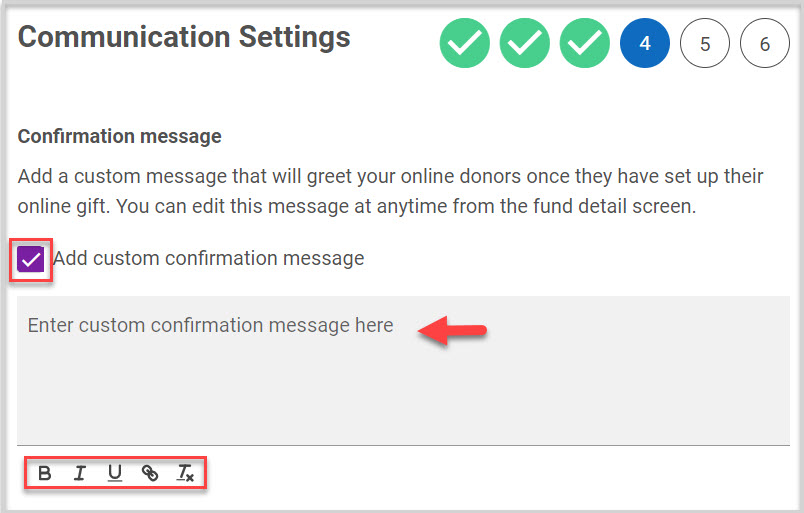
2. If desired, check Add custom email thank you message to the email that will be sent to the donor once their gift has been submitted. Create a a custom message using the rich text formatting tools. A custom email thank you message can be enabled or disabled in the future.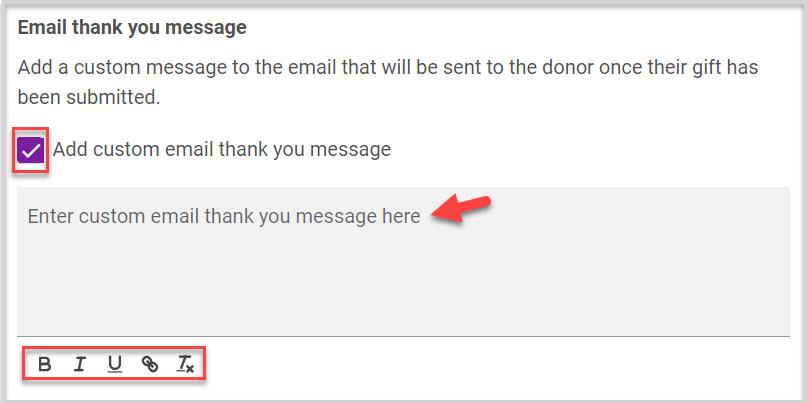
3. Click Continue.

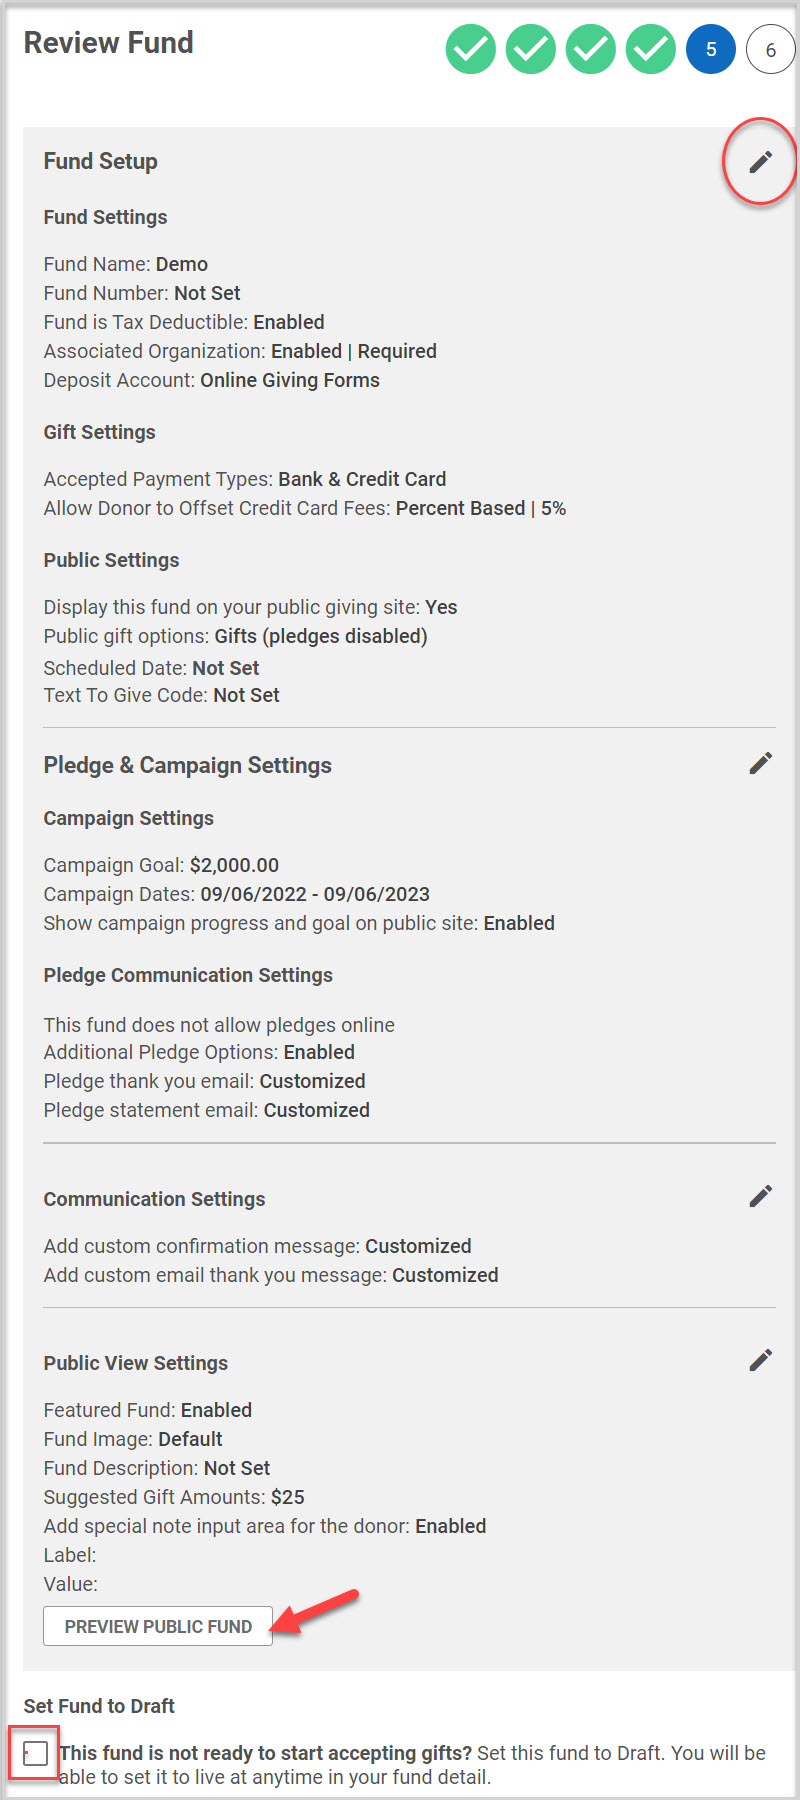
Review Fund
1. Review and Edit Fund. To go to a specific section to edit, click on any pencil icon. To get back to the fund review screen, click on the number 5 circle.
If desired, click on the button to Preview the Public Fund.
2. Set Fund to draft. Check this box if you are not ready to start accepting gifts. This sets the fund to draft. It can be set to live at anytime in the fund detail.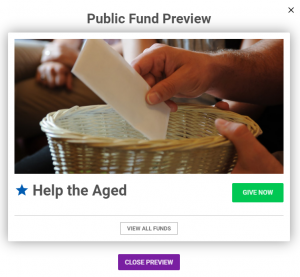
3. Click on Create Fund.

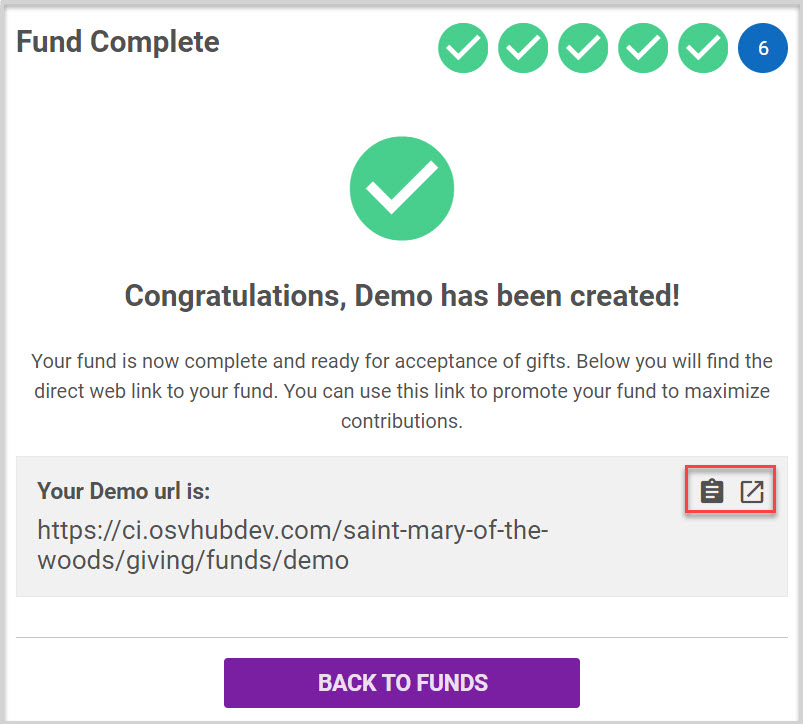
Fund Complete
The Fund is Set Up!
1. On the congratulatory page, click on the clip board icon to copy and share the live Parishioner Link. It can be copied and shared via email or your website. It can also be included it in your bulletins and newsletters.

2. Click on this icon to launch the donor site and see the new fund. 
Check this out for links to more information on Funds.
Note* Visual steps are best viewed at full screen. Click Esc on your keyboard when you are finished viewing.