


Create a Note in the Mission Pathways Enterprise Application
This article provides steps to create a note in the Mission Pathways Enterprise Application.
Notes can be created in the Mission Pathways Enterprise application to keep track of information. Team members who have been added to a note can view the note, and are sent an email whenever a new note is created or edited. Team Members, users who have a login to the Enterprise application, are notified of the note to ensure they are kept aware of important information. Team Members are users who have a login to the Enterprise application.
To help you create your note, the note section includes a rich text tool bar. You are able to insert links, images, and videos into the notes. You can also add desired Ministries, Topics, and Associated Organizations. A note can be turned into a pdf and downloaded or printed.
Complete the following steps to create a note in the Enterprise application:
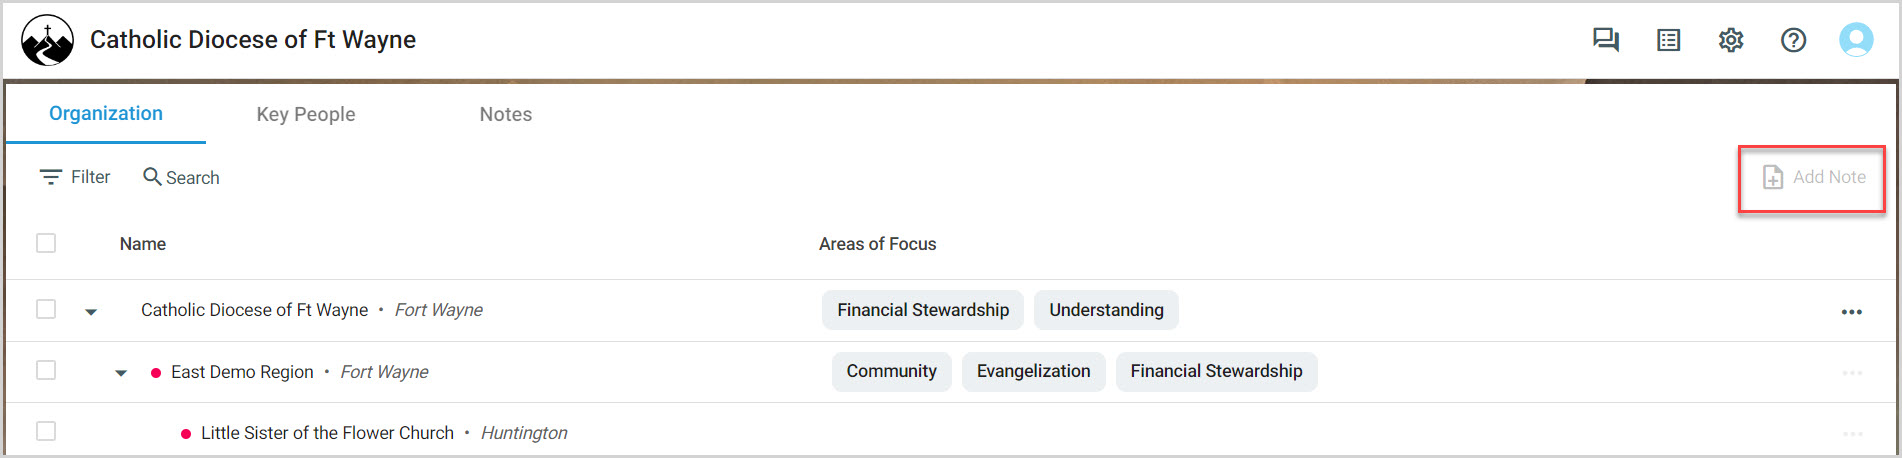
1. Click on Add Note on the main page.
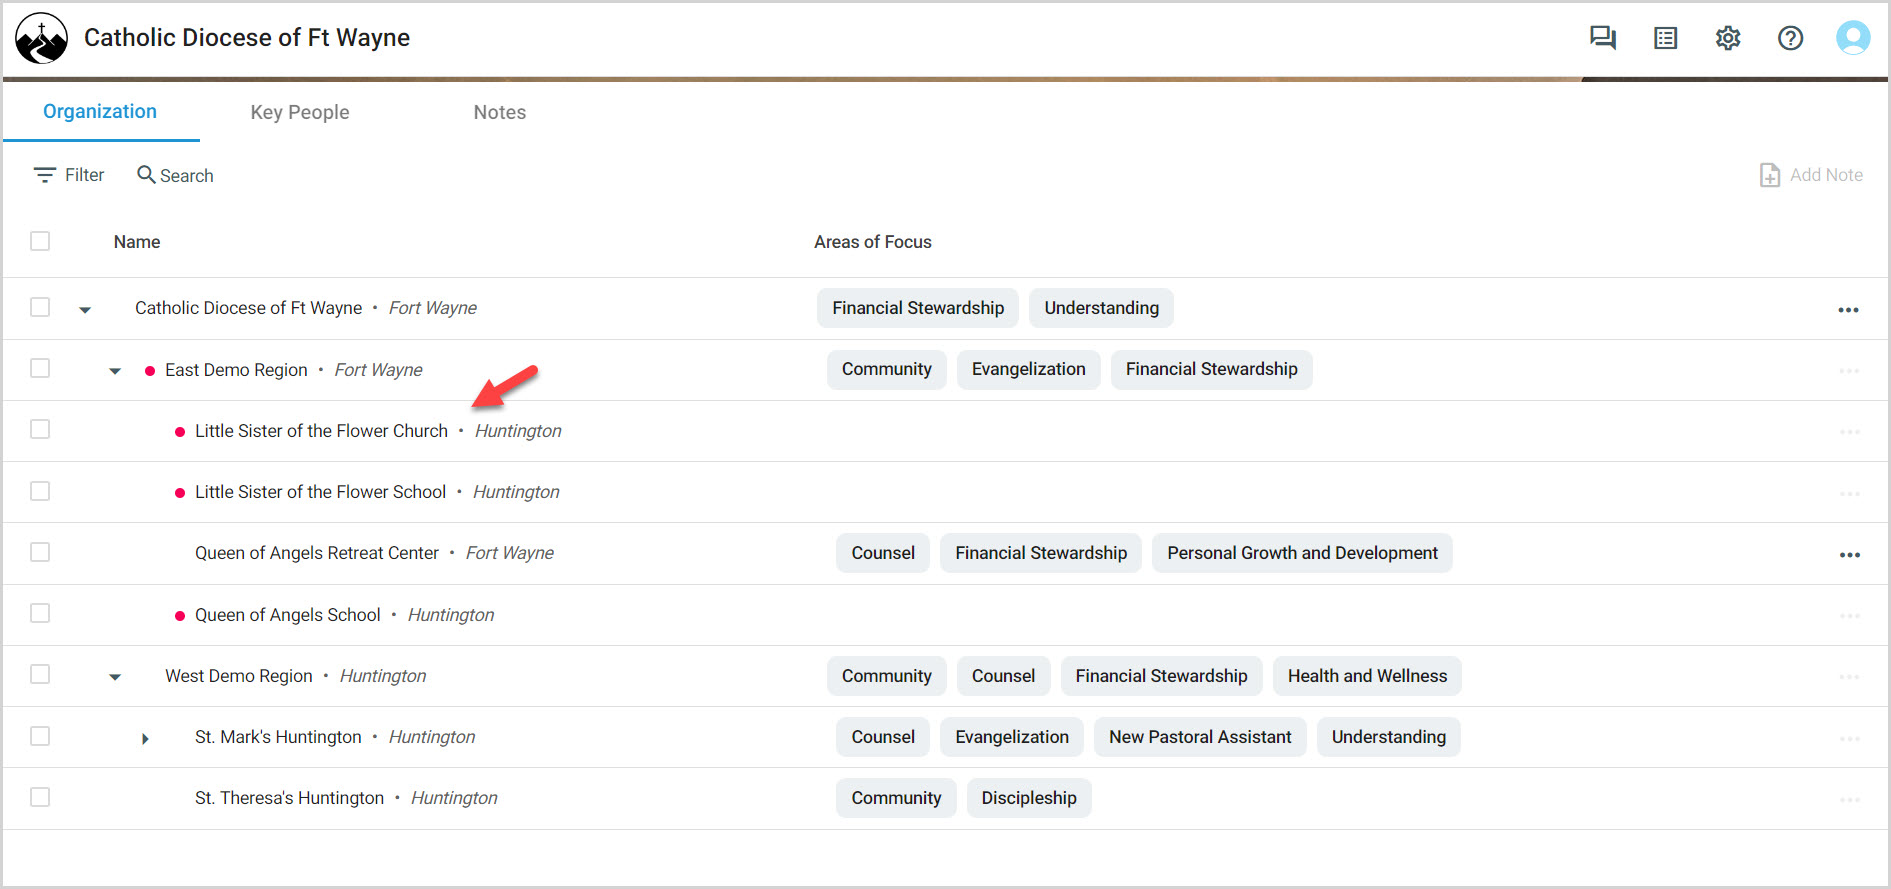
2. Or, click into the desired organization
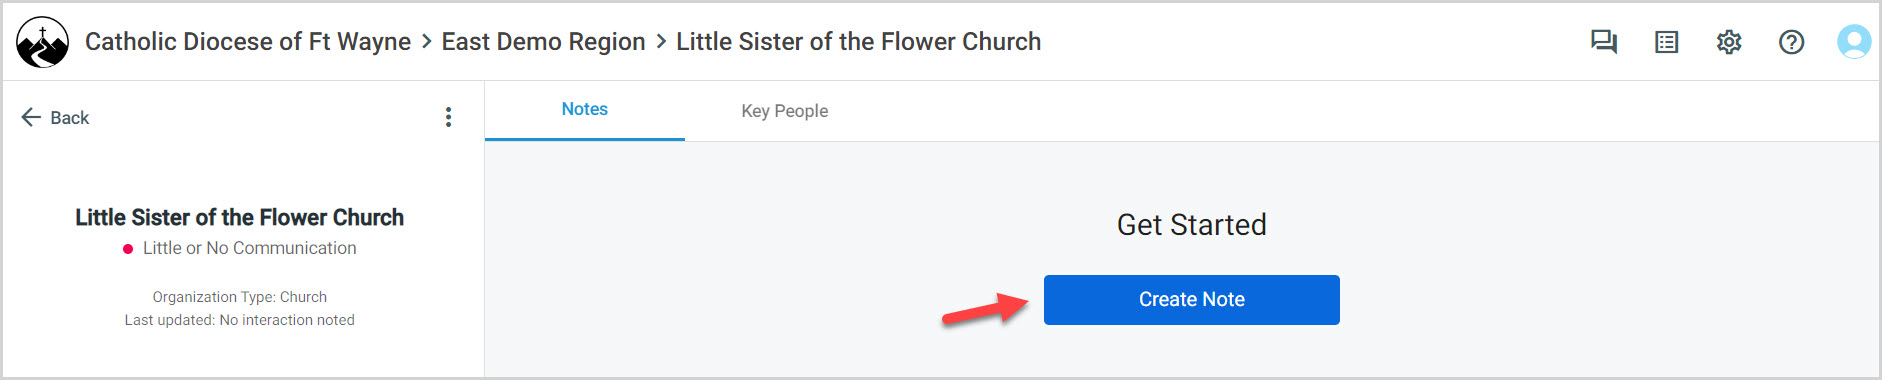
3a. This is your view if you have not created a note before. Click on Create Note.
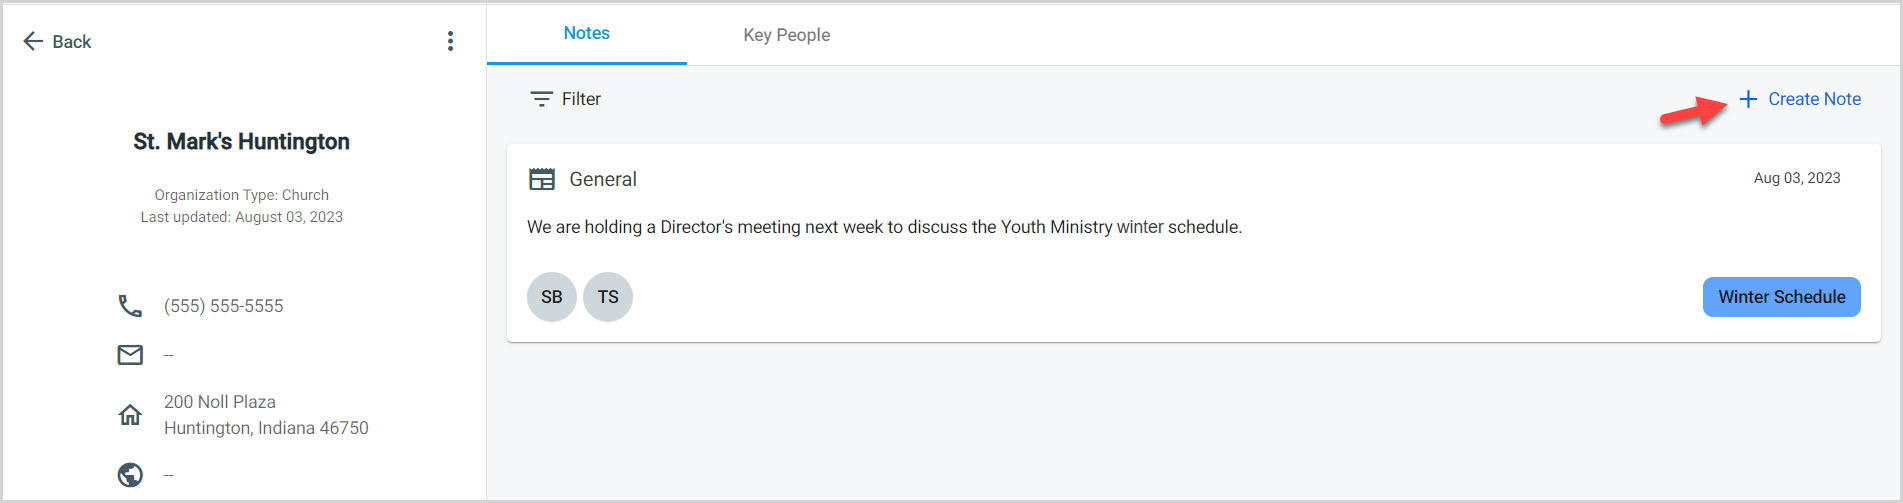
3b. This is your view if a note has been created before. Click on Create Note.
4. The current day is the default date, or select a different date if desired.
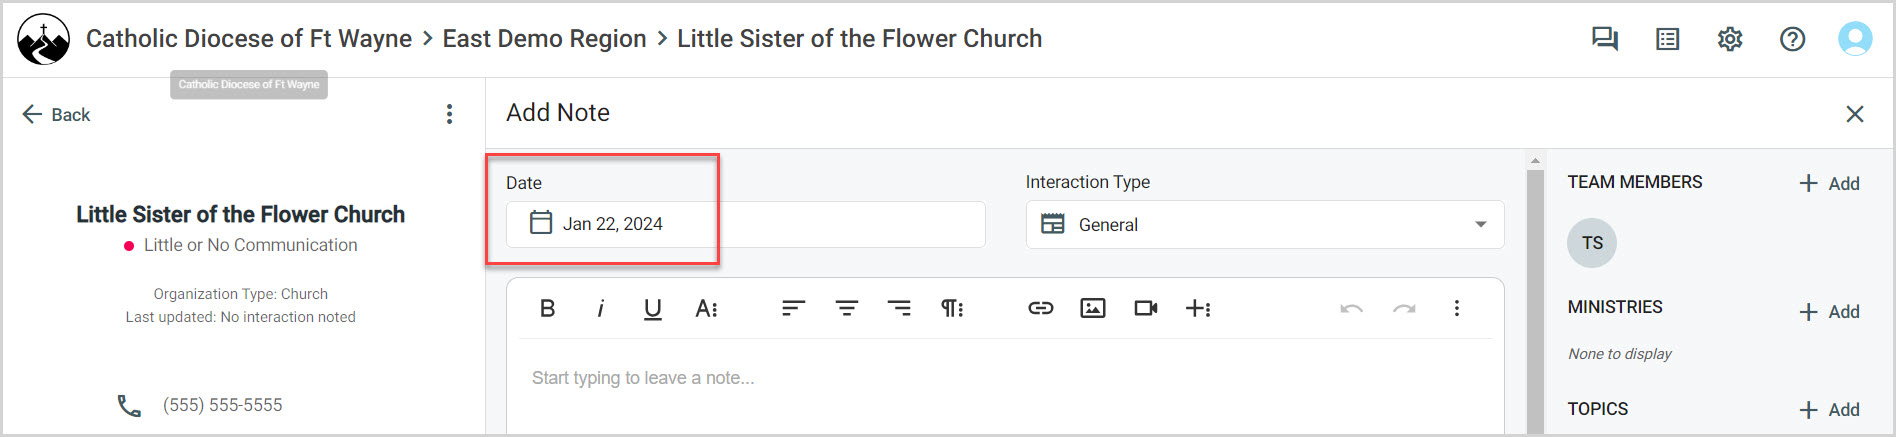
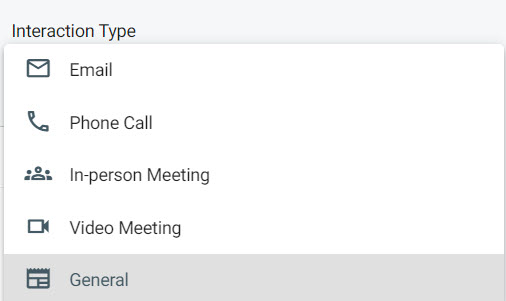
5. Click on the drop-down menu to select the Interaction Type. (Email, Phone Call, In Person Meeting, Video Meeting, or General.)
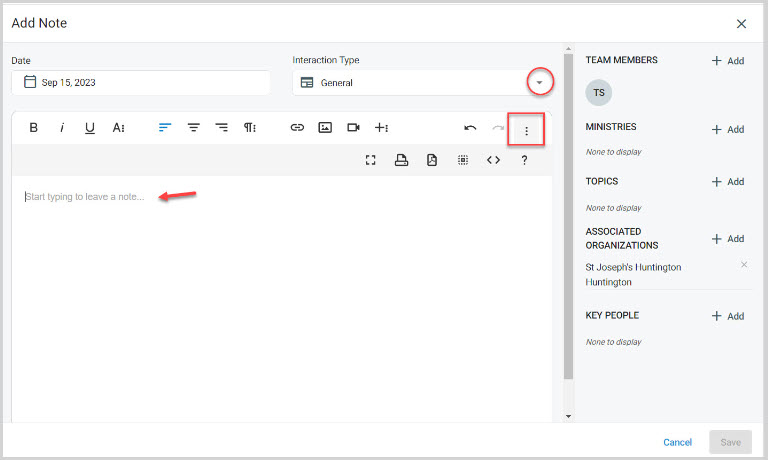
6. Use the rich text tool bar to create your note. Click on the ellipsis to expand the rich text toolbar to insert links, images, and videos into the notes.
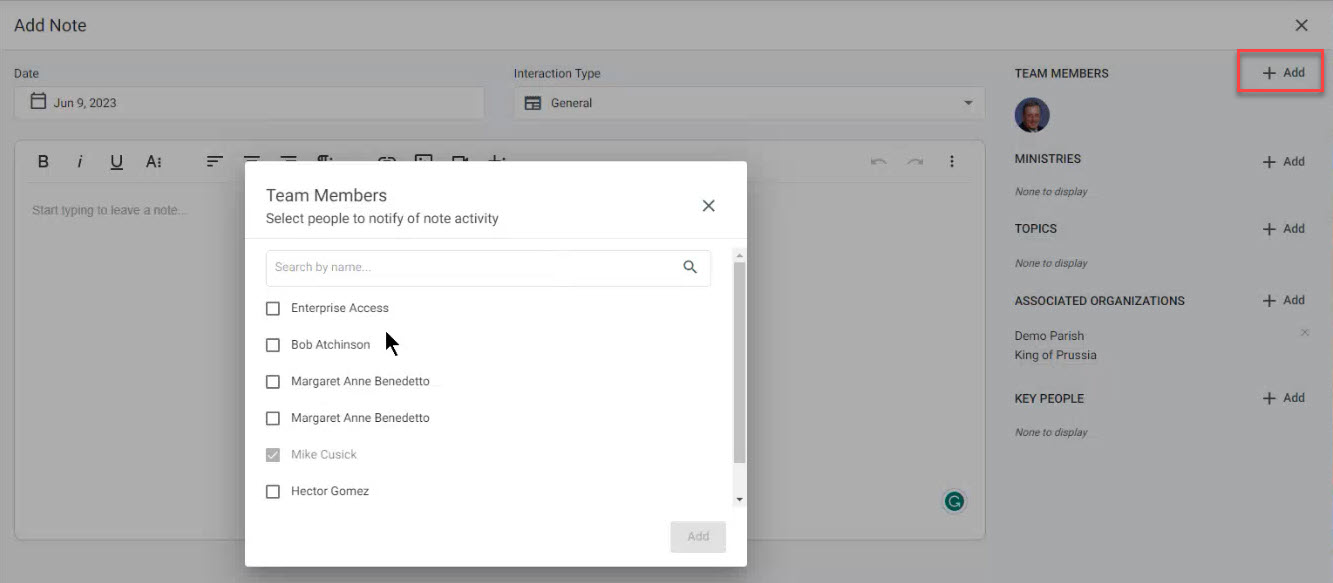
7.Click on the plus icon to Add a Team Member.
8. Place a checkmark in the box to notify desired Team Member(s) about note activity.
9. Click Add.
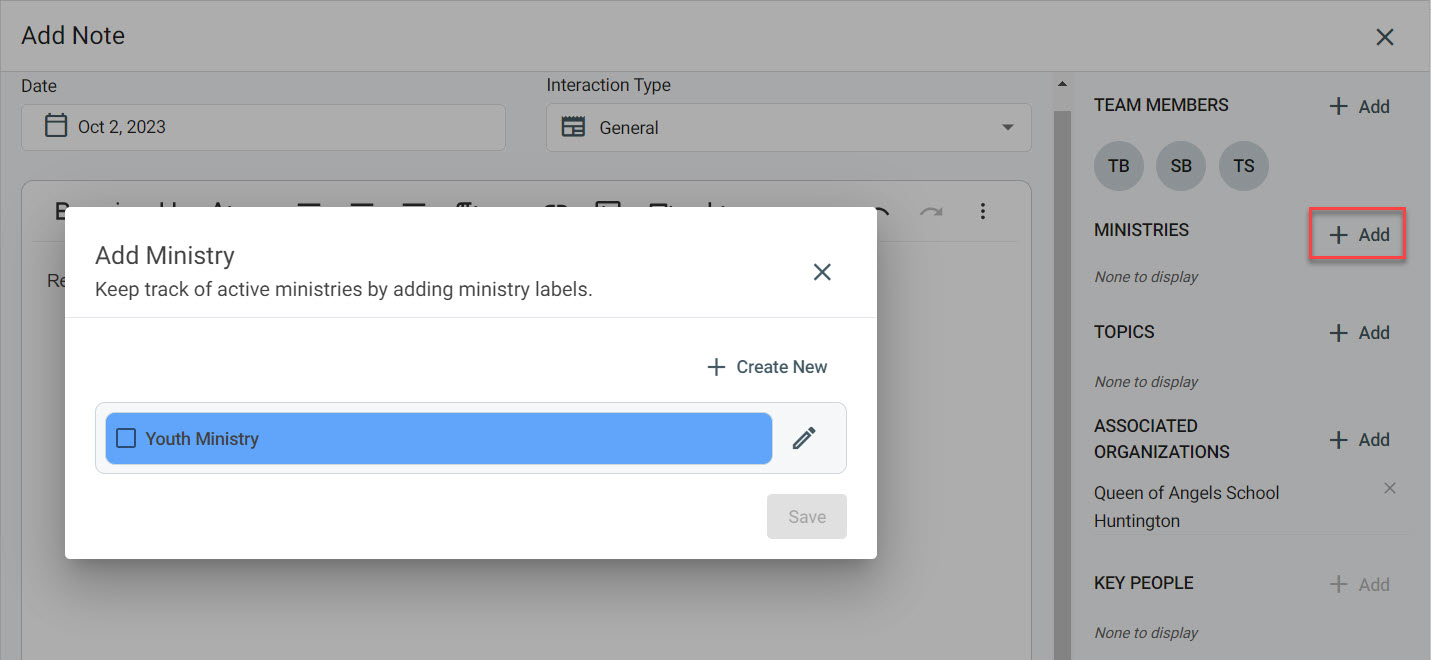
10. Click on the plus icon to add a Ministry.
11. Keep track of active ministries by adding ministry labels by selecting Create New.
12. Place a checkmark in the box to add a desired Ministry.
13. Click on Save.
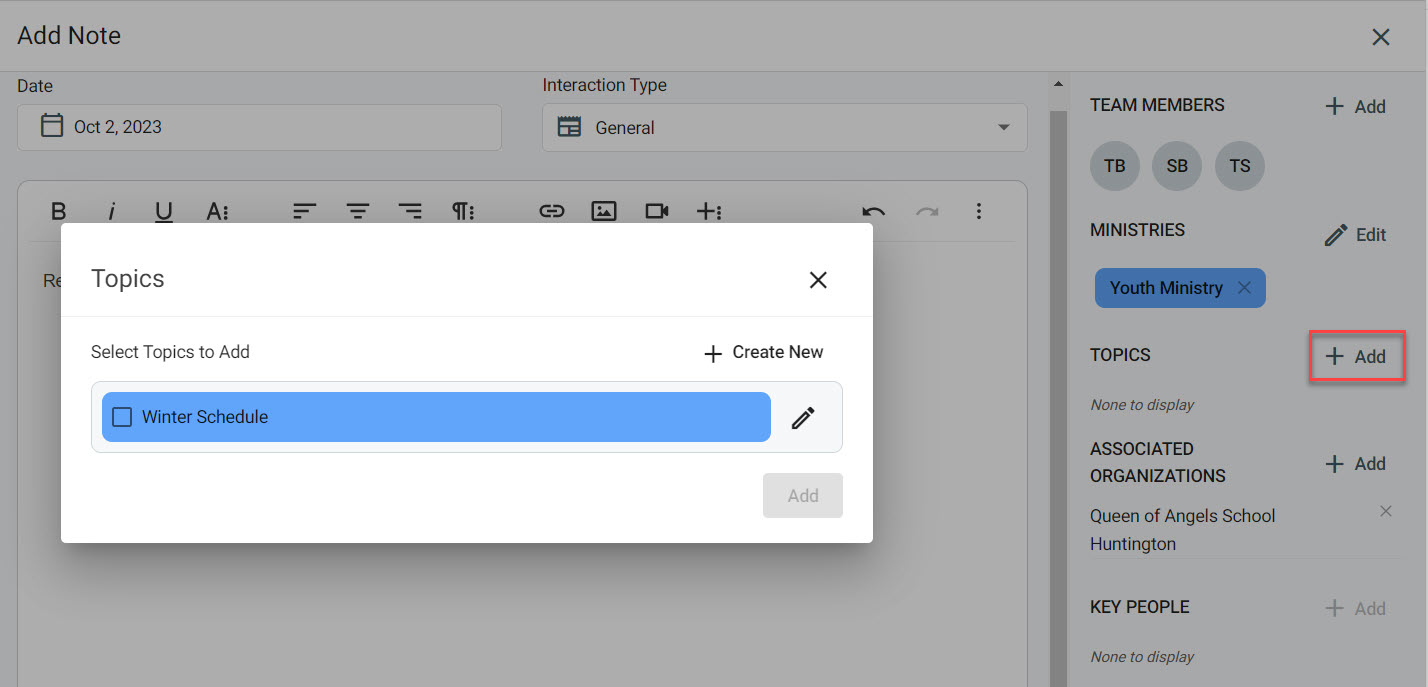
14. Click on the plus icon to add a Topic.
15. Create Topics to add by clicking on Create New.
16. Select Topics to Add.
17. Click on Add.
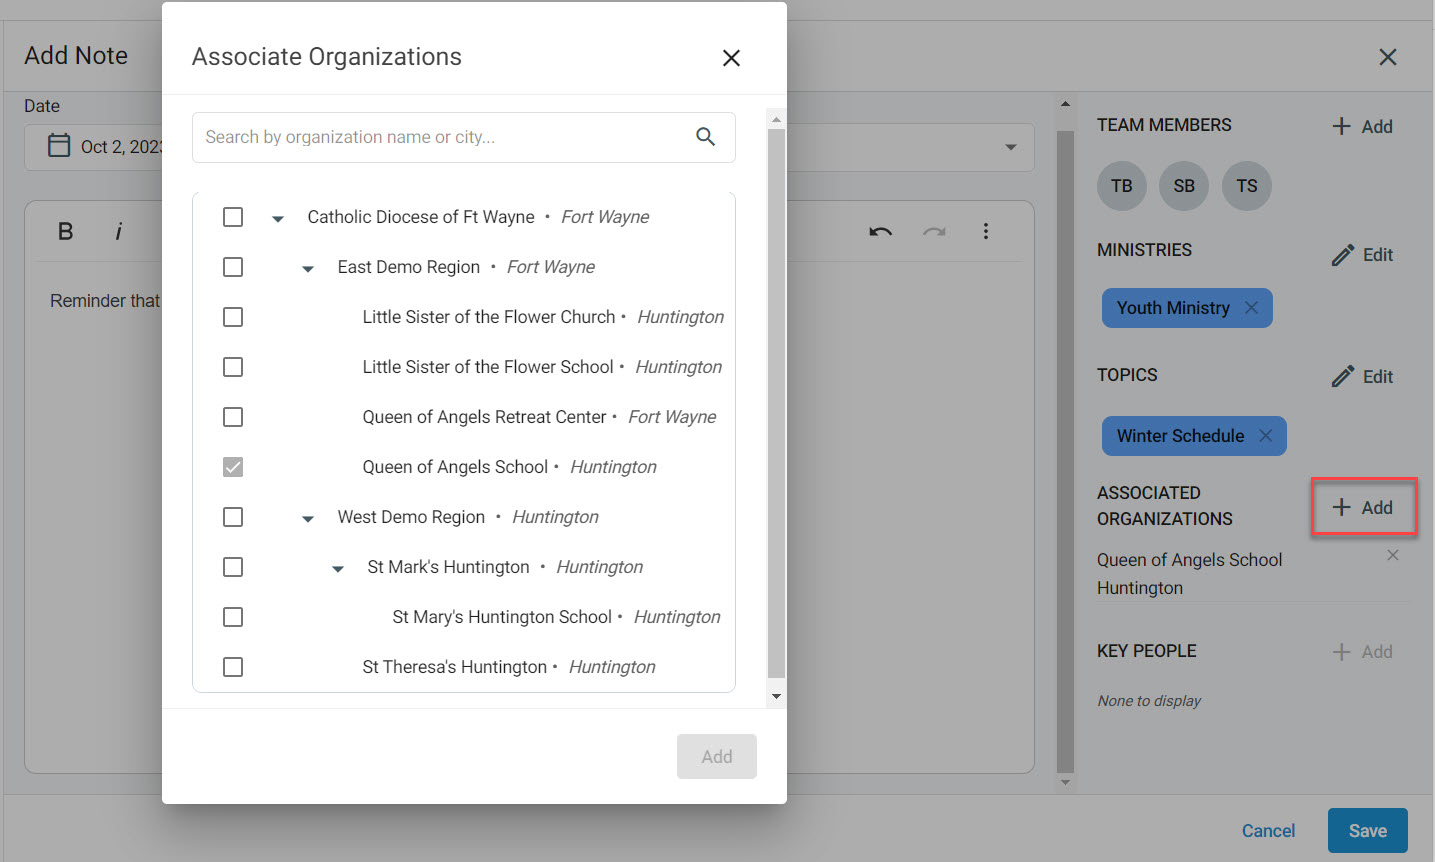
18. Click on the plus icon to add an Associated Organization.
19. Place a checkmark in the box to select the Associated Organizations.
20. Click on Add.
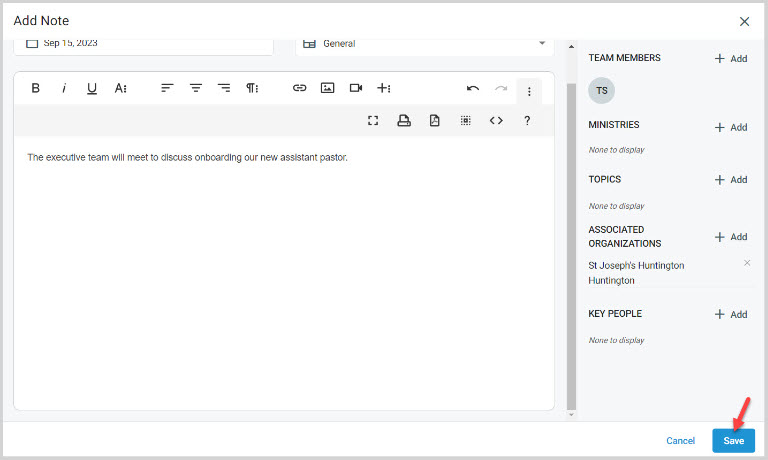
21. Click on Save to save the note.
Note* A note can be turned into a pdf and downloaded or printed from the toolbar.

Click here for more information about Notes in the Mission Pathways Enterprise application.
Note* The video is best viewed at full screen. Press Esc on your keyboard when you are finished viewing.